


89
BACKING SECTION
SONG MODE
(For more information on recording data at
the beginning of a song, refer to step #2 on
page 84 in “REALTIME RECORDING.”)
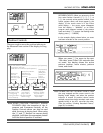
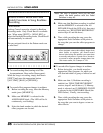
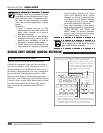
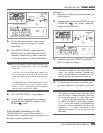
Note: SETTING BACKING MUTE STATUS—To set the
Backing mute status, simultaneously hold down
[SHIFT] and press the button corresponding to
the part you wish to mute or turn on
([ACCOMP], [BASS] or [DRUMS]). (The speaker
symbol in the display next to each part appears
when the part has been turned on.)
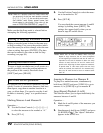
4. To record all the data you’ve set in steps #2
and #3 above, press [ENTER]. (All events
are automatically recorded to the position
with one press of [ENTER]; a dot appears at
the position to indicate recorded events.)
Note: In Step recording, pattern numbers can only be
recorded to the first 16th note of a measure. A
pattern cannot begin playing in the middle of a
measure. (If you attempt to do this, an “ONLY
MEAS TOP” message appears in the display.)
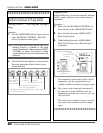
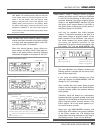
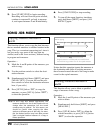
5. After step #4, the position indicator in the
Measure/Event section of the display auto-
matically moves ahead (by one quarter note)
to the next beat in the measure. You can
record the next event or events there, or use
the Position Controls to move ahead or back
to any 16th note position in any measure.
HINT
RECORDING EFFECT CHANGES—Even though
effect program changes and bypass (effect
on/off) events cannot be actually entered
in Step recording, you can pause recording
in Realtime recording and enter them indi-
vidually (see hint #7 on page 88).
Note: MULTIPLE EVENTS—Remember that several
events of different types can occupy the same
position in a song. However, since two events
of the same type (for example, two different
chords) cannot occupy the same position, the
most recently recorded event takes precedence
and the previous one is erased.
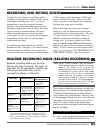
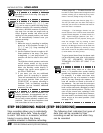
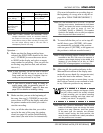
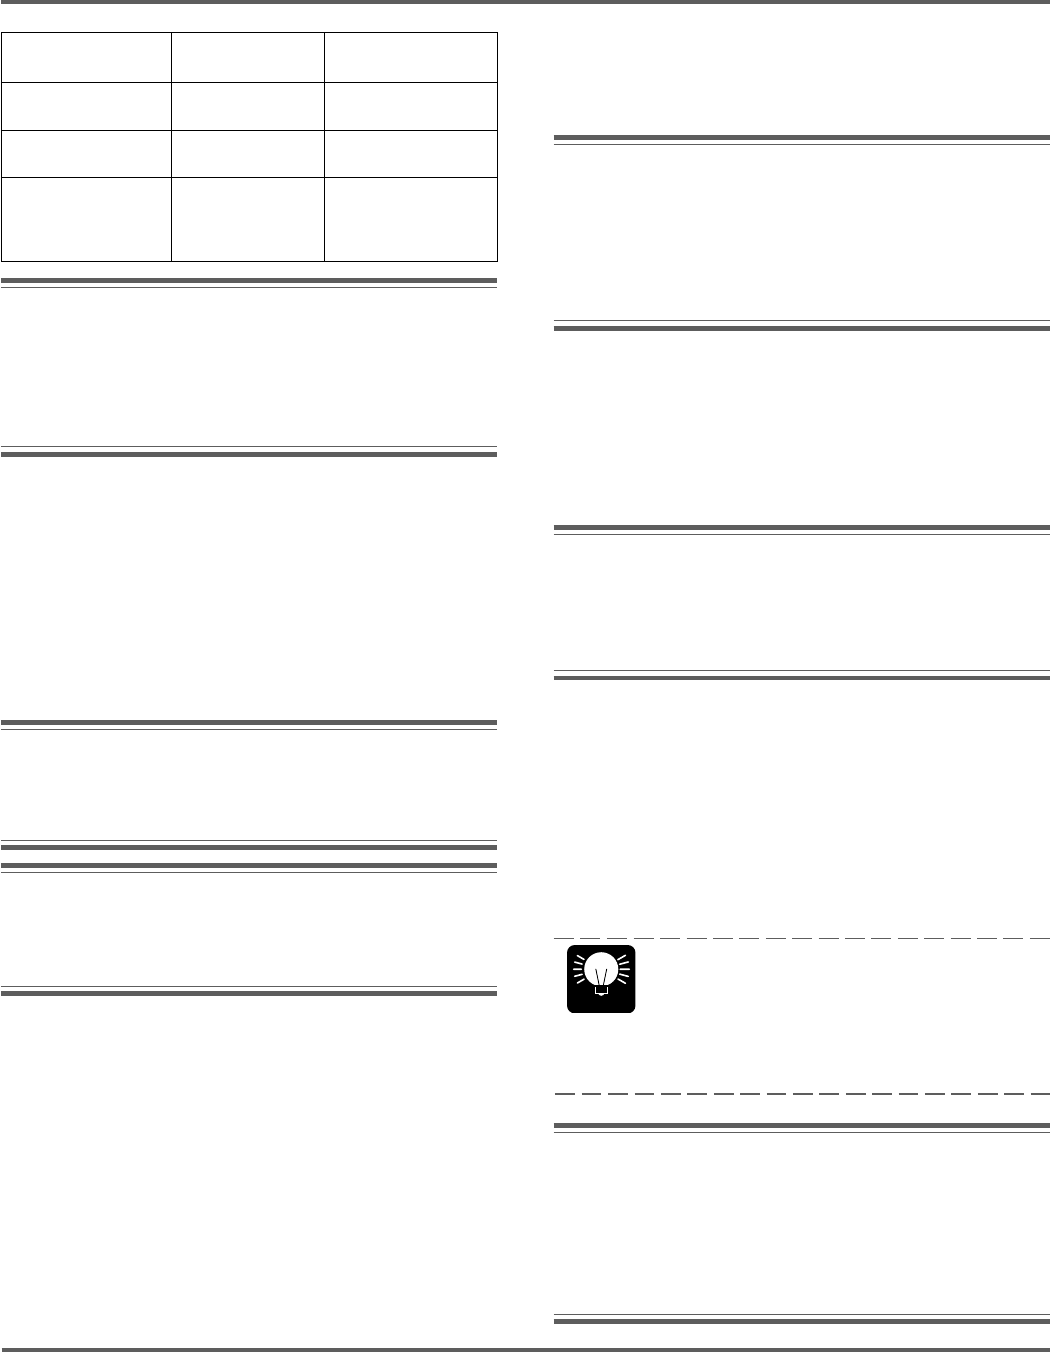
Data Type Method of Entry Available
Recording Position
Patterns (including By panel controls At the beginning
Fill In, Ending) only. of any measure.
Chords By panel controls Anywhere in song.
only.
Backing By panel controls. Anywhere in song.
(Accompaniment,
Bass, Drums)
mute status
Note: ABOUT TEMPO CHANGES AND RECORDING—Tempo
changes themselves cannot be recorded. However,
the tempo of the song can be changed manually,
either before, during or after recording of a song, and
the last tempo setting made is the one that is
subsequently used for the song.
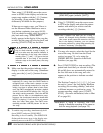
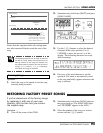
Operation —
1. Make sure that the Song mode has been
selected (the SONG LED should be lit), then
use [6 CURSOR] to move the cursor arrow
to SONG in the display and select an empty
song number for recording. (You can also use
an existing song that has data, and add new
data to it.)
Note: In Step recording, you do not need to use the
[SONG REC] button. As long as you are in the
Song mode and the song is stopped, Step re-
cording can be performed at any time.
Note: If you have to erase a song to make an
empty song, refer to operation step #1 in
“REALTIME RECORDING”, page 83; also see
page 95 for details on erasing a song.
2. Make sure that you are at the beginning of
the song, then use [6 CURSOR] to move the
cursor arrow to PTN in the display and select
the pattern number with which you wish to
start the recording.
3. Also, set all the other data that you wish to
record at the start of the song: the starting
chord (see page 84) and the initial Backing
mute status (see note below for instructions).
STEP RECORDING MODE (STEP RECORDING)