


SONG MODE
85
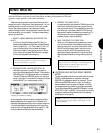
SONG RECORD
In Song Record Mode you can record a sequence in the currently selected song memory,
either in real-time or step-time, as well as determine recording related parameters like time
signature, tempo, quantize, click volume and others.
Realtime recording lets you record the different parts of a
song as you would if using a multi-track tape recorder, i.e., one
part after another
live
, with or without a click track to keep
time to. Step recording lets you input each part one after
another
one step at a time
, in accordance with note duration and
other values which you can specify. The basic process of song
recording is as follows:
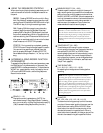
1. SELECT A SONG MEMORY AND DEFINE THE
MULTI
From within Song Play Mode, press [F2] ( Seq ) to
access the Song Sequence Play screen, and select a song
memory location (01 ~ 16). Then press [F1] ( Mlt ) to
jump to the Song Multi function screen and assign
Instrument voices to Tracks, so that when you record,
all you have to do is press a TRACK button in prepara-
tion for recording each Instrument part.
NOTE: If the selected song number contains data, then first
clear the song using the Clear Song function in Song Job
Mode. (For information, see page 96.)
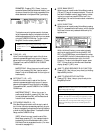
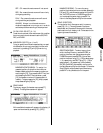
2. DESIGNATE REALTIME OR STEP STATUS
After defining the multi, press [F2] ( Seq ) again to
return to the Song Sequence Play screen. Then press the
RECORD button in the Sequencer section on the panel.
The red LED above the RECORD button will light, and
certain information in the screen will change, to indicate
that the W5/W7 is in record standby mode.
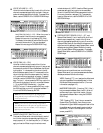
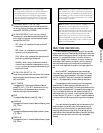
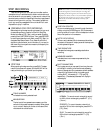
(Display for realtime recording.)
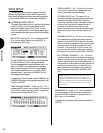
In record standby mode, the display changes to the Song
Sequence
Record
function screen, which is basically the
same as the Song Sequence Play function screen, except the
Quantize parameter is also displayed, and the recording
mode functions will appear above function keys [F4 ~ F8]
to let you determine realtime or step record status.
3. RECORD THE SONG PARTS
In record standby mode, press the TRACK button of the
track which contains the Instrument voice of the first
part you want to record. Then press RUN to record the
part. When you re finished, press STOP/TOP and the
sequence will reset at the measure you started from. To
record another part, simply repeat the process. (To
playback the part, simply press RUN.)
4. SAVE THE SONG TO FLOPPY DISK
When you ve finished recording a sequence, or even if
you re in the middle of the process and have to stop,
save it to floppy disk, so you can load it back into the
W5/W7 the next time you need it and pick up from
where you left off. (NOTE: Always save your song
sequences to floppy disk before turning off the power.
Sequence data is cleared from song memory at power
off.)
NOTE: The various Song Job functions also provide valuable
song creation tools. For example, you can build up parts of a
song by using the Copy Measure function (for more
information, see Song Job, page 98).
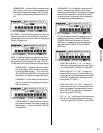
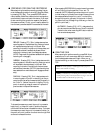
● ENTERING AND EXITING SONG RECORD
MODE
To enter Song Record Mode from another mode, first press
SONG in the Mode section on the panel, then press
RECORD in the Sequencer section on the panel. The red
LED over the RECORD button will light, and the Song
Sequence Record function screen will appear, which lets
you access all recording related functions and parameters.
To exit Song Record Mode, press RECORD again, or press
STOP/TOP, or EXIT, or SONG. (You can also jump directly
to another mode from Song Record Mode, by pressing a
MODE button on the panel.)
NOTE: You cannot enter the Song Record Mode when the W5/
W7 is in Song Edit, Song Job, Utility, or Disk Modes, or in the
Song Setup display.