Editing Drum Kits
109
Quick StartIntroductionSetupProgram
Combination
MultiEffectGlobalArpeggiatorDrum Kit
External control
Other functions
Appendices
2. Select the High “Drum Sample.”
Press the [CATEGORY] button to view a list of
the drum samples organized by category. For
details on how to make a selection, see
“Selecting programs by category” (☞p.38).
3. Select a drum sample name in the list so that it
is highlighted.
4. Press the [MENU/OK] button to confirm the
selection.
5. Press the [PAGE+] button to access the
GLOBAL 4: DKit- Low Sample page.
6. Specify the Low Drumsample as you did in
steps 2–4.
Now you have assigned drum samples to the
High Drumsample and Low Drumsample.
Next, we’ll assign the velocity range for these
drum samples.
7. Set the “Velocity SW L→H”.
The Low drum sample will sound when you
play a key less strongly than the specified
velocity value, and the High drum sample will
sound when you play more strongly.
For example if you set “Velocity SW L→H” to
100, the drum sample assigned to “Low” will
sound when you play the keyboard softly, and
the multisample assigned to “High” will sound
when you play strongly.
Note: If you don’t want to use this function, set
“Velocity SW L→H” to 001. Only the High
drum sample will sound.
Note: This is the same type of function as
velocity multisample switching in a program.
(☞p.48)
Fine-tuning the sound of each sam-
ple
1. If you like, adjust the Levels for the two Drum
Samples.
Set the High and Low “Level” settings to adjust
the volume balance.
2. Set the tuning and EG parameters as desired.
For each Drum Sample, you can control offsets
to the Program’s settings for transposition,
tuning, and EG attack and decay times.
3. You can adjust the sound or specify reverse
playback for each drum sample.
For each drum sample, set the “FC (Filter
Cutoff)” and “Reso (Resonance)” parameters,
and specify “S.Ofs” and “Rev (Reverse).” (☞PG
p.87)
4. Repeat steps 1–3 to set up each key of the Drum
Kit.
You can also copy settings from one “Key” to
another, using the “Copy Key Setup” utility
command.
Using Exclusive Groups
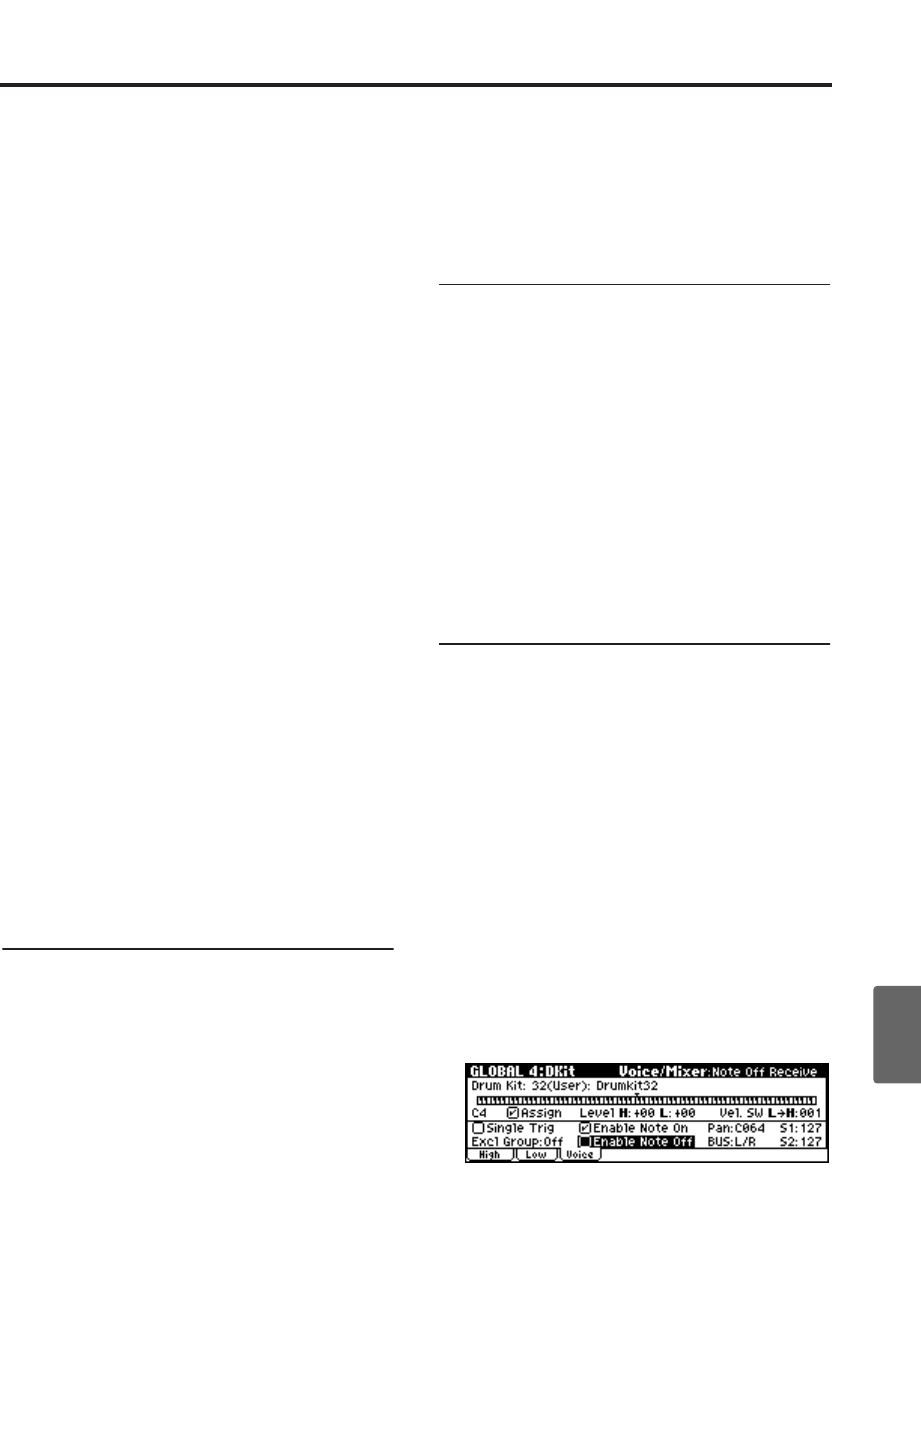
1. Access the GLOBAL 4: DKit, Voice/Mixer
page.
2. Use the Excl Group (Exclusive Groups) to make
one drum sound cut off another drum sound -
such as closed and open hi-hats.
For example, let’s say that you’ve assigned an
open hi-hat and a closed hi-hat to the same
exclusive group:
• Play the open hi-hat sound.
• While it’s still ringing, play the closed hi-hat.
• The open hi-hat sound will be cut off–simulat-
ing the action of a physical hi-hat.
Using Hold
The Program Hold parameter can be especially
useful for drum programs, since it lets the samples
ring out naturally regardless of how long you hold
down the note. The way that this works depends
on settings in both the Program and the Drum Kit,
as described below.
To enable Hold:
1. Access the PROG 1: Ed–Basic, Prog Basic page.
2. Voice Assign, make sure that the “Hold” check
box is checked.
Once you’ve turned on “Hold” for the
Program, the function is controlled on a note-
by-note basis according to settings within the
Drum Kit.
3. Access the GLOBAL 4: DKit, Voice/Mixer
page.
4. For each key, set the Enable Note Off Receive
parameter as desired.
If this check box is unchecked, the key will be
held. If it is checked, the key will not be held.
If you turn off “Hold” in the Program, no keys
will be held - regardless of their “Enable Note
Off Receive” setting.
