Other functions
112
Assigning a name (Rename)
You can modify the name of any program, combi-
nation, multi set, category, arpeggio pattern, etc.
The following table shows the items that you can
rename, and the corresponding page.
1. Use the ClickPoint to select the text button ( ),
and press the center to open the text dialog box.
See the table above for the appropriate page.
Note: In a utility menu command, select the text
button ( ) in the dialog box that appears.
In GLOBAL 3, select the text button ( ) in the
page.
The text dialog box will appear.
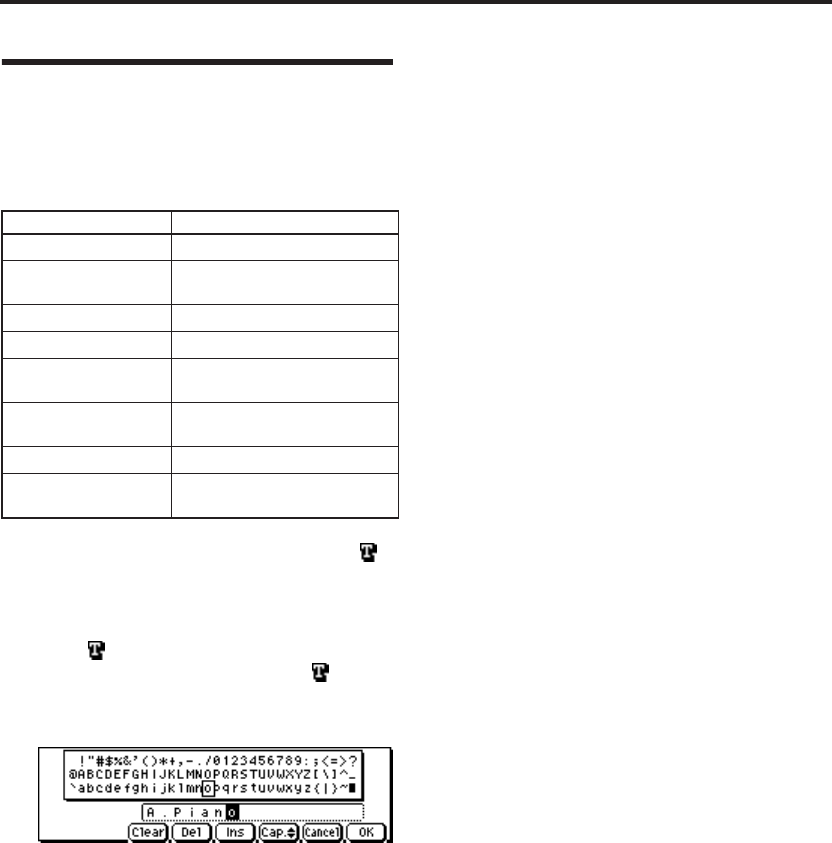
For example to enter the text shown in the
illustration, you would proceed as follows.
2. Use the ClickPoint [√][®][π][†] to select
“Clear.”
All text will be erased from the text box.
3. Enter “A”.
Use the [VALUE] dial or the [INC][DEC]
buttons to select “A”.
Press the [ENTER] button or the ClickPoint
[®]. The cursor will move.
•You can enter text using just the ClickPoint.
When you press the ClickPoint center, the
square-framed cursor in the text box will
change.
Use the ClickPoint [√][®][π][†] to select a
character. Press the center once again to finalize
the selection.
Use the ClickPoint [®] to select the next
character, and enter it in the same way.
• The function buttons shown in the lower line
perform the following operations. Use the
ClickPoint [√][®][π][†] to select a function,
and press the center to execute it.
Clear: Erase all text.
Del (Delete): Delete the character at the cursor
location.
Ins (Insert): Insert a space at the cursor
location.
Cap. (Capital): Switch between uppercase and
lowercase letters.
• The following input operations can also be per-
formed.
“0”–“9,” “–,” and “.” can be input using the
numeric buttons. When you input these, the
cursor will advance automatically.
By pressing the [ENTER] button at the space
(blank), you can input the selected text before
the space.
4. Enter the remaining characters as described in
step 3.
5. Press the [MENU/OK] button.
If you opened the text dialog box from the
utility dialog box in step 1, you will return to
the previous dialog box. In that dialog box,
press the [MENU/OK] button (twice) to
execute the Rename operation.
If you opened the text dialog box from the
GLOBAL 3 page in step 1, the Rename
operation will be executed.
Item to rename Page
Program name PROG 0...9 Utility: Write Program
Combination name
COMBI 0...9 Utility: Write
Combination
Multi set name MULTI 0-1 Utility: Rename Track
Track name MULTI 0...9 Utility: Write Multi
Drum kit name
GLOBAL 4 Utility: Rename Drum
Kit
Arpeggio pattern name
GLOBAL 5 Utility: Rename
Arpeggio Pattern
Program category name GLOBAL 3: TEXT
Combination category
name
GLOBAL 3: TEXT
