Setup
30
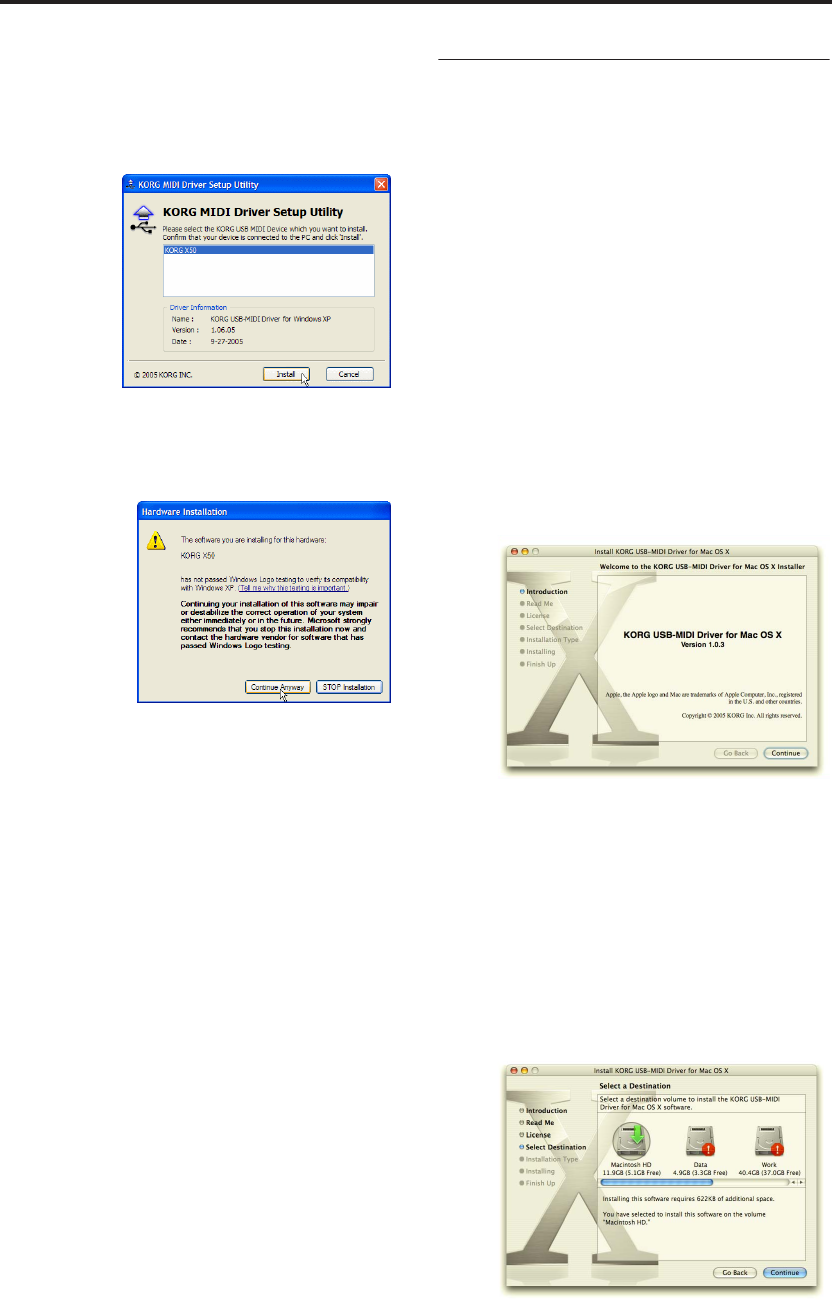
the list above. The lower area will show the
version of the KORG USB-MIDI Driver that
you will be installing. Select X50 in the list
above, and click [Install]. Driver installation
will begin.
4. If a warning dialog box regarding digital
signature authentication appears during the
installation, click [Continue] to continue the
installation.
5. Driver installation has been completed. Click
[Finish] to exit the installer. If you are asked
whether you want to restart Windows now,
choose [Yes] to restart.
Note: For details on installation and setup, and on
uninstallation, see the “Installation manual”
(HTML) on your computer. To view the
“Installation manual,” click from your taskbar’s
[Start] → [All Programs] → [KORG] → [KORG
USB-MIDI Driver Tools] → [Installation manual].
About the X50 and driver ports
KEYBOARD port
Applications on your computer use this port to
receive MIDI messages from the X50 (data from
the keyboard and controllers).
SOUND port
Applications on your computer use this port to
send MIDI messages to the X50’s internal sound
generator, making it produce sound.
Setting up the X50 Editor/Plug-In Editor
For details on setting up and using the X50 Edi-
tor/Plug-In Editor, see “Editor/Plug-In Editor
Manual” (PDF).
Mac OS X:
Installing the KORG USB-MIDI driver
and editor software
Installing the KORG USB-MIDI Driver
Note: Use the KORG USB-MIDI Driver if you are
connecting the X50 via USB to a computer that
satisfies the conditions listed in “KORG USB-MIDI
Driver operating requirements” (☞p.27).
1. Insert the included CD-ROM into your CD-
ROM drive.
2. In the CD-ROM, navigate to the “KORG USB-
MIDI Driver” folder, and double-click “KORG
USB-MIDI Driver.pkg” to start up the installer.
3. Depending on the version of your operating
system, a confirmation dialog box may appear
at this point. If so, enter your password and
click [OK]. When the installer starts up, the
following screen will appear. Click [Continue].
4. “Import information” will appear. Read the
contents, and click [Continue].
5. The “License agreement” will appear. Carefully
read the contents, and click [Continue].
A dialog box will ask whether you accept the
terms of the license agreement. If you accept,
click [Agree].
6. A screen where you can choose the
“Installation destination” will appear. Choose
the installation destination and click
[Continue].


