Editing 16-track songs
E-60/E-50 Music Workstation
r
141
■SysEx
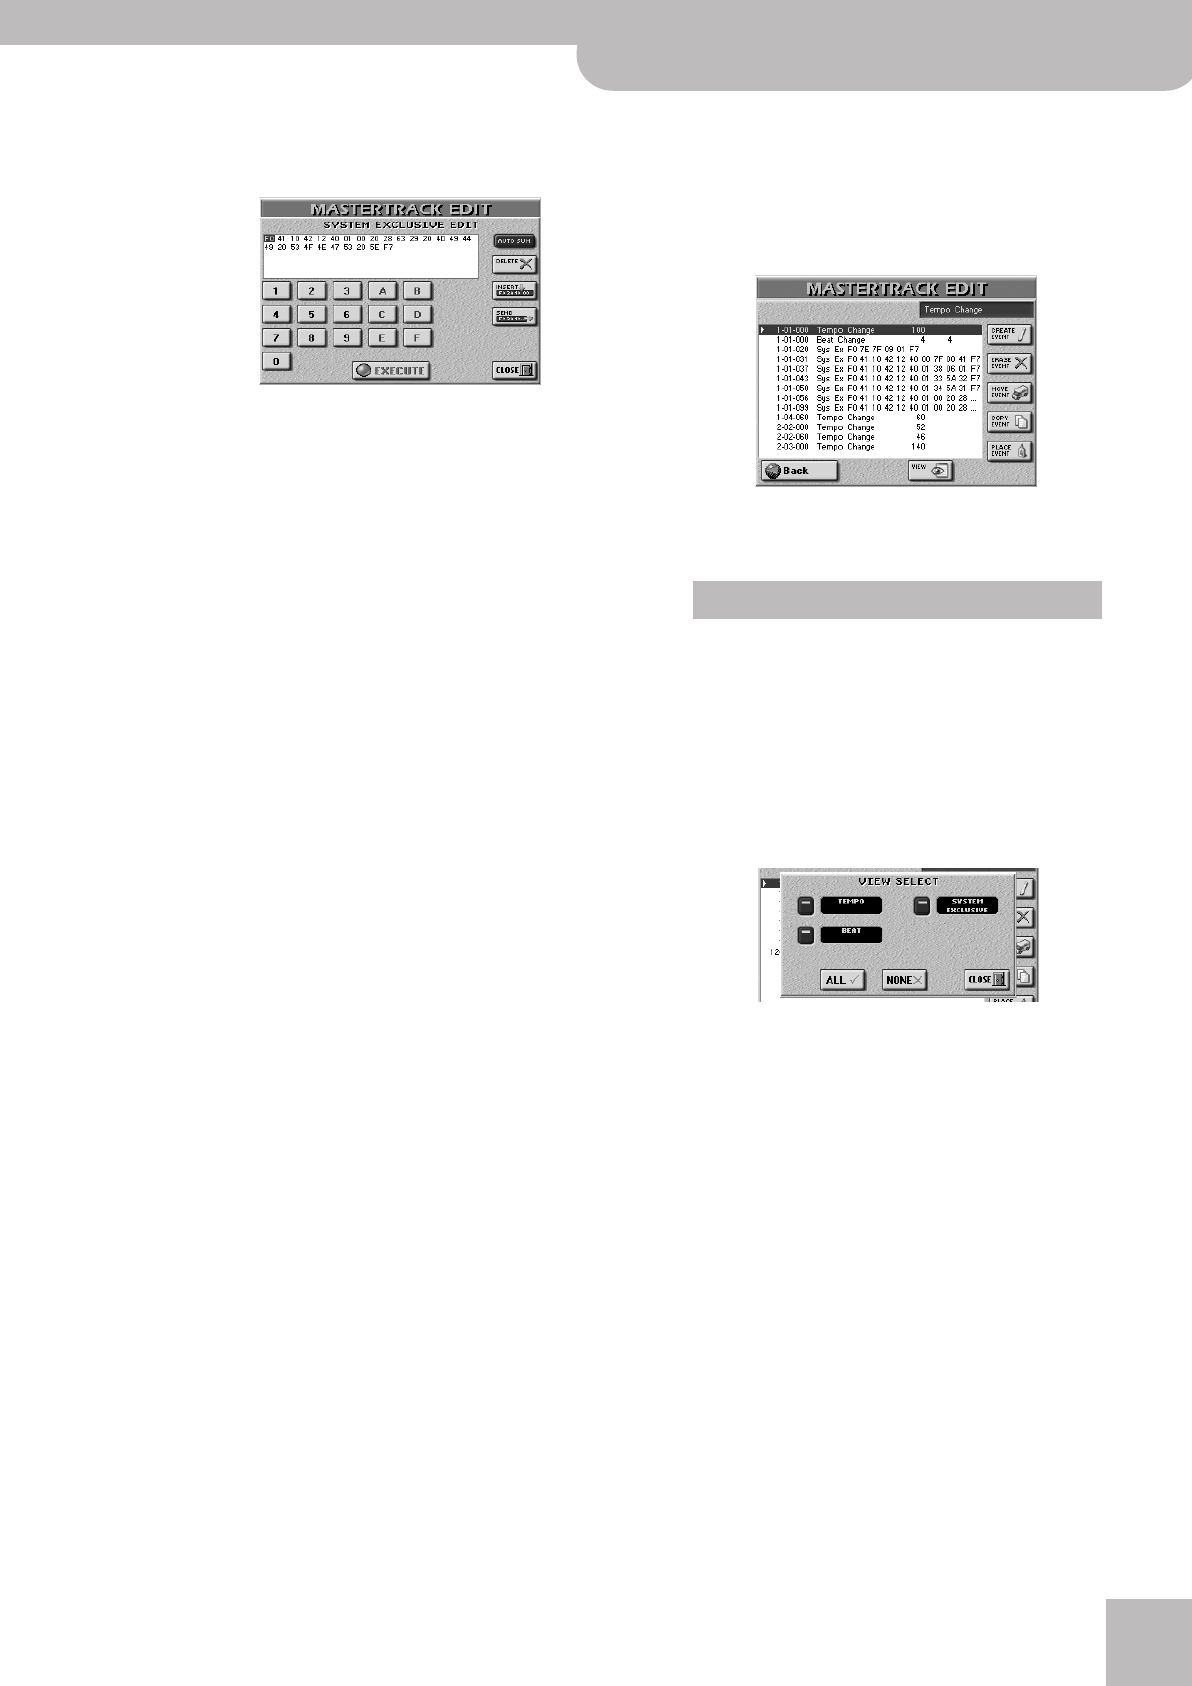
After selecting a “SysEx” line and pressing [®], the dis-
play looks more or less as follows:
Use the [√][®] buttons to select a byte (a pair of num-
bers) in the current line and [ß][†] to change lines.
“SysEx” refers to messages only the E-60/E-50 (or
another GS-compatible sound source) understands.
Changing these values requires a thorough under-
standing of the purpose and structure of SysEx mes-
sages.
Here are some guidelines, however:
• SysEx messages are usually found in the fine print of
an owner’s manual. If not, the distributor (or dealer)
can supply a copy of that information.
• SysEx messages need to be entered in hexadecimal
format – hence the [A]~[F] fields that are considered
numbers. (“Hexadecimal” means that each group
contains 16 different numbers rather than 10.)
“41” in hexadecimal notation actually represents the
number “65” in decimal notation [(4 x 16) + (1 x 1)].
• SysEx messages always start with “F0” (to signal the
beginning of such a message) and end with “F7” (end
of exclusive message).
• Some manufacturers (like Roland) use a byte that
allows the user to check whether the SysEx message
is correct. That byte is called the “checksum”. If you
don’t know how to calculate that value, press the
[AUTO¥SUM] button icon to have the E-60/E-50
insert it for you.
This is a very important step for Roland tone genera-
tors. If the checksum is wrong or missing, the entire
string will be ignored.
Note: The checksum is only calculated for SysEx strings of a
certain length (more than 7 bytes).
• Use the [0]~[9] and [A]~[F] fields to enter the value for
the selected (white-on-black) byte. (“A” stands for 10,
“B” for 11, “C” for 12, “D” for 13, “E” for 14, and “F” for
15.)
• Press the [DELETE] field to remove the selected byte.
All subsequent bytes will move one position to the
left.
• Press the [INSERT] field to insert “00” at the current
position. The originally selected byte –and all subse-
quent bytes– move one position to the right. You can
then replace the inserted “00” with the value you
need.
• Press the [SEND] field to transmit the SysEx string in
its current state to the tone generator.
This allows you to check the result before confirming
it.
• Press the [EXECUTE] field to confirm your settings.
Press [CLOSE] if you don’t want to use the SysEx mes-
sage after all.
By pressing [EXECUTE] or [CLOSE], you return to the
MASTER TRACK EDIT page.
Press [Back] to return to the 16-track Sequencer’s
main page – or bear with us…
You probably noticed the fields in the right half of
the MASTER TRACK EDIT page. They allow you to
reduce or expand the number of events of the MAS-
TER track.
■VIEW
Press this button icon if the list of MASTER track
events has become so long that finding the events
becomes a little difficult.
The following pop-up appears:
• Switch on the button icons of the events you want to
see in the list (the indicator in question must light).
[TEMPO] refers to tempo events, [BEAT] to time sig-
nature changes, and [SYSTEM¥EXCLUSIVE] to SysEx
messages.
• Press [ALL] to switch on all button icons or [NONE] to
switch them all off, in which case the MASTER TRACK
EDIT list only contains the “End of Data” message.
• Press [CLOSE] to close the pop-up window without
applying your changes. Press [EXECUTE] to close the
pop-up window and use your changes.
Other edit operations
E-60_50_OM_UK.book Page 141 Thursday, June 22, 2006 10:06 AM


