


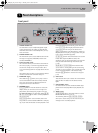
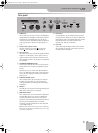
Front panel
E-60/E-50 Music Workstation
r
21
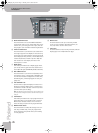
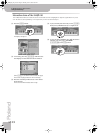
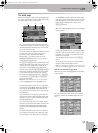
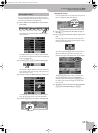
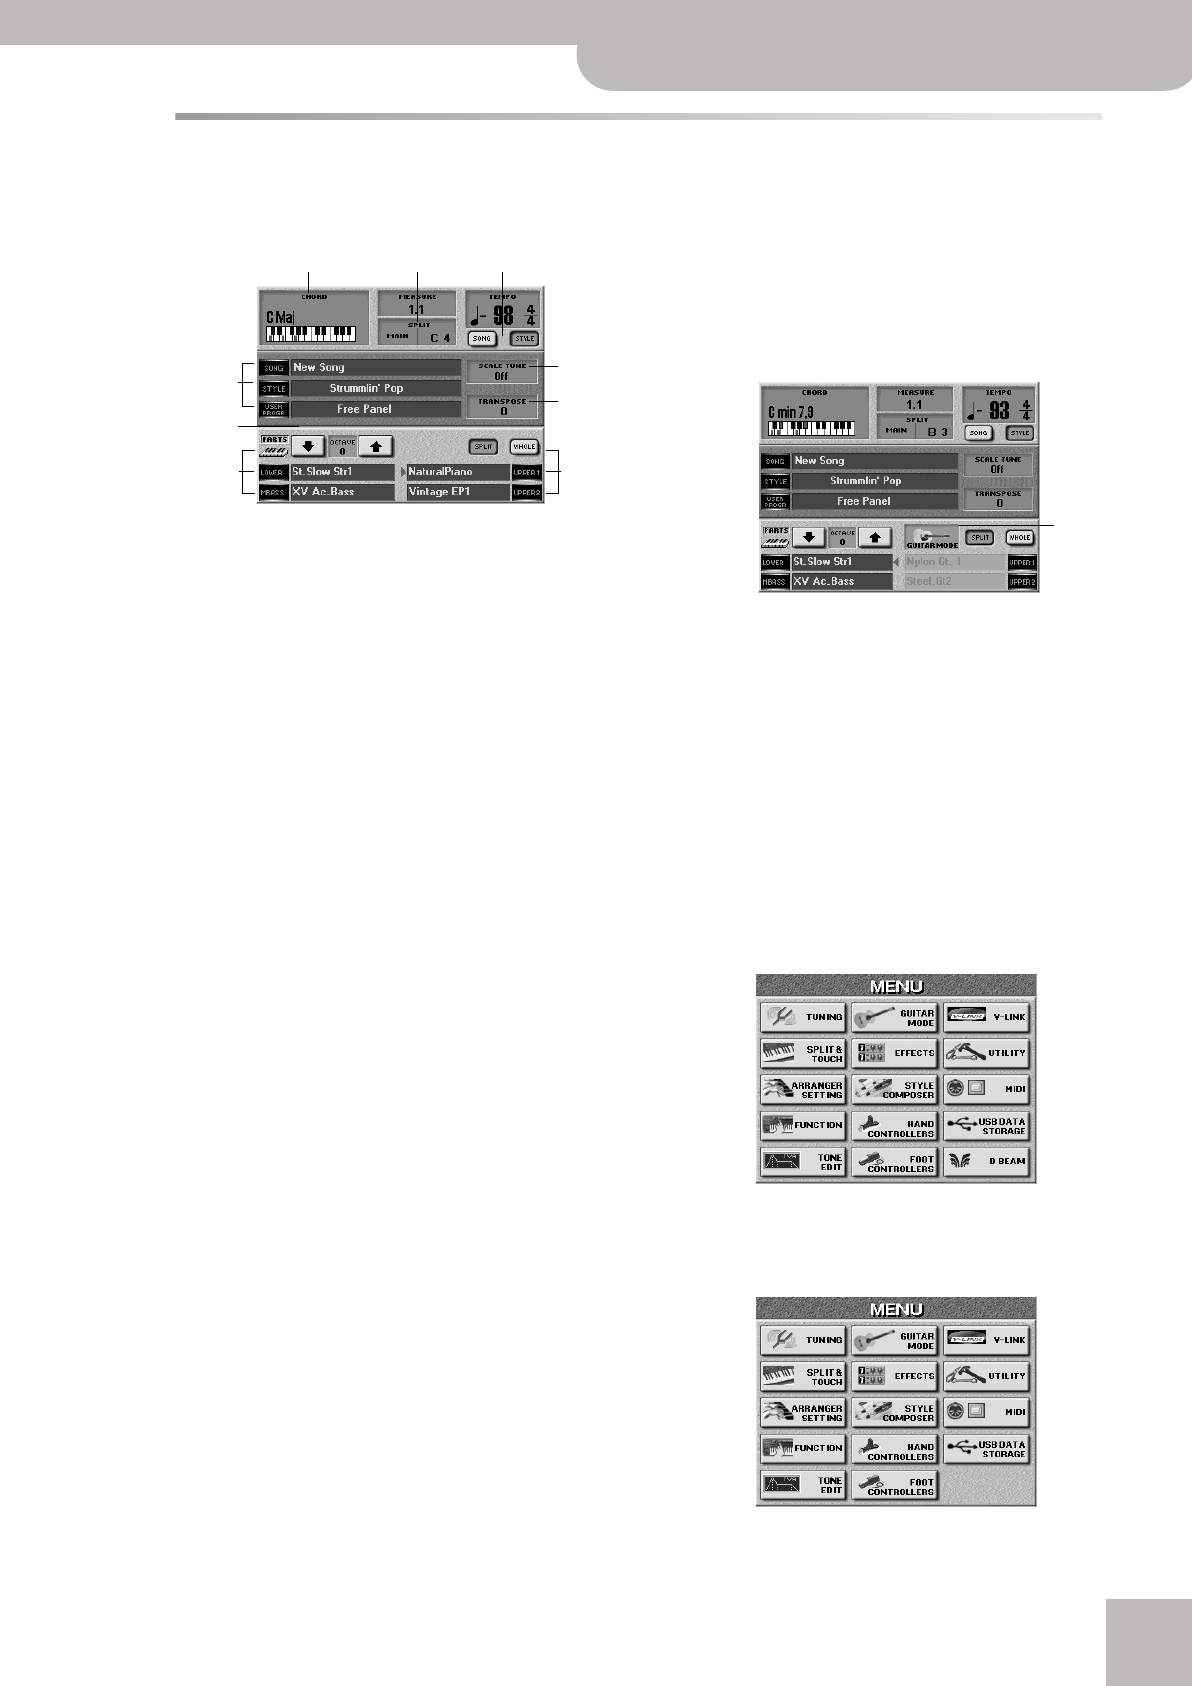
The main page
When you leave Demo mode (or any other display page)
or if you do not change any of the E-60/E-50’s settings,
the display looks more or less as follows:
The information shown here depends on the E-60/
E-50’s current settings, the data you loaded, etc., but
the above illustration should be fairly close to what
you see on your instrument.
Almost all information displayed is assigned to fields
you can press to jump to a different page, set a
parameter or select a parameter for editing.
Pressing field A, for instance, takes you to the
ARRANGER SETTING page. Press B if you want to
change the split point settings.
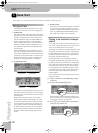
The [SONG] and [STYLE] buttons C look different and
therefore also behave differently: press one of them
to select the section whose tempo should be dis-
played. (You can change the tempo value of the
selected section using the [√SLOW][FAST®] and [TAP]
buttons after stopping playback.) They do not allow
you to switch from Style to Song mode, however,
because that is handled automatically – depending
on whether the [PLAY÷STOP¥®÷ª] or [START÷STOP]
button currently lights.
Note: While on the main page, you can also set the tempo
using the [DATA÷ENTRY] dial and the [DEC]/[INC] buttons.
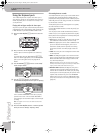
The fields indicated by D take you to a page where
you can select songs (SONG), Music Styles (STYLE) or
User Programs (USER PROG). These fields have the
same functions as the buttons of the same name in
the FINDER pad.
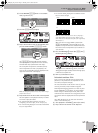
The OCTAVE button icons E allow you to shift the
tuning of the currently selected Keyboard part (indi-
cated by an arrow). To select a Keyboard part, press
its TONE ASSIGN button.
The remaining fields F allow you to select the Key-
board part you wish to assign another sound to and
recalls the TONE SELECT page. They duplicate the
functions of the (KEYBOARD PART) TONE ASSIGN
buttons.
The SCALE TUNE field G takes you to a page where
yo can change the tuning of the E-60/E-50’s notes
(so as to be able to use Arabic scales, for example).
The TRANSPOSE field H, finally, calls up the display
page where you can transpose one, several or all sec-
tions (this depends on the mode you select on that
page). This field duplicates the function of the
[TRANSPOSE] button.
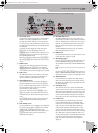
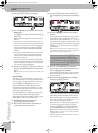
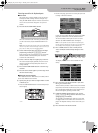
When the E-60/E-50’s Guitar mode is on, the display
looks as follows:
Pressing the I field takes you to the GUITAR MODE
page. Note that this field can either contain an elec-
tric guitar or an acoustic one to indicate the kind of
instrument you selected.
This field duplicates the function of the [GUITAR]
button.
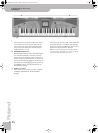
As you see, there is a lot you can control without
having to wade through endless menus.
Note: If the main page does not appear automatically, you can
return to it by pressing the [EXIT] button once or several times.
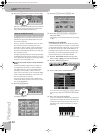
General note about the E-50’s menu
When you press the E-60’s [MENU] button, the display
looks as follows:
The E-50, on the other hand, doesn’t have a D Beam
controller, which is why its MENU page looks as fol-
lows:
A BC
D
F F
G
H
E
I
E-60_50_OM_UK.book Page 21 Thursday, June 22, 2006 10:06 AM