MIDI
188
r
E-60/E-50 Music Workstation
• The E-60/E-50 is supplied with a CD-ROM that con-
tains the driver files you may need to install on your
computer for USB–MIDI applications. Before pressing
the [USB] field, you must install the required drivers
on your computer.
See the operating instructions on the CD-ROM.
(4) Do one of the following:
• Press a MIDI SET [1]~[8] field to select a MIDI Set.
• Press the SELECT field that corresponds to the section
whose default settings you want to load. These two
fields can be used instead of a MIDI Set.
If you press [Keyboard&Style¥Parts], the Song parts no
longer receive/transmit MIDI messages. If you press
[Song¥Parts], the Keyboard and Style parts no longer
transmit MIDI messages.
• Press the [EDIT] field to gain access to the MIDI
parameters. Next, use the PAGE [ø][˚] fields to select
the part or section whose settings you want to
change.
(5) After changing MIDI parameter settings, press the
[WRITE] field to write them to a MIDI Set
(page 193).
(6) Press the [EXIT] button to return to the main page.
Working with presets
The opening MIDI page contains two big fields with
preset settings. All you need to do is press them to
restore the default settings for the sections or aspects
in question.
[Keyboard&Style¥Parts]: This field recalls the factory
MIDI settings for the Keyboard parts (UP1/2, LWR, MBS,
MELODY INT) and the Style parts (ADrum, ABass, Acc1~
6). The most important (and practical) use for this field
is resetting the MIDI transmit/receive channels of the
Keyboard and Style parts and to switch off MIDI trans-
mission/reception of the Song parts.
Note: This field applies to both reception (RX) and transmission
(TX). The E-60/E-50 indeed allows you to set separate TX and RX
channels for each part.
[Song¥Parts]: This field restores the factory settings for
the E-60/E-50’s Song parts and switches off the MIDI
transmission and reception of the Keyboard and Style
parts.
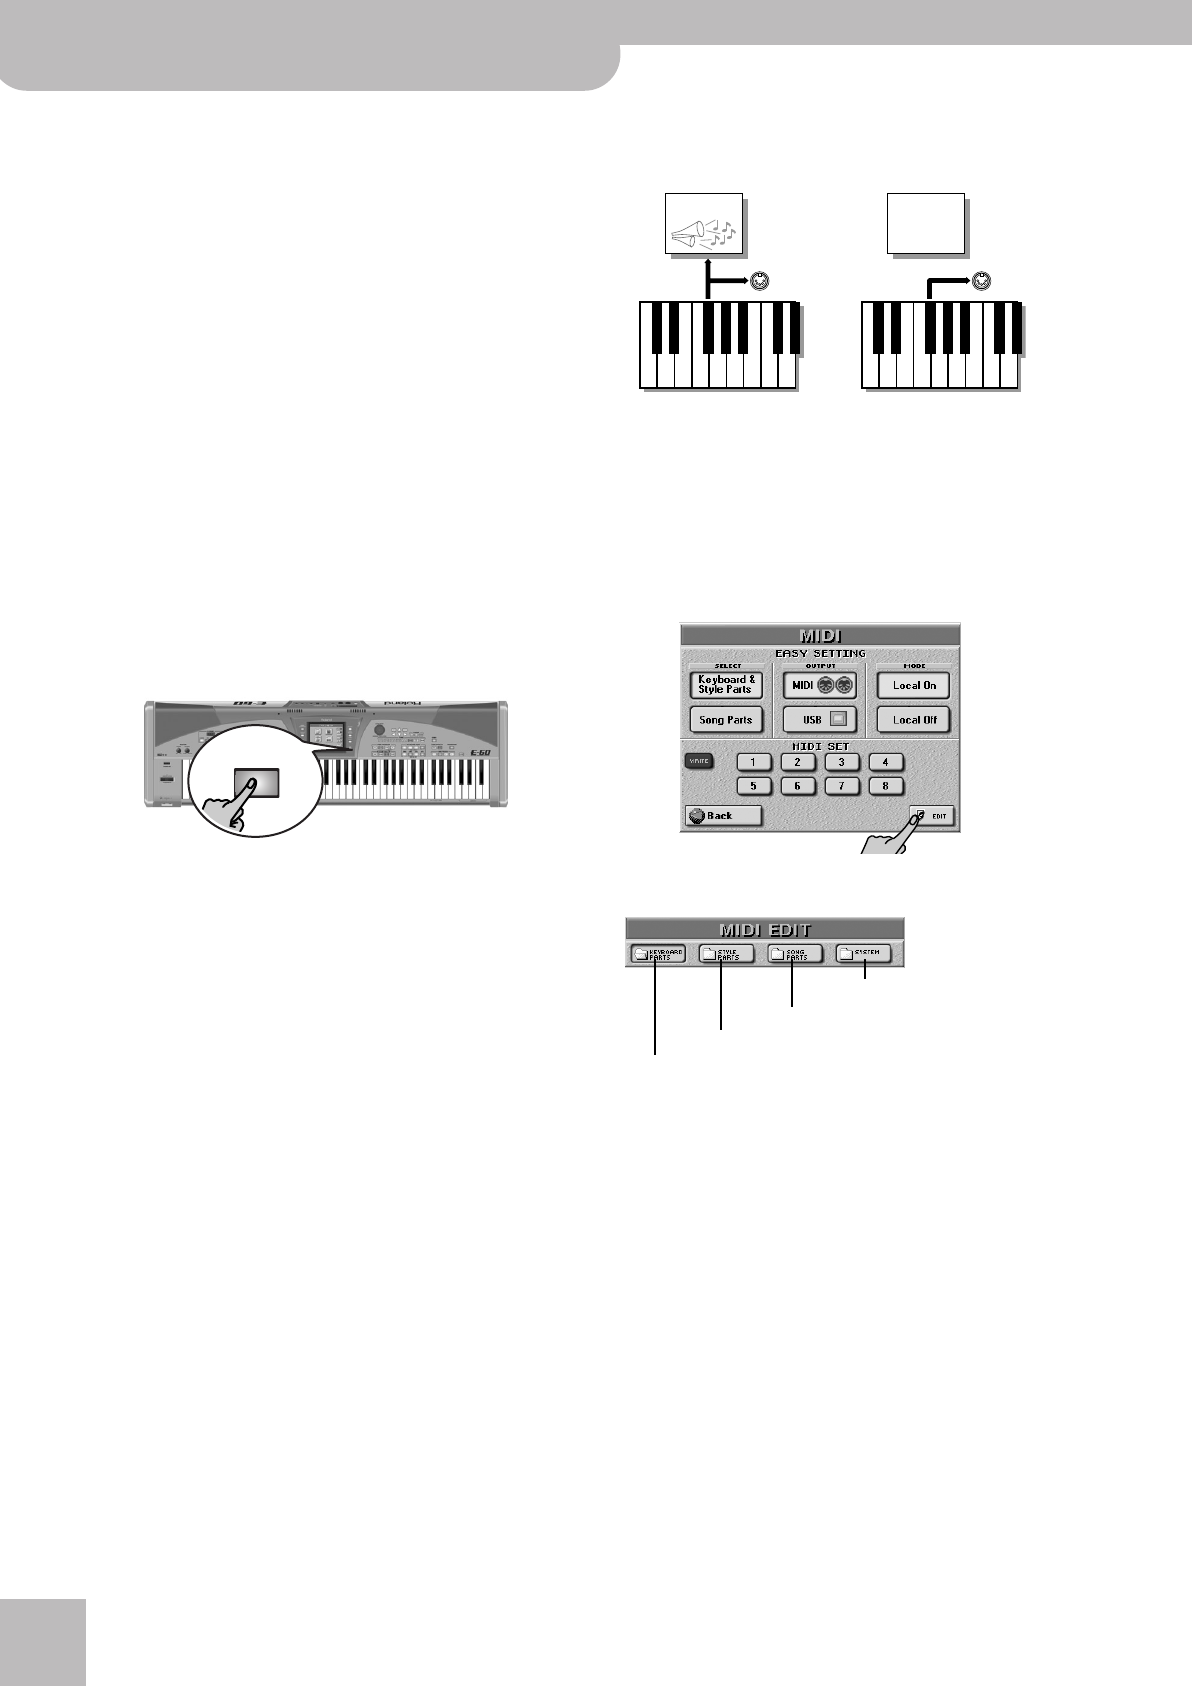
MODE [Local¥On]/[Local¥Off]: These settings allow you to
establish or remove the connection between the E-60/
E-50’s keyboard/Arranger/Recorder and the internal
tone generator.
If you select [Local¥On] (default), playing on the E-60/
E-50’s keyboard or playing back a song/Style causes the
corresponding notes to sound. If you select [Local¥Off],
the corresponding MIDI messages are no longer sent to
the internal tone generator – but they are still trans-
mitted to the MIDI OUT socket (or USB port) and hence
to external MIDI instruments.
When you press one of these fields, the number of the
currently selected MIDI Set is indicated with an asterisk
(*) to signal that the current settings no longer corre-
spond to the written settings. See p. 193 for details
about the MIDI Sets.
Editing procedure
(7) Press the [EDIT] field on the first MIDI page.
(8) On the page that appears now, select the section
whose parameters you wish to edit:
(9) Use the PAGE [ø][˚] buttons to select the part you
want to edit.
(10) Press the field of the parameter you wish to edit
and set the desired value with the [DATA÷ENTRY]
dial or the [DEC]/[INC] buttons.
(11) Press the [Back] field and save your MIDI settings to
a Set; —or—
Press the [EXIT] button to return to the main page.
EXIT
MIDI OUT
LOCAL ON
LOCAL OFF
MIDI OUT
+Style
+ SMF
+Style
+ SMF
+Style
+ SMF
+Style
+ SMF
Sound source Sound source
Refers to the Recorder/sequencer parts
Refers to the Style parts
Synchronization, general settings
Keyboard parts (including MELODY INTELL)
E-60_50_OM_UK.book Page 188 Thursday, June 22, 2006 10:06 AM


