Recording Styles from scratch
E-60/E-50 Music Workstation
r
153
• Press the second [BEAT] field (the denominator) and
enter the duration of each beat using the
[DATA÷ENTRY] dial or the [DEC]/[INC] buttons.
You can also already set the tempo (20~250) here, or
leave that for later.
‰ Continue with step (6) below.
■Preparing your own settings
If none of the templates matches the settings you
need, press the [MY¥SETUP] field.
Here, you can prepare the STYLE COMPOSER for the
work at hand by selecting the desired sounds and
setting additional parameters.
Please proceed in the order given here until you have
a firm grasp of the flexibility:
(a) Press the [TRACK] field and use the [DATA÷ENTRY] dial or
the [DEC]/[INC] buttons to select the track whose settings
you want to change.
With the exception of the tempo, all parameters shown
here only apply to the selected track. There are 8 tracks:
ADrum (the drums), ABass (the bass) and Acc1~6 (melodic
accompaniment parts).
(b) Press the [TRACK¥INSTRUMENT] field to jump to the TONE
SELECT page. (You can also press a TONE button to
assign the desired sound to the track.)
The AccDrums track can only use Drum Sets (so that only
the [DRUMS] button of the TONE pad is available).
(c) Play a few notes on the keyboard to audition the sound.
(d) If necessary, change the CONTROLS settings by pressing
their fields and using the [DATA÷ENTRY] dial or the [DEC]/
[INC] buttons.
The four fields refer to the following aspects:
These settings may come in handy to ensure that all ACC1
parts (for example) use the same amount of reverb and are
always located in the right half of the stereo image. You
can also change these settings later (see p. 161).
(e) Repeat steps (a)~(d) for the remaining tracks, Modes and
Divisions.
(f) Press the first [BEAT] field (the numerator) and enter the
desired number of beats using the [DATA÷ENTRY] dial or
the [DEC]/[INC] buttons.
(g) Press the second [BEAT] field (the denominator) and
enter the duration of each beat using the [DATA÷ENTRY]
dial or the [DEC]/[INC] buttons.
See “Time signature” above. You can already set the tempo
(20~250) here, or leave that for later.
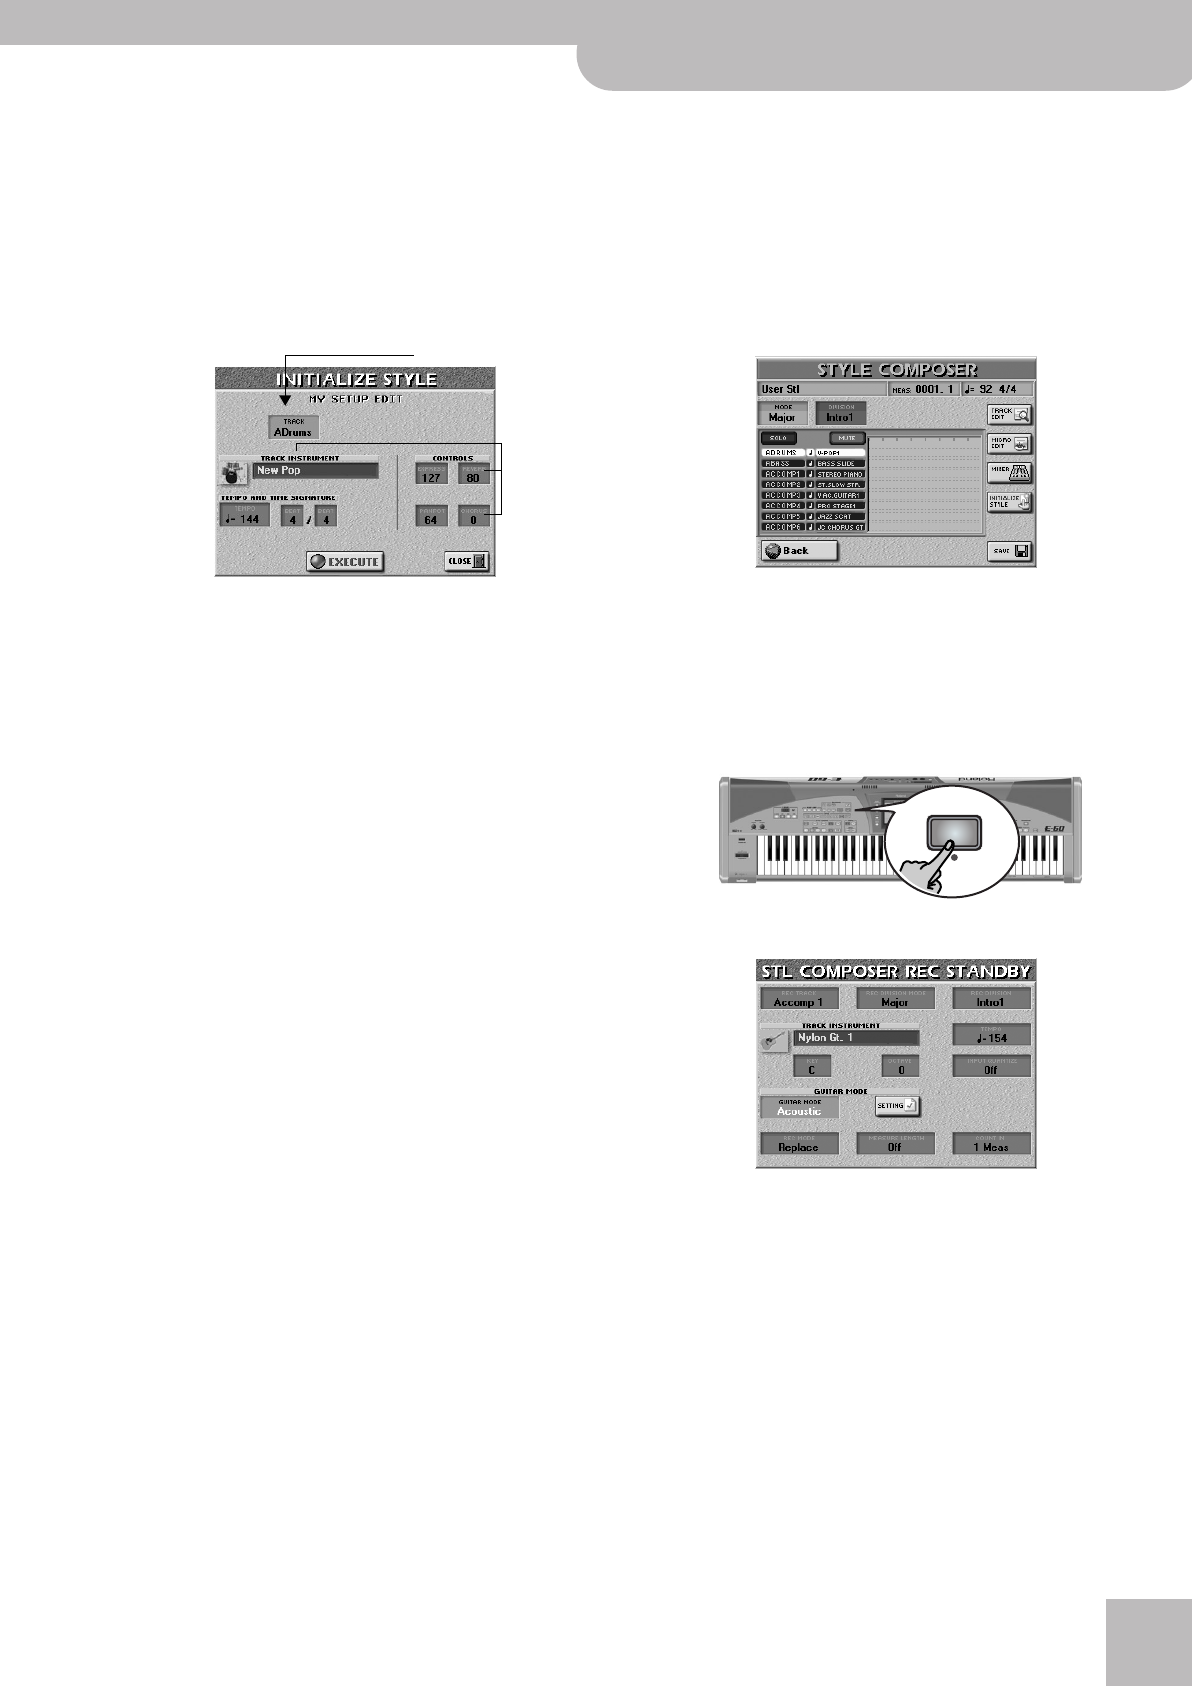
(6) Press the [EXECUTE] field.
The display returns to the STYLE COMPOSER page,
which only contains the sound assignments you have
just made.
Getting ready for the first track
(7) On the STYLE COMPOSER page, press the DIVISION
field and use the [DATA÷ENTRY] dial to select the
Division you want to record (“Intro”, “Main”, “Fill”
or “Ending”).
(8) Press the RECORDER [REC¥∏] button.
The display changes to:
EXPRESS Temporary volume changes (CC11).
REVERB Reverb Send (CC91), i.e. how strongly the
selected track should be processed by the
reverb effect.
PANPOT The track’s stereo placement (00[L]~64~127[R]).
CHORUS Chorus Send (CC93), i.e. how strongly the
selected track should be processed by the cho-
rus effect.
8 possibilities
Can be set for
all 8 tracks
REC
E-60_50_OM_UK.book Page 153 Thursday, June 22, 2006 10:06 AM


