Using the 16-track sequencer
146
r
E-60/E-50 Music Workstation
Other edit operations
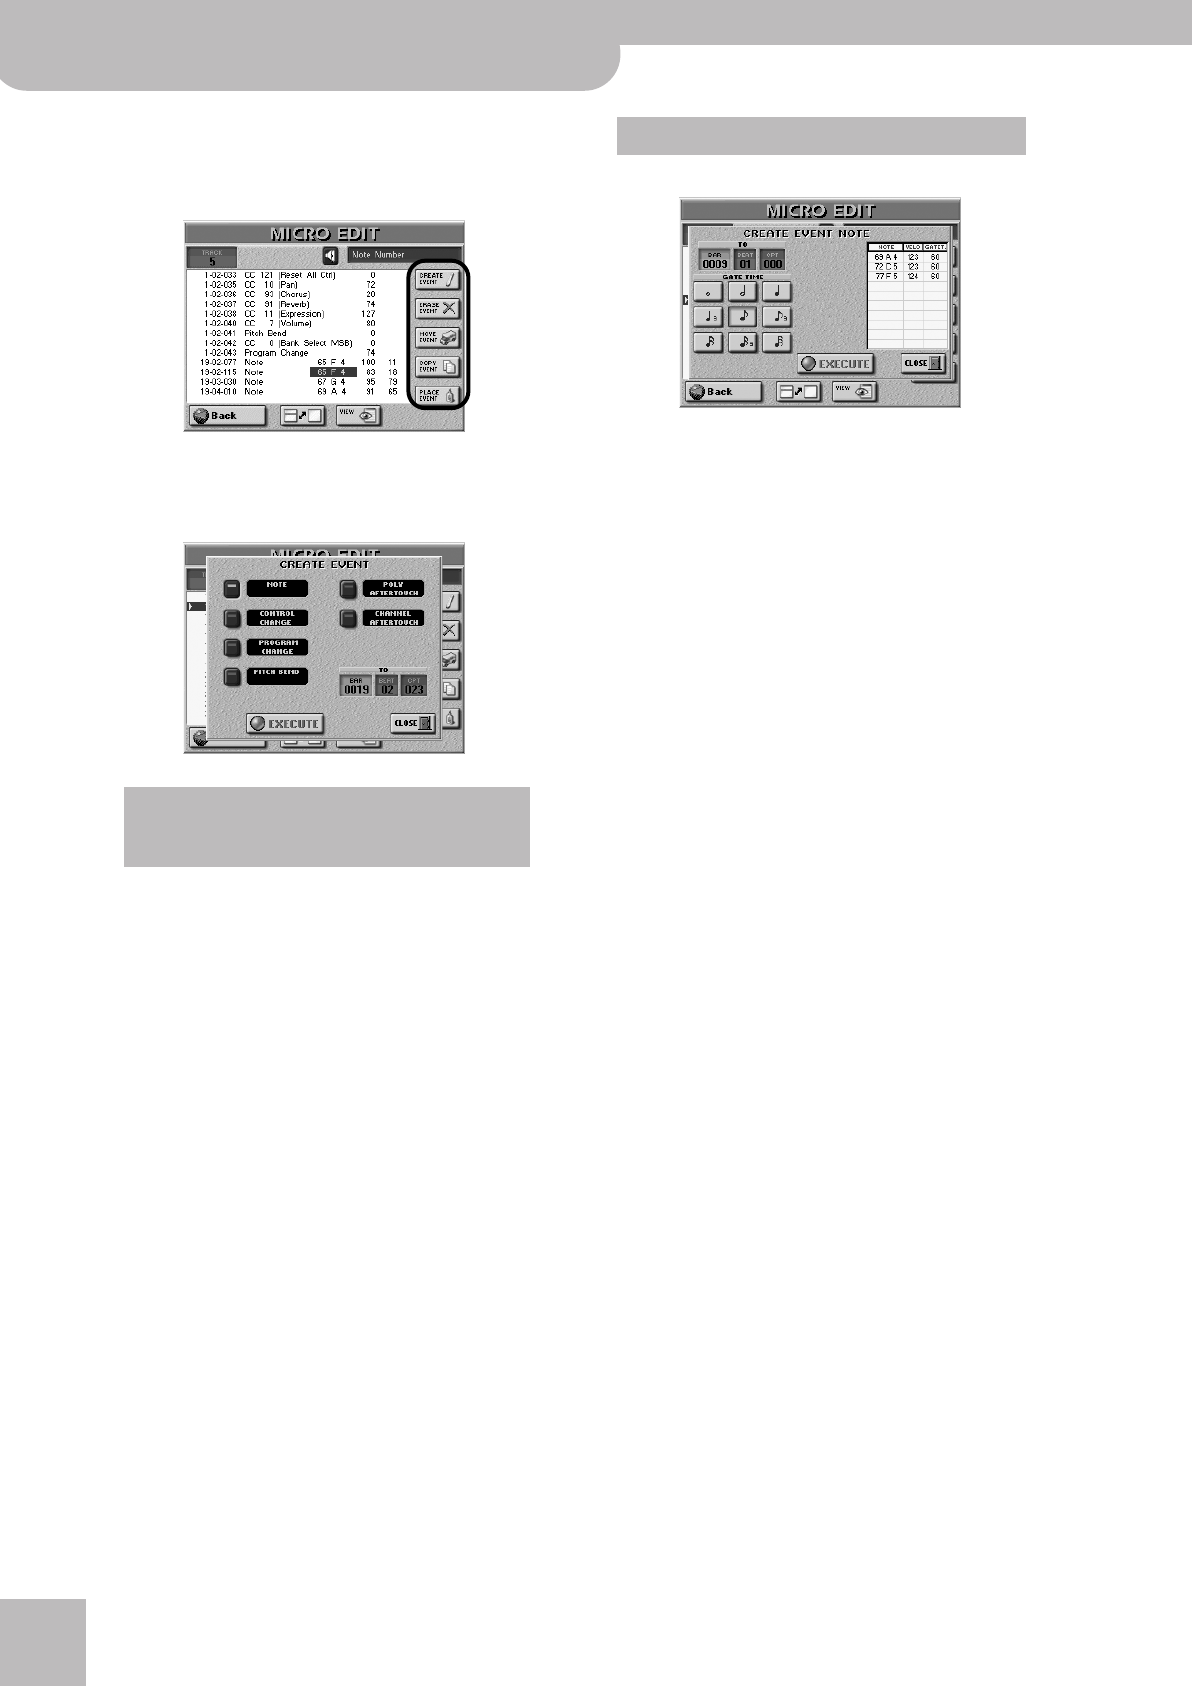
The fields in the right half of the MICRO EDIT page
allow you to reduce or expand the number of events of
the track you selected.
■CREATE EVENT
Press this button icon to add a new event to the
selected track. The following pop-up appears:
• Press the button icon that corresponds to the kind of
event you want to add.
Here are the default values of the events you create:
• Specify the position where your new event should be
inserted by pressing the [BAR], [BEAT] and [CPT] fields
and entering the desired value for each unit using
the [DATA÷ENTRY] dial or the [DEC]/[INC] buttons.
• Press the [EXECUTE] field to confirm your settings
and add the new event.
Press [CLOSE] to close the pop-up window without
applying your changes.
If you press the [NOTE] field, the display changes to:
This pop-up window allows you to enter up to 10
notes for each position (see the [BAR], [BEAT] [CPT]
fields). The velocity values of the keys you press are
also adopted.
• To enter chords: press and hold the key of at least
one constituent note, then press the remaining keys.
Any key you press after releasing the keys of notes
already entered in the “table” replaces the “old”
notes.
• Press one of the note icons to specify the duration of
the note(s) shown in the “table”. This is possible both
before and after playing the required note(s) on the
keyboard.
• Press the [EXECUTE] field to confirm your settings
and add the new note (or chord).
■ERASE EVENT
• Use the [DATA÷ENTRY] dial or the [ß][†] buttons to
select the event you want to delete.
• To select several consecutive events, press the
[DATA÷ENTRY] dial while turning it towards the left
(upward direction) or the right (downward direction).
• Press the [ERASE¥EVENT] button icon to remove the
event you selected.
■MOVE EVENT
This function allows you to move one or several
events.
Note: If the position to which you move the selected event
already contains other events, the moved event is added at the
end of that group.
• Select the event you want to move.
Note: For this function, you could take advantage of the VIEW
filter to avoid selecting event types that should remain where
they are. See “VIEW” on p. 144.
Note: Events located at “1-01-00” cannot be moved further to
the left.
• To select several consecutive events, press the
[DATA÷ENTRY] dial while turning it towards the left
(upward direction) or the right (downward direction).
All events selected in this way appear on a dark back-
ground.
If the position for which you create a new event already
contains other events, the new event is added at the
end of that group.
Note: Note Number: 60 C4
On Velocity: 100
Gate Time: 60
Control Change: CC01 Modulation, value “0”
Program Change*:
[*] “Control Change” also allows you to insert Bank Select mes-
sages (CC00 and CC32). Such messages must be located BEFORE
the program change to which they apply. The correct order is:
CC00‰ CC32‰ PC. Also, it is usually wiser to assign these three
values to consecutive CPT positions.
Program Change Number “1”
Pitch Bend: “0”
Poly Aftertouch: Note Number: 60 C4
Poly Aftertouch Value: “0”
Channel Aftertouch: “0”
Adding notes
E-60_50_OM_UK.book Page 146 Thursday, June 22, 2006 10:06 AM
