7
Preparations
Preparations
1
Before installing the VS8F-2, turn off the power of the VS-1824
and all connected devices, and disconnect all cables from the
VS-1824.
2
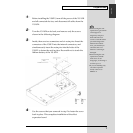
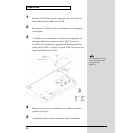
Turn the VS-1824 on its back, and remove only the screws
shown in the following diagram.
3
Inside, there are two connectors and six resin pins. Insert the
connectors of the VS8F-2 into the internal connectors, and
simultaneously insert the resin pins into the holes of the
VS8F-2 to fasten the unit in place. Be careful not to touch the
lithium battery of the VS-1824.
fig.1-05.e
4
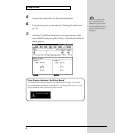
Use the screws that you removed in step 2 to fasten the cover
back in place. This completes installation of the effect
expansion board.
•When turning the unit
upside-down, get a bunch
of newspapers or
magazines, and place
them under the four
corners or at both ends to
prevent damage to the
buttons and controls.
Also, you should try to
orient the unit so no
buttons or controls get
damaged.
•When turning the unit
upside-down, handle
with care to avoid
dropping it, or allowing it
to fall or tip over.
•If you are installing only
one effect expansion
board, connect it to
EFFECT A.


