Mute Groups 113
03D—Owner’s Manual
Mute Groups
Channels can be grouped for multiple mute control using only one [ON] button. This
makes it easy to mute several channels simultaneously. Input channels 1 through 24 and
the stereo input can be used in mute groups. All channels in a mute group don’t have
to be on or off. A mute group can contain a mix of on channels and off channels. When
a mixed mute group is switched, on channels go off and off channels come on. This
could, for example, be used to toggle two channels for A/B comparison. There are four
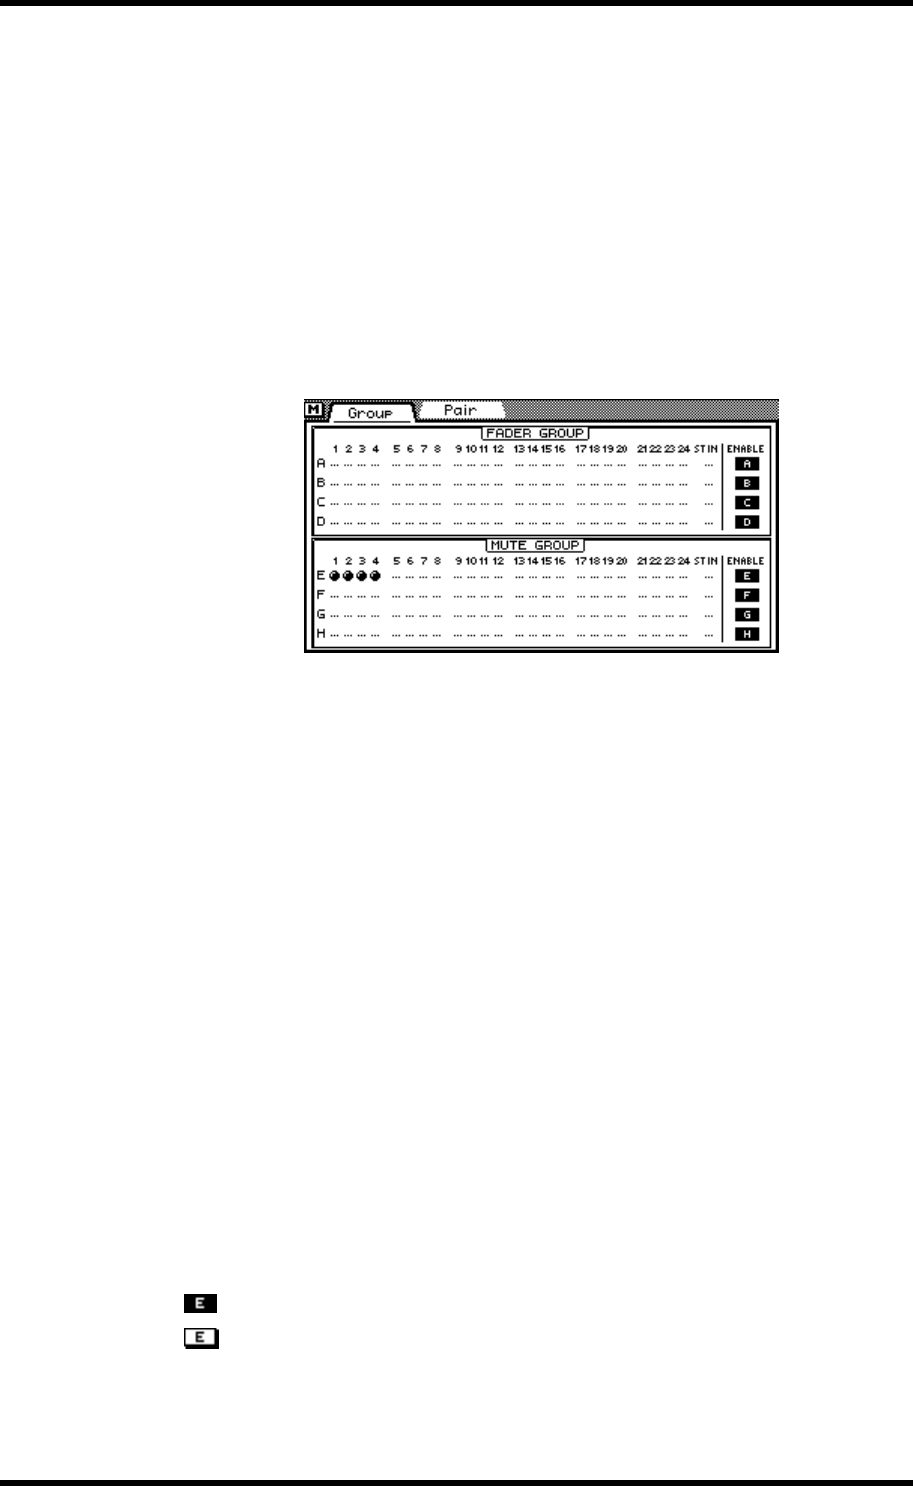
mute groups available: E, F, G, and H. Mute groups are configured on the Group page.
Making a Mute Group
1. Use the [GROUP/PAIR] button to locate the Group page shown below.
2. Use the [
π] [†] cursor buttons to select the fader groups and the [SEL]
buttons to add and remove channels to and from the mute groups. Set
the Mixing Layer to 17–24/MASTER to set input channels 17 to 24.
If you are using a mouse, simply click to add and remove channels to and from the mute
groups. Channels cannot be added to more than one mute group.
The channels of a stereo pair (Stereo Pairs on page 114) are added to and removed from
mute groups together.
When the Group page is selected, the [SEL] buttons are used to add and remove chan-
nels to and from the mute groups. When another page is selected, the [SEL] buttons
return to normal operation.
Disabling a Mute Group
The four mute groups can be disabled individually using the ENABLE switches at the
right side of the Group page. This allows you to set individual channels within a group.
1. Use the [
π] [†] cursor buttons to select the mute group that you want
to disable: E, F, G, or H.
2. Press the [ENTER] button.
If you are using a mouse, simply click the ENABLE switch.
3. Press the [ENTER] button again to enable the mute group.
Mute group enabled
Mute group disabled


