


Assembling the stand > Cautions for assembly
64
Assembling the stand
Cautions for assembly
• When placing the piano on the stand, be careful not to
pinch your hands.
• Be sure that the correct parts are assembled in the correct
orientation and position, and follow the steps in order.
• Do not apply weight to the front edge of the piano before
tightening the screws, otherwise the piano may fall down.
Assembling procedure
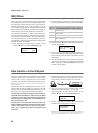
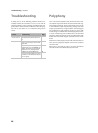
1. Open the packing carton and take out the contents. Check
that all of the following items are available.
NB: You will need a cross-point (Phillips #2) screwdriver
for assembly.
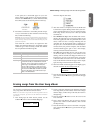
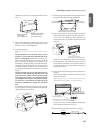
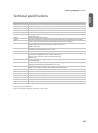
2. Screw the adjuster into the pedal box as far as it will go, and
attach the pedal cable.Use screws (a) to fasten the side pan-
els to the pedal box. Make sure that there is no gap between
the side panels and the pedal box.
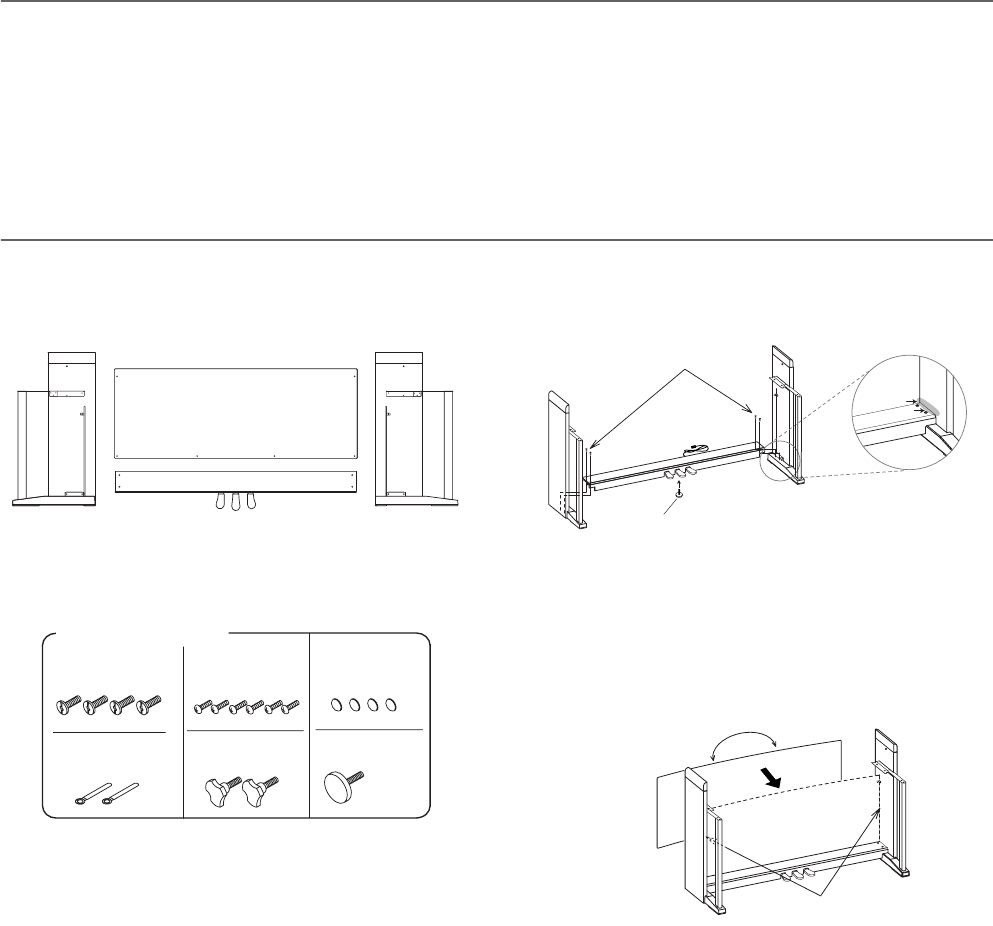
3. With the finished surface (woodgrain) facing forward,
curve (bow) the back panel slightly and fit it into the
grooves of the side panel.
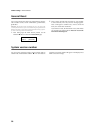
4. Use screws (b) to fasten the side panels.
Start by fastening the bottom edge of the back panel (four
places). In two places, pass the screw through a cable
holder to attach it to the stand. Attach the power cable
holder at either the right side or the left side depending on
the position of the AC outlet you’ll be using. Tighten these
screws.
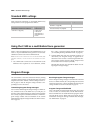
Then fasten the top edge of the back panel (two places).
Don’t tighten these screws completely yet, since you’ll be
Back panel
Sideboard A
(Left side)
Pedal Box
Sideboard B
(Right side)
Assembly Accessories
Screws (b)
(M4 x 14)...6pcs.
Piano Fasteners
...2 pcs.
Adjuster...1pc.
Screws (a)
(M6 x 20)...4pcs.
Cable holder
...2 pcs.
Caps...4pcs.
This is used to adjust the height
after you’ve finished assembling
the stand; don’t tighten it completely.
Screws (a)
Pull out the
pedal cable
Align precisely, so that there is
no gap between the side panel
and pedal box.
Slightly curve the back panel,
and fit it into the grooves
Grooves in side panels
Finished
surface