


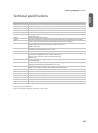


Assembling the stand > Assembling procedure
65
English
adjusting this area after you attach the instrument to the
stand.
5. Make sure that the stand is not tilted and that there are no
gaps in it, and then firmly tighten all of the screws, except
for the two screws you left untightened.
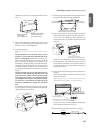
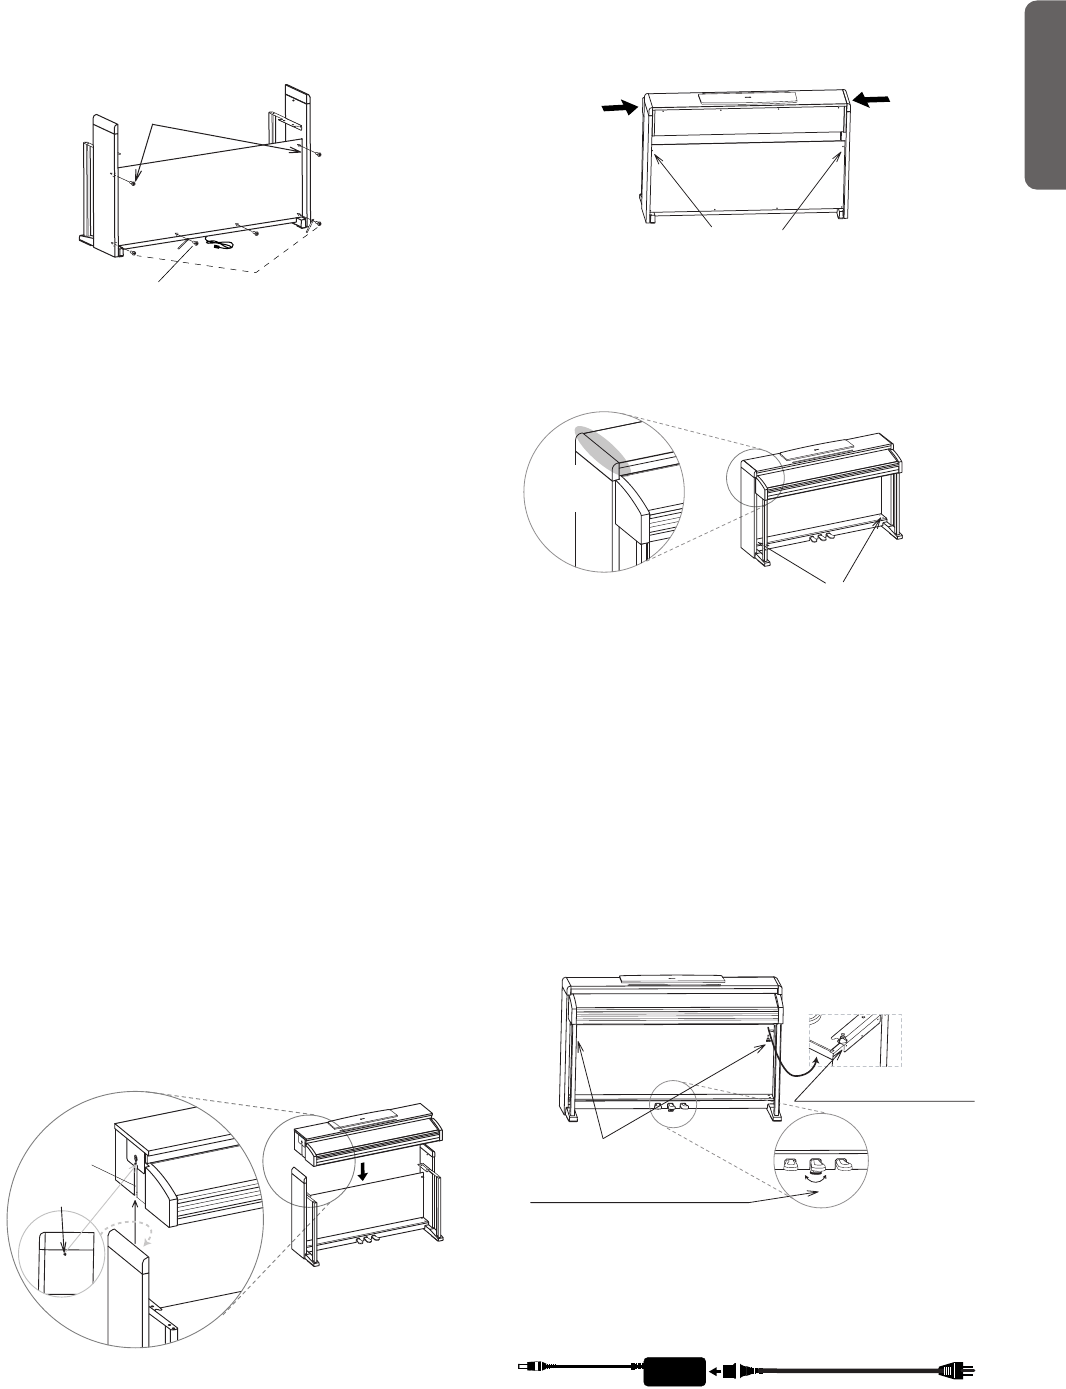
6. Attach the instrument.
Note: The side panels are easily scratched; please use cau-
tion.
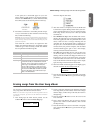
Lift the instrument with both hands, being careful to
keep them not closer than 70mm from both ends of the
piano to avoid pinching. Position the screw heads pro-
truding from the inside of the left and right sides of the
stand, so that they are aligned with the grooves of the
metal fitting at the left and right ends of the instrument.
and gently lower the instrument onto the stand. If the
instrument is aligned correctly, the screws on the inside of
the side panels will fit firmly into the grooves of the metal
fittings.
Warning: Carefully lower the left and right ends of the
instrument evenly, keeping the instrument level, and
being careful not to pinch your hand or drop the instru-
ment. Lifting only one side is very dangerous and may
also damage the metal fixtures of the instrument itself.
You must raise or lower both left and right ends of the
instrument simultaneously, keeping the instrument
level.
You can perform this step more easily if you use your body
to apply pressure to the side panel of the stand while slid-
ing the instrument onto the stand.
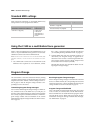
7. While pressing the upper edge of the stand, tighten the two
back panel screws that you had left untightened.
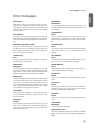
8. Make sure that there are no uneven gaps between the top
surface of the instrument and the top of the side panels.
If you notice any unsightly gap, make adjustments by
loosening the screws (a) that fasten the side panel to the
pedal box.
If there is a very noticeable gap between the instrument
and the side panels of the stand, or if the gap is uneven, it
may be that the instrument was not placed correctly on
the stand. If so, lift up the entire instrument and place it
correctly on the stand.
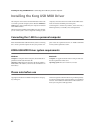
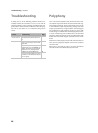
9. Fasten the instrument fastening bolts from below the in-
strument.
Then loosen the adjuster, and adjust it so that it is in firm
contact with the floor.
Note: Unless the adjuster is in firm contact with the floor,
the pedal will wobble, possibly causing malfunctions.
Verify that all screws are firmly tightened. Finally, place
caps on the heads of pedal box screws (a).
10.Connect the included power cable to the AC adaptor.
Fasten the cable holders
at the left or right side
(for the power cable)
Leave untightened
Attach together with
a cable holder
(for the pedal cable)
Screw head
Groove
Firmly tighten the two screws while pressing
the left and right side panels from the outside.
Press against the
side of the instrument
Press against the
side of the instrument
If you notice an uneven gap,
loosen screws (a) to make adjustments.
Avoid
uneven gaps
Screw into holes on the
back of the instrument
Loosen adjuster to the correct position
Instrument fastening bolts
Included power cable
DC plug
AC adaptor