


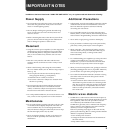


16
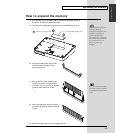
Expanding the memory
Removing the memory
To remove the memory module, reverse the installation procedure.
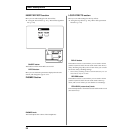
1. Simultaneously press outward the white clips located at either end of the socket.
fig.12-05
2. Remove the memory module from the socket.
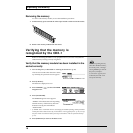
Verifying that the memory is
recognized by the CDX-1
Before re-connecting the CDX-1 to any peripheral devices, check to verify that the
added memory is being correctly recognized.
Verify that the memory module has been installed in the
socket correctly
1. Turn on the power, as described in “Turning On the Power” (p. 33).
fig.15-04
After several seconds when the CDX-1 starts
up normally, the post-fader screen appears.
2. Press [UTILITY].
The Menu are displayed as icon.
fig.2-06
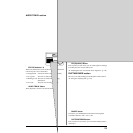
3. Press CURSOR [ ] to select the DIMM
Diagnosis icon.
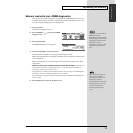
4. Press [YES/ENTER].
fig.2-07
The DIMM Diagnosis screen appears.
“DIMM” will indicate status the expanding
internal memory. If the memory has been
detected correctly, this will indicate
“INSTALLED.”
* If “DIMM” shows “NOT INSTALLED” even though you installed expanding memory, the added
memory has not been detected correctly. As described in “Turning off the power” (p. 34), turn off
the power. Please re-install the memory correctly, as described in “How to expand the memory”
(p. 15).
5. Press [DISPLAY] to return to the Basic screen.
In case of expanding memory
other than 128 MB of memory,
turn on the power, a message
“Wrong DIMM Type! Turn off
the power, and replace
w/correct one” appears, and.
At this time, the CDX-1 will
not operate normally.