


45
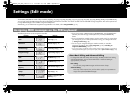
Settings (Edit mode)
Advanced editing 1–3
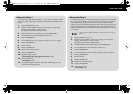
In Aftertouch Assign advanced editing 1, you can specify an upper and lower limit
for the aftertouch data as well as edit the basic editing items. In advanced editing 2
and 3, you can also specify note aftertouch data (Polyphonic Key Pressure) instead
of a channel.
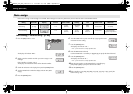
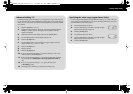
1. Press the [EDIT] button so it’s lit.
2. Slightly move the controller to which you want to assign aftertouch. If the
controller is a button, press it. The display will indicate the controller
number you selected.
3. Check the indication in the display, then press the [ENTER] button.
4. Turn the VALUE knob to make the display indicate “AT.”
5. Press the [ENTER] button.
6. Turn the VALUE knob or press controller [A2 (1)]–[A4 (3)] to make the
display indicate “AT1,” “AT2,” or “AT3.”
7. Press the [ENTER] button.
8. Enter the channel.
9. Press the [ENTER] button.
10. If you’re using advanced editing 2 or advanced editing 3, enter a note
number and press the [ENTER] button.
11. If you’re using advanced editing 1 or 3, specify an upper limit and lower
limit as described in Specifying the value range (upper/lower limits) (p.
45).
12. If you’re using advanced editing 1 or 3, specify the output port.
(-> Port setting (p. 65))
13. According to the controller type, set the button mode (p. 64).
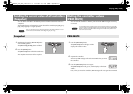
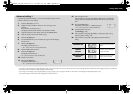
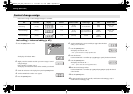
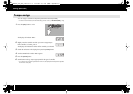
Specifying the value range (upper/lower limits)
If you’re using the PCR keyboard to assign MIDI messages (p. 41) in Edit mode, and
you’ve selected a mode that allows you to specify the range of the value, you’ll need
to set the maximum and minimum value.
1. The readout should be as shown.
2. Use the VALUE knob or controllers [A1]–[A8] and [B1]–
[B8] to specify the upper value limit.
3. Press the [ENTER] button.
4. The readout should be as shown.
5. Use the VALUE knob or controllers [A1]–[A8] and [B1]–
[B8] to specify the lower value limit.
6. Press the [ENTER] button.
PCR-300_500_800_e.book 45 ページ 2006年12月19日 火曜日 午後2時59分