


54
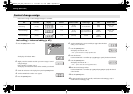
Settings (Edit mode)
Advanced editing 1
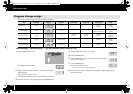
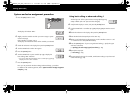
RPN/NRPN advanced editing 1 lets you specify the upper limit and lower limit for
the data entry MSB (CC#6) of the transmitted RPN/NRPN message, in addition to
allowing you to make the settings described in basic editing.
1. Press the [EDIT] button so it’s lit.
2. Slightly move the controller to which you want to assign an RPN or NRPN
message. If the controller is a button, press it. The display will indicate the
number of the controller you selected.
3. Check the indication in the display, then press the [ENTER] button.
4. Turn the VALUE knob to make “RP” appear.
* If you want to assign an NRPN, make “NP” appear. The rest of the procedure is the
same as for RPN.
5. Press the [ENTER] button.
6. Turn the VALUE knob or press controller [A2 (1)] to select the “RP1”
indication.
7. Press the [ENTER] button.
8. Enter the channel.
9. Press the [ENTER] button.
10. Use the VALUE knob or controllers [A1]–[A8] and [B1]–[B8] to specify the
RPN MSB (CC#101) (or the NRPN MSB (CC#99)).
11. Press the [ENTER] button.
12. Use the VALUE knob or controllers [A1]–[A8] and [B1]–[B8] to specify the
RPN LSB (CC#100) (or the NRPN LSB (CC#98)).
13. Press the [ENTER] button.
14. Specify the range of the data entry MSB (CC#6).
(-> Specifying the value range (upper/lower limits) (p. 45))
15. Specify the output port.
(-> Port setting (p. 65))
16. As appropriate for the type of controller, set the button mode (p. 64) or
make virtual center click settings (p. 65).
PCR-300_500_800_e.book 54 ページ 2006年12月19日 火曜日 午後2時59分