7. Listening to recorded tracks
while you record another
track (Overdubbing)
The process of recording additional tracks while
you listen to previously recorded tracks is called
“overdubbing”.
As an example, we will explain how you can play-
back the sound that was recorded on track 1, and
perform analog recording on track 2.
■ Select the playback/recording tracks
1 Press the track 1 [TRACK STATUS] key several
times to select PLAY (indicator lit green), to enable
(the previously recorded) track 1 for playback.
2 Press the track 2 [TRACK STATUS] key to select
REC (ANALOG) (indicator blinking red), to
enable it as the recording track.
3 Either turn down [CHANNEL] faders 3–7/8, or
press their [TRACK STATUS] keys several times to
select MUTE (indicator off), to mute these tracks so
that they will not sound during playback.
■ Connecting the input device for the record-
ing track and adjusting the level
4 As shown in “■ Connecting the input device and
adjusting the level” (p.11, p.12), connect an instru-
ment etc. to the INPUT 1 jack, and set the input
level.
5 Raise or lower the [CHANNEL] fader of the play-
back track to a volume that will be comfortable for
playing along with.
■ Starting and stopping recording
6 Press the [REC] key, and then press the [PLAY] key
to begin recording. Press the [STOP] key to stop
recording. (Refer to “■ Starting and stopping
recording”, p.11)
■ Listening to the recorded performance (Play-
back)
7 Move the current time to a location earlier than the
point at which you began recording. Then set the
[TRACK STATUS] of the recorded track to PLAY,
and press the [PLAY] key to begin playback. Press
the [STOP] key to stop playback. (Refer to
“■ Listening to the recorded performance (Play-
back)”, p.11)
8. Manually re-recording
part of the performance
(Manual Punch In/Out)
If you made a mistake during the performance that
you recorded, or if you were not able to play the
entire song as you had intended, there is no need
to re-record the entire song — you can re-record
just the part that you need.
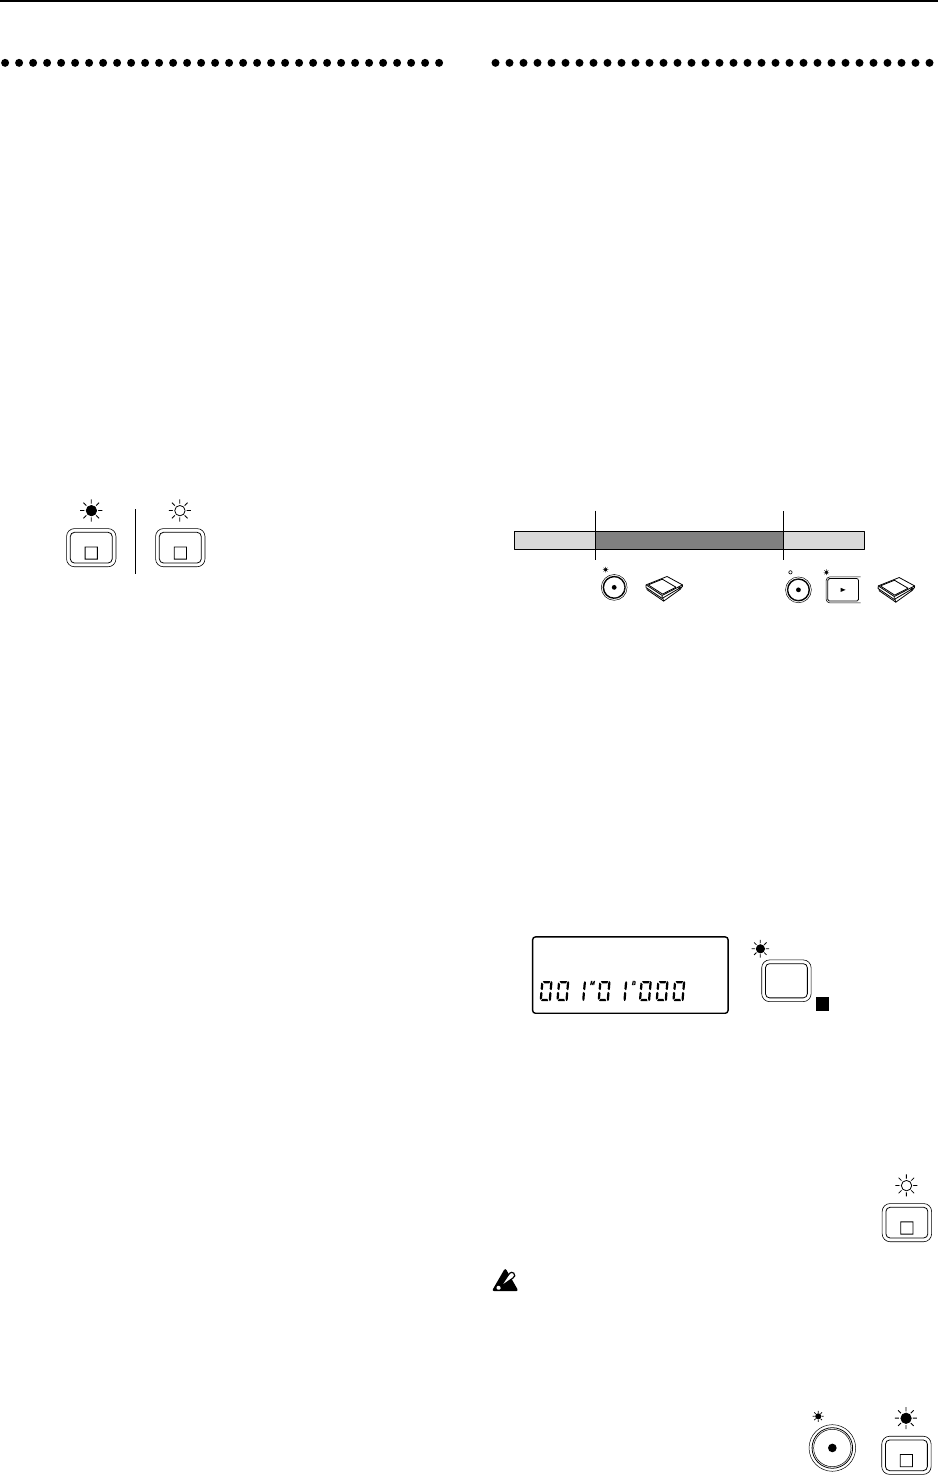
“Punch In” is the action of switching from song
playback to record, and “Punch Out” is the action
of switching back from recording to playback.
“Manual Punch In/Out” is when you perform the
Punch In and Punch Out manually. On the D8, you can
Punch In during playback either by pressing the [REC]
key or by pressing a foot switch <sold separately>. You
can Punch Out by pressing either the [REC] key or the
[PLAY] key, or by pressing a foot switch.
■ Connecting the input device and adjusting
the level
1 As explained in “■ Connecting the input device
and adjusting the level” (p.12), connect the input
device and adjust the level. At this time, make
adjustments so that there is no difference between
the volume of the instrument that is being input
and the volume of the track.
■ Select the input monitor
2 Press the [SYSTEM] key several times (indicator lit)
to access the “Mon” display. Then rotate the
[VALUE] dial to select Auto.
■ Starting and stopping recording
3 Move the current time location to a point earlier
than the location that you wish to re-record. If you
hold down the [STOP] key and press the [REW]
key, you will move to the beginning of the song.
4 Press the [PLAY] key (indicator lit) to
begin playback.
The [TRACK STATUS] indicator which
was set to REC will blink, and you will
hear the sound of the track.
For tracks whose [TRACK STATUS] is set to REC,
the EQ and fader will affect only the input sound,
and will not affect the playback sound. After
adjusting the input level, do not modify the fader
or EQ settings during playback, since this will
change the volume and EQ of the input sound.
5 When you wish to begin re-
recording, press the [REC] key
(Manual Punch In). The
[TRACK STATUS] indicator will
2
R
1
L
blinking redlit green
REC
Foot switch
Foot switch
or
or or
Stop recordingBegin recording
(playback) (recording) (playback)
REC
PLAY
Mon:Auto
SYSTEM
E
2
R
2
R
REC
