Chapter 2
Operation
Saving to and
loading from DAT
This section explains how song data can
be backed up to a DAT recorder, and then
restored from the DAT recorder.
Korg will take no responsibility for any loss of data
which may result from the inability to backup/
restore correctly.
Backup to a DAT recorder is limited to the amount
of data that will fit on a single 120 minute tape.
It is not possible to backup to a digital audio device
other than a DAT recorder (e.g., MD recorder, DCC
recorder or ADAT).
Be sure that the audio equipment connected to the
DAT recorder has been turned down to the mini-
mum volume, so that the sound from the DAT
recorder is not output from speakers or head-
phones. If you playback the DAT with the volume
raised, your speakers or hearing may be damaged.
1. Saving a song to a DAT
recorder (Backup)
Here will explain how to backup a song from the
D8 to a DAT recorder.
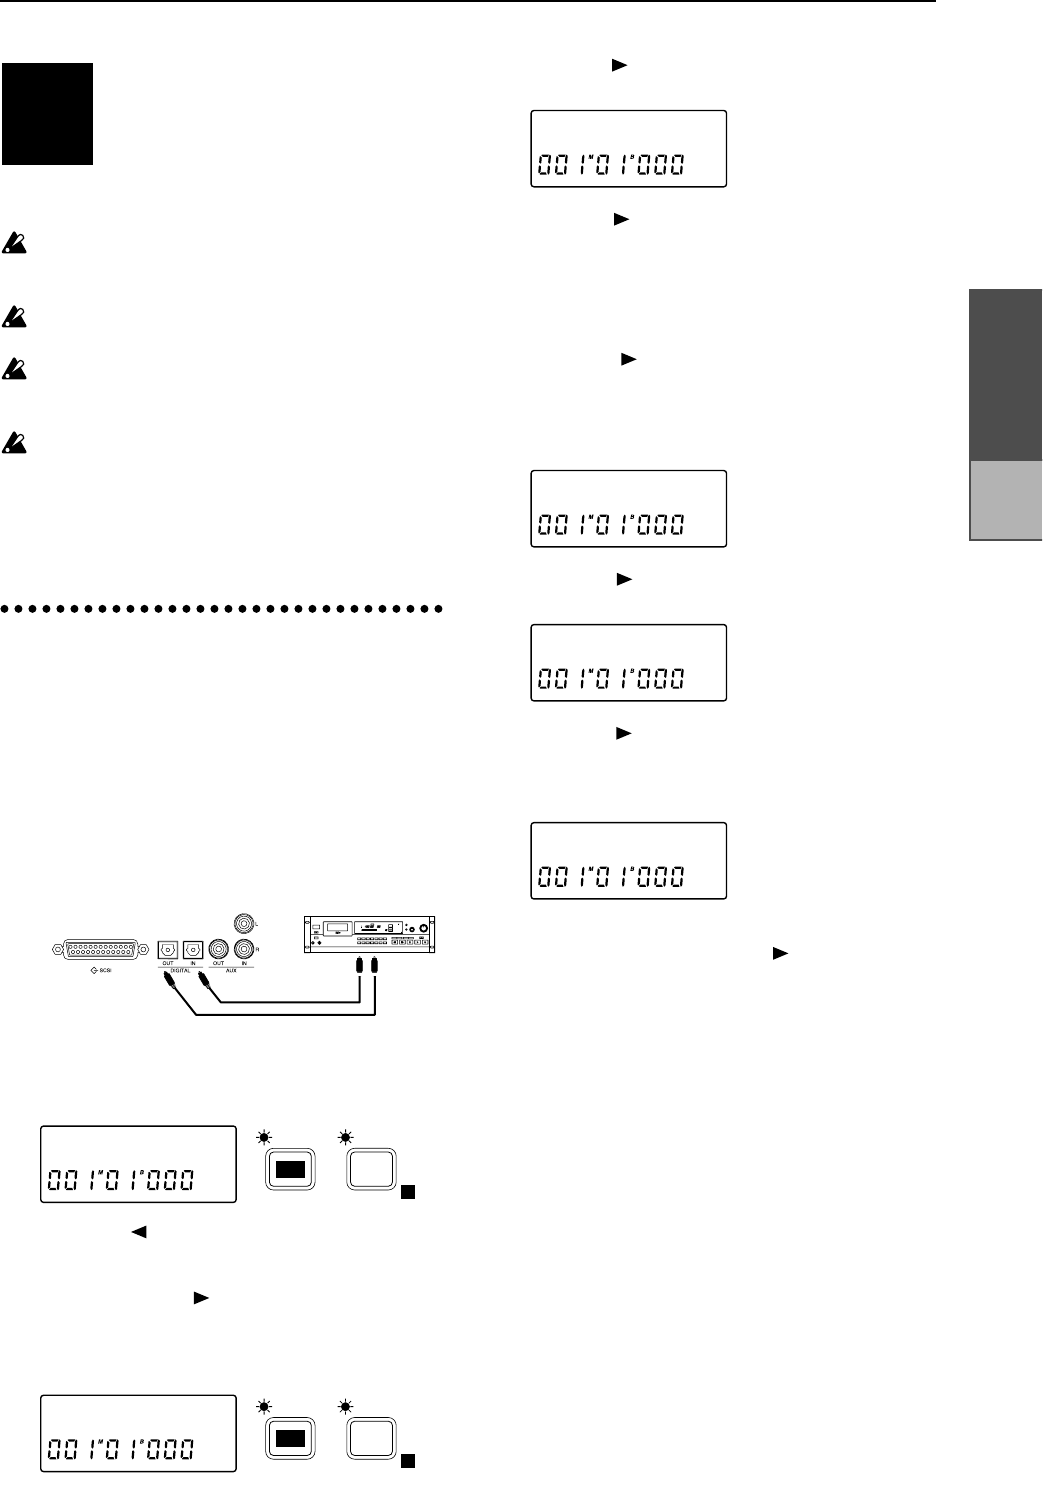
1 Connect the DIGITAL OUT connector of the D8 to
the DIGITAL IN connector of your DAT recorder.
Adjust the settings on your DAT recorder so that
the input from its DIGITAL IN will be recorded.
(For details on DAT settings, refer to the owner’s
manual for your DAT recorder.)
2 Press the [EDIT] key, and then press the [SONG
TRACK] key several times to display the song
name.
3 Press the [ ] key, and then rotate the [VALUE]
dial to select the drive which contains the song that
you wish to backup. If you wish to backup a single
song, press the [ ] key and then rotate the
[VALUE] dial to select the song number as well.
4 Press the [SYSTEM] key several times to make the
display read “DiskUtil”.
5 Press the [ ] key, and then press the [SYSTEM] key
several times to make the display read “Backup”.
6 Press the [ ] key. The drive and song number that
you selected in step 3 will be displayed. If you
wish to backup all songs of the currently selected
drive, rotate the [VALUE] dial to select 1-✽✽ (All).
If you wish to backup an individual song, leave the
selection as it is.
7 Press the [ ] key, and then rotate the [VALUE]
dial to select the DAT “H” as the backup destina-
tion drive. The display will indicate the required
length of tape, so use a tape of greater length than
this.
8 Press the [ ] key, and the contents of the backup
will be displayed.
9 Press the [ ] key, and the display will alternately
indicate “RecDAT” and “RecStart_?”, prompting
you to begin recording on the DAT recorder. Start
recording from the beginning of the DAT tape.
10 After you have started recording on the DAT
recorder, press and hold the [ ] key for approxi-
mately one second to begin the backup.
11 When the backup is completed, the display will
alternately indicate “Completed” and “StopDAT”.
Stop the DAT recorder.
STEP13
DIGITAL OUT
Restore
Backup
DIGITAL IN
A01:SngNa˙
E
SONG /
TRACK
EDIT
DiskUtil ˙
E
SYSTEM
EDIT
Backup œ
øH:DAT100œ
I**øDATokœ
RecDAT


