


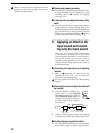


18
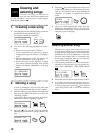
■ Connecting the input device and adjusting
the level
5 As explained in “■ Connecting the input device
and adjusting the level” (p.11, p.12), connect the
input device and adjust the level. At this time,
make adjustments so that there is no difference
between the volume of the instrument that is being
input and the volume of the track.
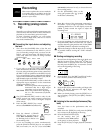
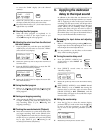
■ Select the input monitor
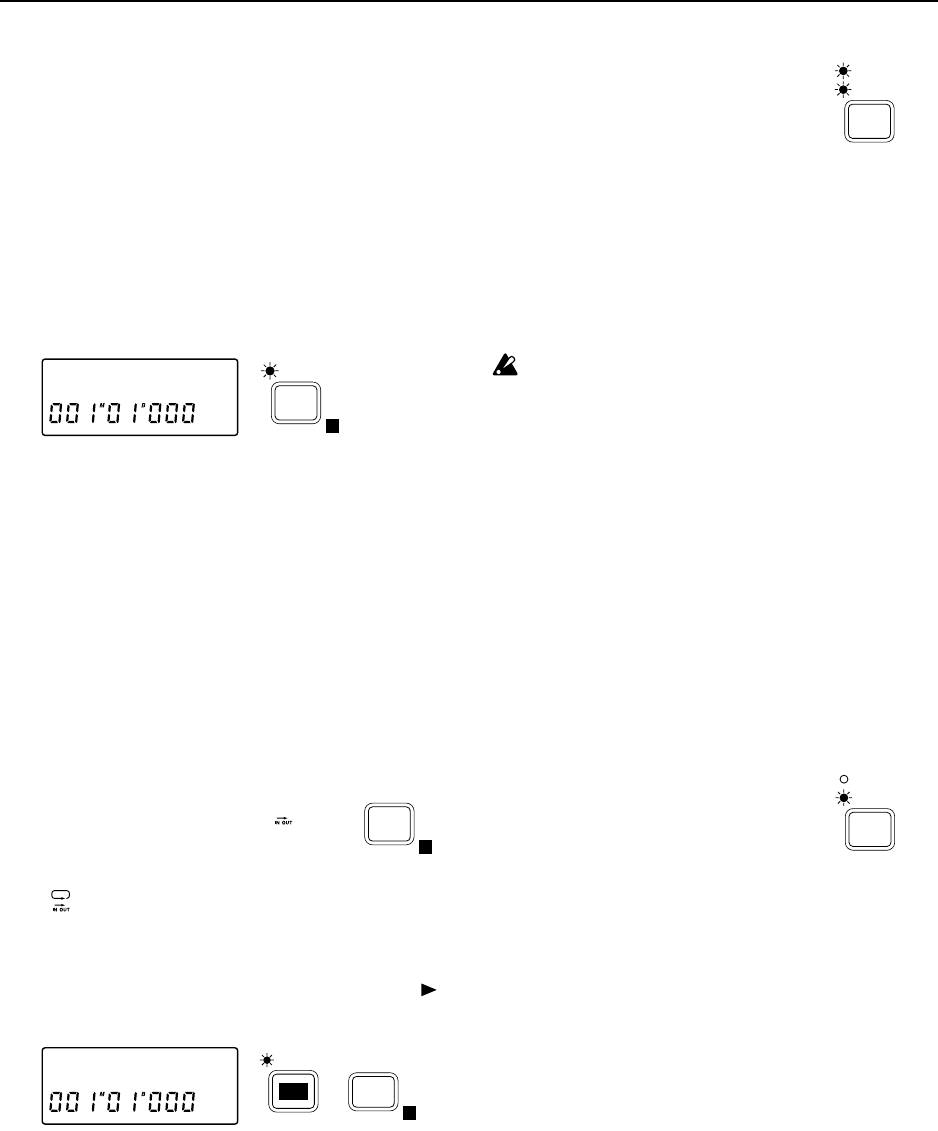
6 Press the [SYSTEM] key several times (indicator lit)
to access the “Mon” display (refer to SYSTEM P3).
Then rotate the [VALUE] dial to select Auto.
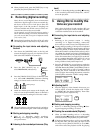
■ Auto Play function and Auto Repeat function
When performing Auto Punch In/Out, it is conve-
nient to use the Auto Play function or the Auto
Repeat function in conjunction with Auto Punch
In/Out (refer to p.51, p.52).
When the Auto Play function is on, pressing the
[REC] key and then pressing the [PLAY] key will
automatically move to the pre-roll time and begin
playback. Then the IN–OUT area will be recorded,
and the post-roll time will playback, and finally
playback will stop automatically. In addition, if
Auto Repeat is on, the Auto Play function will
occur as described above, and then you will move
to the pre-roll time without stopping and continue
playing back to the post-roll time.
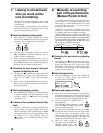
7 Pressing the [PLAY MODE] key once
will make the display show “ ”, and
the Auto Play function will be turned
on. Pressing the [PLAY MODE] key
once again will make the display show
“ ”, and the Auto Repeat function will be on.
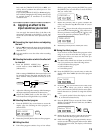
8 Press the [EDIT] key, then press the [PLAY MODE]
key several times to make the display read “Pre-
Rol”, and specify the pre-roll time. Rotate the
[VALUE] dial to specify the value. Press the [ ]
key and rotate the [VALUE] dial to set the unit to
either measures (M) or seconds (s).
9 Press the [PLAY MODE] key to make the display
read “PstRol”, and referring to step 8, set the post-roll
time. After making the setting, press the [EDIT] key.
* Subsequent steps 10–18 are for when the Auto
Play function is on. If you are not using the Auto
Play/Repeat functions together, set the current
time to a location earlier than the IN time, and then
begin recording or playback.
■ Rehearsing auto punch in/out
Before you actually perform auto punch in/out
recording, it is a good idea to rehearse the record-
ing. If you do not need to rehearse, proceed to
“■ Auto punch in/out setting”.
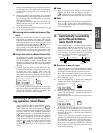
10 Press the [REC MODE] key several
times to select AUTO PUNCH +
REHEARSAL (both indicators lit).
When AUTO PUNCH +
REHEARSAL is selected, initiating
recording will cause the input monitor etc. to func-
tion in the same way as if recording were actually
being performed. This allows you to rehearse the
recording.
11 Press the [REC] key ([REC] and [PLAY] indicator
will blink), and then press the [PLAY] key ([REC]
and [PLAY] indicator lit) to begin playback. The
[TRACK STATUS] indicator that was set to REC will
blink, and the track playback sound will be heard.
For tracks whose [TRACK STATUS] is REC, the EQ
and fader will affect only the input sound, and will
not affect the playback sound. After adjusting the
input level, do not modify the fader or EQ settings
during playback, since this will change the volume
and EQ of the input sound.
12 When the IN time location is reached, the [TRACK
STATUS] indicator will change from blinking to lit,
the [REC] indicator will begin blinking, and the
external input sound will be heard. Begin rehears-
ing your performance.
13 When the OUT time location is reached, the
[TRACK STATUS] indicator will blink, the [REC]
indicator will go dark, and the track playback
sound will again be heard. Stop rehearsing your
performance.
■ Auto punch in/out setting
14 Press the [REC MODE] key several
times to select AUTO PUNCH
(indicator lit).
■ Starting and stopping recording
15 Press the [REC] key ([REC] and [PLAY] indicator
will blink), and then press the [PLAY] key ([REC]
and [PLAY] indicator lit) to begin playback.
The [TRACK STATUS] indicator that was set to REC
will blink, and the track playback sound will be heard.
16 When the IN time location is reached, the [TRACK
STATUS] indicator will change from blinking to lit,
and recording will begin. At this time the external
input sound will be heard. Play to record your per-
formance.
17 When the OUT time location is reached, the
[TRACK STATUS] indicator will change back to
blinking, the [REC] indicator will go off, and
recording will end. The track playback sound will
once again be heard.
■ Listening to the recorded performance (Play-
back)
18 Move the current time location to a point earlier
than where you began re-recording. Then set the
[TRACK STATUS] of the recorded track to PLAY,
and press the [PLAY] key to begin playback. Press
the [STOP] key to stop. (Refer to “■ Listening to
the recorded performance (Playback)”, p.11)
Also, playing back with [TRACK STATUS] set to
REC will allow you to hear the sound just as it was
Mon:Auto
SYSTEM
E
PLAY
MODE
E
PstRol:02M
EDIT
PLAY
MODE
E
REC
MODE
AUTO PUNCH
REHEARSAL
REC
MODE
AUTO PUNCH
REHEARSAL