29
For Those Using a Computer
For Those Using a
Computer
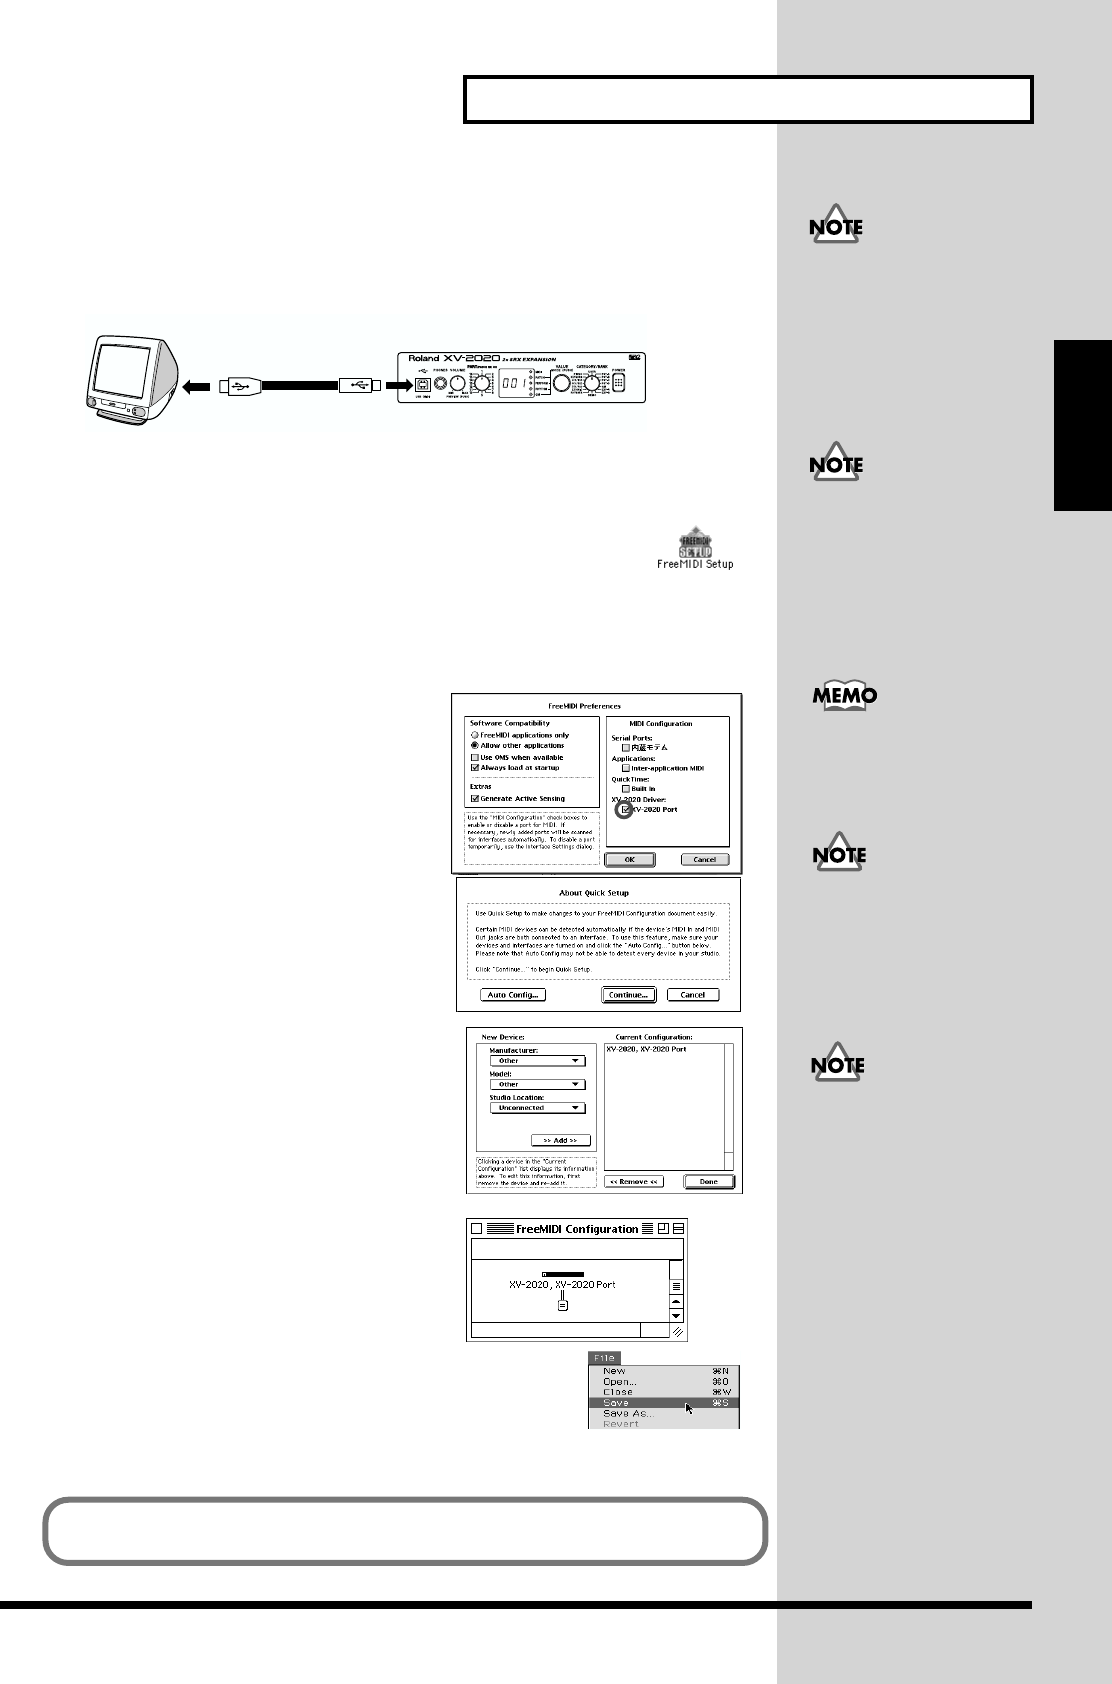
FreeMIDI settings
1. Use the USB cable to connect the XV-2020 and your Macintosh.
fig.USB-02.e
* If using a computer that is not equipped with a USB connector, refer to p. 30.
fig.fm-03.e.eps_50
2. Open the “FreeMIDI Applications” folder, and double-click the
“FreeMIDI Setup” icon.
3. The first time FreeMIDI is started up, a “Welcome to FreeMIDI!” dialog box will
appear. Click [Continue].
If this is the second or later time, select “FreeMIDI Preferences” from the File menu.
fig.fm-04_60
4. In the “FreeMIDI Preferences” dialog box,
check “XV-2020 Port” which is located
below XV-2020 Driver in MIDI
Configuration, and click [OK].
fig.fm-05_65
5. The About Quick Setup dialog box appears.
Click [Continue].
fig.fm-06_60
6. In the dialog box that appears, select the “XV-
2020” in “Studio Location,” and click
[>>Add>>].
fig.fm-07.e.eps_70
7. When settings are complete, click [Done].
A setting window like the following appears.
fig.fm-08_70
8. From the File menu, select [Save], and save your settings.
To prevent malfunction
and/or damage to speakers
or other devices, always
turn down the volume, and
turn off the power on all
devices before making any
connections.
USB cable
Computer
XV-2020
If you are using the XV-
2020 with a sequencer, do
not disconnect the MIDI
cable connected to the XV-
2020 while a song is
playing back.
There will be a version
number following
“FreeMIDI Setup” as the
actual icon name.
If the dialog box does not
show “XV-2020 Driver,”
check whether the XV-2020
is connected correctly, and
start up FreeMIDI Setup
once again.
If the “About Quick
Setup” dialog box is not
displayed, select “Quick
Setup...” from the
“Configuration” menu.
This completes connections for the XV-2020 and Macintosh, and installation of the
MIDI driver. Now, MIDI data can be input and output (recorded and played).


