


13
Step 2: OverdubbingStep 3: Mixdown
Step 4: Mastering
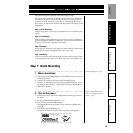
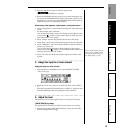
Step 1: Quick Recording Quick Start
Quick Start
The Quick Start section consists of the following four steps.
We’ll begin our explanation by telling how to connect your equipment,
and take you all the way through to the final step of writing your per-
formance to CD-R. Please take some time to work through this Quick
Start so that you can become familiar with the process of recording on the
D1600mkII.
Step 1: Quick Recording
Connect your guitar, record your performance on a track, and then play
it back.
Step 2: Overdubbing
While listening to the performance you recorded, record an additional
guitar performance. We’ll also explain how you can record a keyboard in
stereo, or record vocals using the virtual tracks.
Step 3: Mixdown
Apply effects to each track, and adjust the volume and EQ. Then use the
master effect to apply finishing touches to the entire song.
Step 4: Mastering
Create a two-track master from the song you mixed-down in Step 3. Then
write this stereo master track to CD-R to create your own original CD.
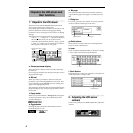
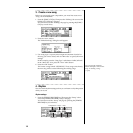
Step 1: Quick Recording
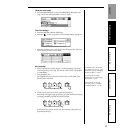
1. Make connections
1. Turn the top panel [TRIM] knob to set the INPUT 8 input level to the
minimum position.
2. Connect your guitar to the front panel [GUITAR IN] jack.
3. Connect your headphones to the front panel [PHONES] jack. If you
are using monitor speakers, connect them to the rear panel [MONI-
TOR OUT L/R] jacks.
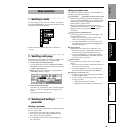
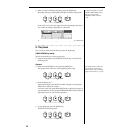
2. Turn on the power
1. Connect the power cable to the D1600mkII, and then plug it into an
AC outlet.
2. Set the top panel [MASTER] fader to “–∞.”
3. Press the rear panel [POWER ON] key.
The D1600mkII will enter standby mode, and the STANDBY LED
will light.
4. Press the top panel [POWER] key.
The power will turn on, and the following display will appear.
Connection diagram (→p.10)
Before you turn off the power,
refer to “2. Turning the power
on/off” (→p.11).