


83
Creating/
selecting a song
Assign audio inputs
to the mixer
Basic
operation
RecordingPlayback
Changing the
time location
Using the
mixer
Using
effects
MixdownTrack
editing
Song
editing
Rhythm/tempo
settings
DataDriveUSBUpdating
the system
MIDI
Press the “Yes” button to begin formatting.
The display will indicate “Completed” when the
operation is finished. Press the “Yes” button.
3. Erasing the data from a CD-RW
Here’s how you can erase the data from a CD-RW disc.
When you erase the data, that disc can again be used as a
blank disk.
When you execute “EraseCD-RW” all data on that
CD-RW disc will be erased.
You cannot execute “EraseCD-RW” on any drive oth-
er than the CD-RW.
1. Insert a CD-RW disc into the CD-R/RW drive.
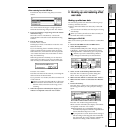
2. Select “EraseCD-RW”.
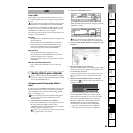
Access the [SYSTEM/USB] “DiskUtil” tab page, and
use the [VALUE] dial to choose “SelOperation”.
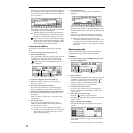
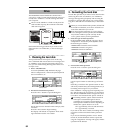
3. Execute the Erase operation.
Press the “Exec.” button to open the dialog box.
Use the “Quick” button to select the type of erasure.
If this button is turned on, the CD-RW disc will be
erased at high speed. Normally you will select this
method.
If this button is turned off, the CD-RW disc will be
erased completely. Use this method if the disc is not
recognized even after being erased with the “Quick”
button turned on.
Press the “Yes” button to begin erasing the disc.
The display will indicate “Completed” when the
erasure is finished. Press the “Yes” button.
You can also erase data from a CD-RW in the
[SONG/CD] “CDR/RW” tab page.
4. Using the drive capacity
efficiently
You can use the following three operations or techniques
to make efficient use of the D1600mkII’s drive capacity.
• Execute the Optimize Track operation
• Erase the Undo data
• Share audio data
Executing the Optimize Track command
Here are three examples of executing the Optimize Track
operation. As you will see, there are some situations in
which this operation will recover additional drive
capacity, and other situations in which it will not. Read
this section, and execute the Optimize Track operation if
it will be useful in your situation.
There is no need for you to execute this Optimize
Track operation frequently. Execute it if the “Disk-
Busy” message appears, or if you want to recover
hard disk space after you have completed a song.
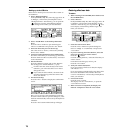
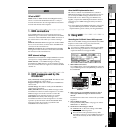
Example 1: You recorded an intro, solo, and ending
on a track
When you record an intro, solo, and ending on the track,
the regions between these will record silence (in reality, a
noise-level signal), unnecessarily occupying space on the
drive.
If you want to keep only the audio data of the intro,
solo, and ending
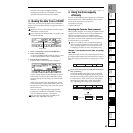
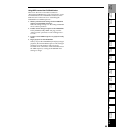
Execute the Optimize Track operation on the track
you recorded, from the beginning of the song to the
end. When executing, set the Optimize Track “Mode”
to “Erase Silence.” This will leave only the actually-
used regions as audio data, so that only the intro,
solo, and ending will occupy space on the drive.
SelOperation
Intro Solo EndingSilence
Silence
“OptimizeTrack”
IN OUT
Data
erased
Data erased
After execution
Intro Solo Ending
Intro Solo Ending
Silence
Silence
Drive