


75
Creating/
selecting a song
Assign audio inputs
to the mixer
Basic
operation
RecordingPlayback
Changing the
time location
Using the
mixer
Using
effects
MixdownTrack
editing
Song
editing
Rhythm/tempo
settings
DataDriveUSBUpdating
the system
MIDI
When you switch songs or turn off the power, the
D1600mkII’s auto-save function automatically saves the
song you recorded or edited, and its parameters.
This means that it is not absolutely necessary for you to
explicitly perform a “save” operation.
If you edit an effect program and want to keep the re-
sults, you must save the effect.
You will use the data-saving operations described here
when you want to save important data created on the
D1600mkII on a CD-R/RW or your computer, for
example when you want to free up additional space by
deleting data from the hard disk.
If you want to save data on your computer, first save the
data to the USB drive of the D1600mkII’s hard disk, and
then save this data on your computer.
You can save the following data.
• Song data
•Effect user data
•WAV files (audio files in WAV format)
The various parameters of the song are not saved on
an audio CD you create. If you want to save the song
in a state in which it can be edited or remixed further,
you must make a backup of it.
1. Backing up and restoring song
data
Backing up song data
You can back up song data in the following ways.
• Backup1Song: Back up the single selected song.
• BackupAllSongs: Back up all songs. (CD-R/RW only)
•Effect user data will also be saved.
•A backed up song cannot be played directly. In
order to play the song, you must first restore it into
the D1600mkII.
To back up to CD-R/RW
Here’s how to back up all songs to CD-R/RW.
No further data can be written to a CD-R/RW disc
you use for a backup.
The CD-R/RW created by this backup operation is
not in ISO9660 format. You will not be able to load it
into a computer or play it on a CD player.
1. Insert a CD-R/RW disc into the CD-R/RW drive.
You must use a blank disc. To erase the contents of a
CD-RW disc so that it can be used as a blank disc,
refer to “3. Erasing the data from a CD-RW” (→p.83).
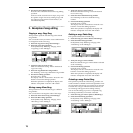
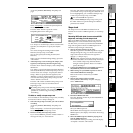
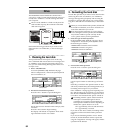
2. Select “BackupAllSongs.”
In the [SYSTEM/USB] “B-U/Rst” tab page, select “B-
U/RstType” and turn the [VALUE] dial to select
“BackupAllSongs.”
Alternatively, you can press the “ ” button to open
the “Select Backup/Restore Type” dialog box.
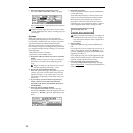
3. Verify the songs you want to back up.
Make sure that “Source” is set to “ALL.”
4. Select the backup-destination drive.
Press the “Drive” button to open the dialog box.
Select “C:CD” and press the “Yes” button.
5. Check the backup-destination drive and the drive
information.
Make sure that “C:CD” is selected as the “Destina-
tion.” The number of CD-R/RW discs is displayed.
Make ready the appropriate number of discs.
If you are using more than one disc, we recom-
mend that you number them beforehand.
6. Execute the backup.
Press the “Exec.” button to display the confirmation
screen. Here you can specify the writing speed.
Press the “Yes” button to begin the backup. Effect
user data will also be backed-up at this time.
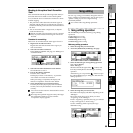
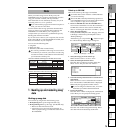
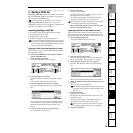
Data
➞CD-R/RW ➞USB drive
File type
1 song + all user effects
WAV-format files
All user effects
All songs + all user effects
Backup1Song
BackupAllSongs
Export
BackupUserData
Either the Insert, Master, or Final user effects
Data save method
Save-destination
Data save methods and the types of file that can be saved
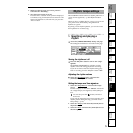
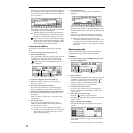
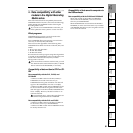
Extension
File type
1 song
WAV-format files
All user effects
Backup1Song
Export
BackupUserData
Insert User Data [Ins001–Ins128]
Master User Data [Mst001–Mst032]
Final User Data [Fin033–Fin064]
Data save method
.DBK
.DFX
.DFI
.DFM
.DFF
.WAV
Filename extensions of files saved on the USB drive
DestinationSource B-U/RstType
Data