


22
Check the recording mode
If you have already checked the recording mode, there’s no need to check
it again; if so, proceed to the next step.
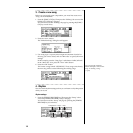
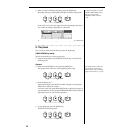
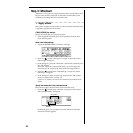
1. Access the [RECORD] “RecMode” tab page, and make sure that
“Select RecMode” is set to “Input.”
Record
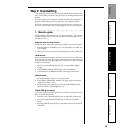
1. Set the recording-start position to the beginning of the song.
At the beginning of the song, the counter value will be “001.01.000”
or “000:00.000”.
2. Press the [REC] key, and then press the [PLAY] key to start recording.
3. When you have finished recording, press the [STOP] key.
Play back
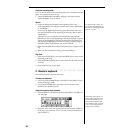
1. Hold down the [STOP] key and press the [REW] key to return to the
beginning of the song.
2. Press the [TRACK STATUS] key to set the recorded tracks to PLAY.
3. Press the [PLAY] key to play back.
3. Record vocals on virtual tracks
In this example, we’ll record several “takes” of vocals on the virtual
tracks of track 4.
Connect a mic
1. Turn the top panel [TRIM] knob to set INPUT 4 to the minimum level
(+4 dB).
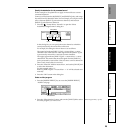
2. Lower the [MASTER] fader, and then connect your mic to the
[INPUT 4] jack. If you are using a condenser mic, you must connect
it to the [INPUT 4] jack and then turn the phantom power switch on.
Never turn on the phantom power switch before you connect the
mic. If you connect or disconnect a mic with the phantom power
turned on, you may damage your equipment.
Assign the input to a mixer channel
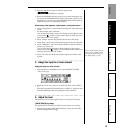
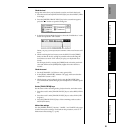
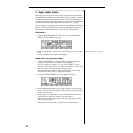
1. Press the [INPUT/TUNER] key to access the [INPUT/TUNER] “Ch
1–8” tab page.
2. Select the “Ch 4” icon, and use the [VALUE] dial to select “INPUT 4.”
Check the level
Assign the vocal signal to the track, and check the level.
1. Press the track 4 [TRACK STATUS] key to select INPUT (LED lit
orange).
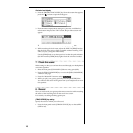
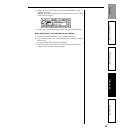
2. Press the [METER/TRACK VIEW] key. In the screen that appears,
press the “ ” button to open the dialog box.
3. In the Select DisplayMode dialog box, select the “PreFaderLev” radio
button, and then press the “OK” button.
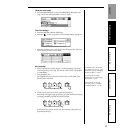
4. Turn the INPUT 4 [TRIM] knob while you watch the level meter.
For details on the counter dis-
play and on how to change the
time location, refer to “Chang-
ing the time location” (→p.46)