


44
Loop recording
When using auto-punch recording, you can use Loop re-
cording to record repeated takes over the same section,
and then use undo/redo to choose the best take.
If you turn “Loop” “On” during auto-punch recording,
the IN–OUT region will be recorded repeatedly (looped).
At this time, playback will occur before and after the IN–
OUT region for the lengths specified by the [AUTO
PUNCH] “AtPunch” tab page settings for “RolTime”
(“Pr
eRoll” and “PostRoll”).
1. Register the region (IN–OUT) that you wish to
record. (→p.46)
This setting can also be made using “Wave” in the
[LOOP] “Loop” or [AUTO PUNCH] “AtPunch” tab
pages.
2. Connect the input device, and adjust the recording
level.
Refer to “1. Analog inputs” and “1. Adjust the record-
ing level, and record” (→p.36, 39).
3. Specify how the sound will be output for monitor-
ing.
Refer to “Manual punch-in/out” step 2. (→p.40)
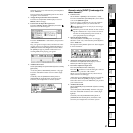
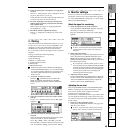
4. Set the pre-roll and post-roll.
In the [AUTO PUNCH] “AtPunch” tab page, select
“RolTime.”
Set “Pr
eRoll” to specify the length of playback prior
to the beginning of recording, and set “PostRoll
” to
specify the length of playback after the end of record-
ing. Set “Unit
” to select the units in which the pre/
post-roll times are set.
When you have made these settings, press the “OK”
button.
5. In the [AUTO PUNCH] “AtPunch” tab page, turn
“Auto Punch” “On.” (The [AUTO PUNCH] key will
light.)
6. In the [LOOP] “Loop” tab page, turn “Loop” “On.”
7. Begin recording.
When you press the [REC] key, the D1600mkII will
locate to the beginning of the pre-roll time preceding
the IN (recording start) point, and will enter record-
ready mode. (The [REC] key LED will blink.)
Press the [PLAY] key to begin playback.
Playback will occur for the pre-roll time, and record-
ing will begin at the IN time. (The [REC] key LED
will light.)
When the OUT time is reached, recording will end,
and playback will continue for the post-roll time.
(The [REC] key LED will blink.)
Then the D1600mkII will locate to the beginning of
the pre-roll time, and the same operations will be
repeated.
To stop, press the [STOP] key at a point outside of the
recording area (IN–OUT).
8. Listen to the recorded content.
Use the undo/redo function to select the best take.
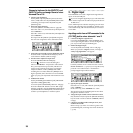
9. Press the [UNDO] key.
A list will show the latest and previous recordings.
10. Rotate the [VALUE] dial to select what you believe
to be the best take from the list.
11. Press the “Undo” button to execute the Undo.
The selected take will be recalled.
12. Play back, and verify that you selected the correct
take.
If the [AutoPunch] “AtPunch” tab page “AutoP-
unch” setting is “On” when you press the [PLAY]
key, the region between the recording start (IN) and
recording end (OUT) points will play back as a loop.
13. If you decide to cancel the Undo, press the “Redo”
button to return to the “Level00” take.
The undo operation you executed in step 11 will be
cancelled.
Press the “OK” button to return to the previous
screen.
In addition to the recording methods described above,
the following possibilities are available when recording
on the D1600mkII. For details refer to the page listed.
• Apply EQ to the audio being recorded. (→p.48)
• Apply effects to the audio being recorded. (→p.54)
• Listen to the internal rhythm while recording your per-
formance. (→p.72)
• Record the internal rhythm. (→p.72)
• Rehearse the recording. (→p.135)