


27
Step 2: OverdubbingStep 3: Mixdown
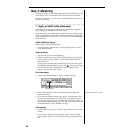
Step 4: Mastering
Step 1: Quick Recording Quick Start
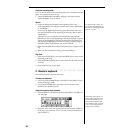
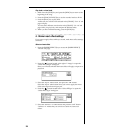
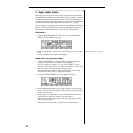
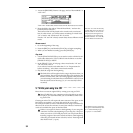
For example, the dialog box shown above portrays the following set-
tings.
The upper left indicates track channel 3 → effect 1 → mixer channel 3.
This means that the track 3 audio signal will be processed by effect 1,
and sent to mixer channel 3.
The upper right indicates Off → effect 2 → Off. This means that effect
2 is not used.
2. Press the effect 1 “SelectTr” field, and use the [VALUE] dial to select
the track channel to which you will apply the effect.
For this example, select “4”.
3. Press the “OK” button in the dialog box.
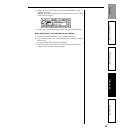
Select an effect program
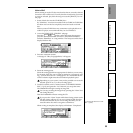
1. Press the [INSERT EFFECT] key to access the [INSERT EFFECT]
“InsEff1” tab page.
2. Select the “EffectNumber” button, and use the [VALUE] dial to select
the effect program you want to use.
You can also press the [PLAY] key and select an effect during play-
back.
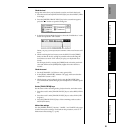
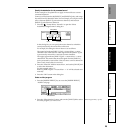
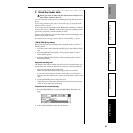
2. Apply EQ (equalizer)
Here’s how to make EQ settings for each mixer channel.
1. Press the [EQ/PHASE] key, and from the [EQ] “Eq 1–4,” “Eq 5–8,”
and “Eq 9–12” tab pages, select the tab page that contains the EQ you
want to adjust.
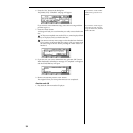
Each channel has a three-band EQ with Lo, Mid, and High, and you
can adjust the frequency of the Mid range.
2. Select each EQ icon and turn the [VALUE] dial to specify the value.
The numerical value is shown in the upper left of the screen.
Negative (–) gain settings will cut the corresponding frequency
range, and positive (+) gain settings will boost it.
Increasing the center frequency value will raise the center frequency,
and decreasing this value will lower the center frequency.
3. Adjust the EQ while the song plays back.
4. When you have finished making adjustments, press the [STOP] key.
EffectNumber
Effect Program List (→p.166)
EQ (→p.48)
Low EQ gain (L)
High EQ gain (H)
Mid EQ gain (M)
Mid EQ center frequency (F)
Step 3: Mixdown