


41
Creating/
selecting a song
Assign audio inputs
to the mixer
Basic
operation
RecordingPlayback
Changing the
time location
Using the
mixer
Using
effects
MixdownTrack
editing
Song
editing
Rhythm/tempo
settings
DataDriveUSBUpdating
the system
MIDI
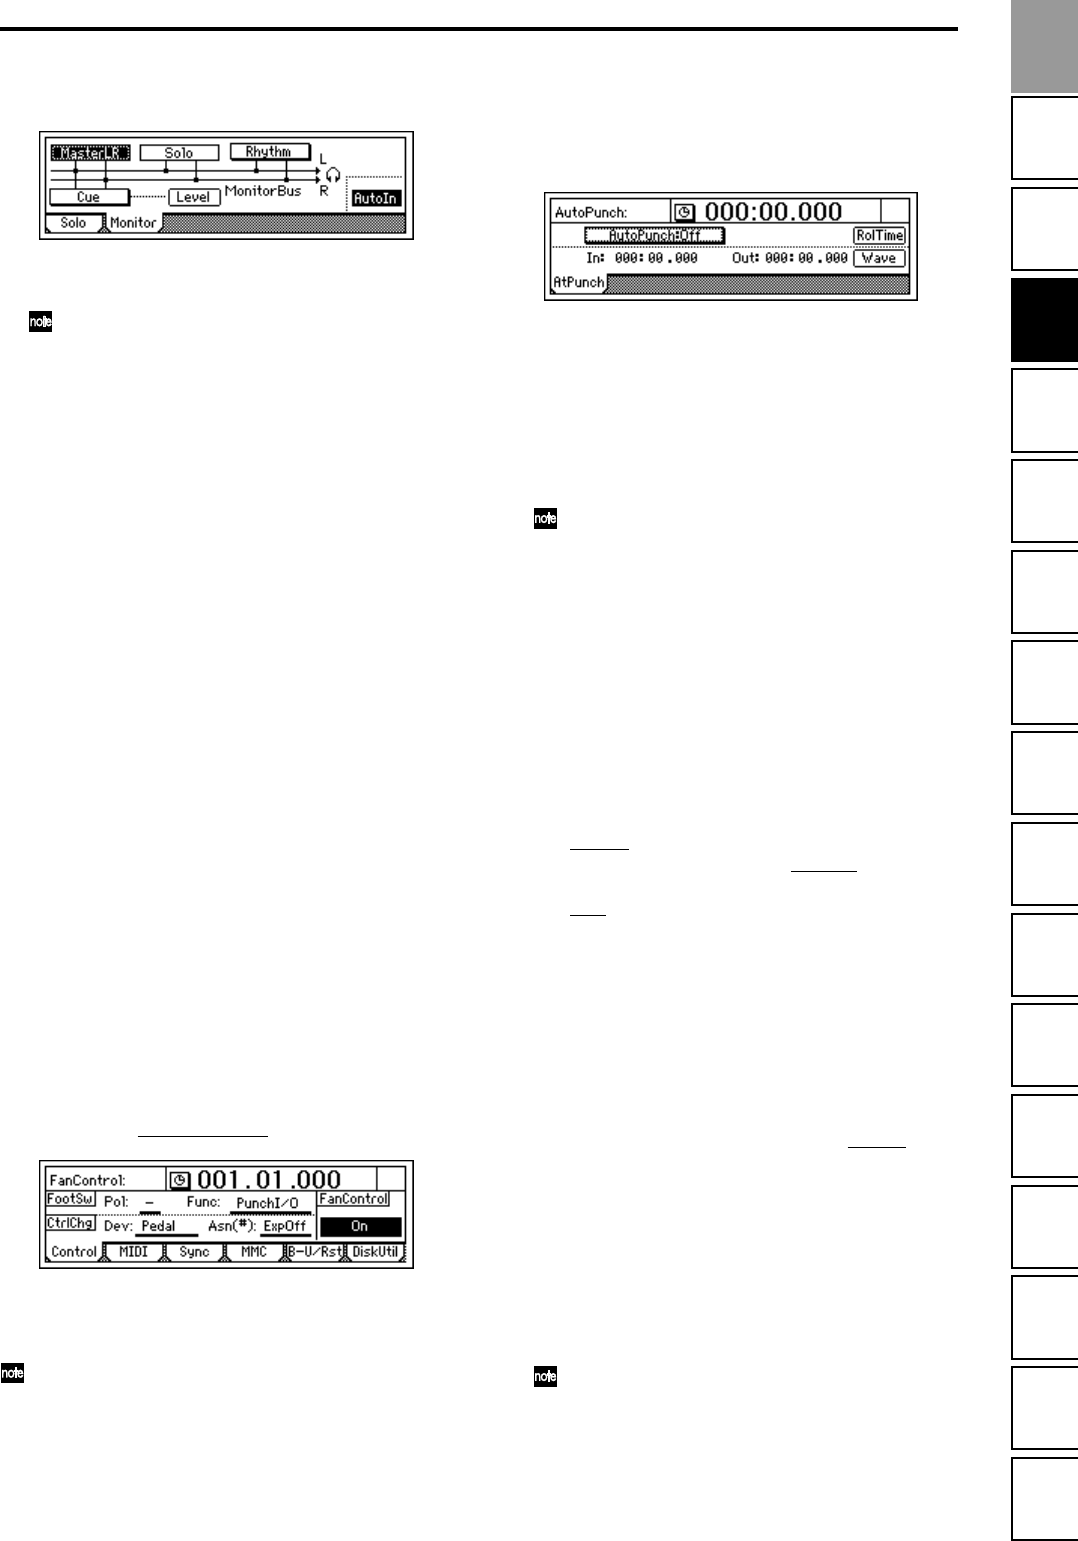
2. Make monitor output settings.
Access the [SOLO/MONITOR] “Monitor” tab page.
Select the signal that you wish to monitor. (→p.132)
Turn the “AutoIn” button “On.”
If the “AutoIn” button is “Off”, you will always
hear the input signal that is assigned to the
recording track. If it is “On”, the sound recorded
on that track will be heard during playback, and
the assigned input signal will automatically be
heard during recording.
3. Move the current time to a location earlier than the
point where you wish to begin re-recording.
4. Press the [PLAY] key to begin playback.
The song will play back, and you will hear the sound
of the playback tracks and the track selected for
recording.
5. At the point where you wish to begin re-recording,
press the [REC] key.
Recording will begin (manual punch-in), and you
will begin hearing the external input signal.
6. At the point where you wish to stop re-recording,
press the [REC] key or [PLAY] key.
Recording will stop, and the track will switch back to
playback (manual punch-out). You will begin hear-
ing the track playback.
7. Press the [STOP] key to stop.
After recording, move the current time to a point
earlier than where you began recording, and check
that the recording was satisfactory.
Manual punch-in/out using a foot switch
You can switch between playback and recording by
pressing a PS-1 foot switch (separately sold option).
This allows you to switch between playback and record-
ing while you are performing on an instrument, or when
you are at a distance from the D1600mkII.
1. Connect a foot switch to the [FOOT SW] jack.
2. Access the [SYSTEM/USB] “Control” tab page.
3. Specify the function of the foot switch.
Select “Func (FootSwFunction
)” to “PunchI/O.”
4. In “Manual punch-in/out” steps 5 and 6, perform
manual punch-in/out by pressing the foot switch
instead of the [REC] key (you may use either).
You can also use the foot switch to record from the
beginning of the song.
Set the “Func” parameter of step 3 to “Play/Stop.”
Press the [REC] key at the beginning of the song (LED
will blink), and press the foot switch to start record-
ing.
Auto punch-in/out
Auto punch-in/out is when punch-in and punch-out
occur automatically at pre-specified times.
1. Access the [AUTO PUNCH] “AtPunch” tab page.
2. Register IN (punch-in) as the time at which record-
ing will begin, and OUT (punch-out) as the time at
which recording will end.
For details on registering the IN and OUT times, refer
to p.46.
In the [AUTO PUNCH] “AtPunch” tab page, you can
press the “Wave” button to register the IN and OUT
points while viewing a waveform display.
The time locations you register will be
overwritten onto the [IN/LOC1] key and [OUT/
LOC2] key.
3. Connect the input device, and adjust the recording
level.
Refer to “1. Analog inputs” and “1. Adjust the record-
ing level, and record” (→p.36, 39).
4. Make monitor output settings.
Refer to “Manual punch-in/out” step 2.
5. Specify the “pre-roll” – the length of playback that
will occur before the recording start location.
In the [AUTO PUNCH] “AtPunch” tab page, press
the “RolTime” button to access the “SetRollTime”
dialog box.
Set “Pr
eRoll” to the desired length of playback before
the beginning of recording. Set “PostRoll
” to the
desired length of playback after the end of recording.
Set “Unit
” to the desired unit of pre/post-roll time.
When you have finished making settings, press the
“OK” button to return to the previous page.
6. Turn on the auto punch-in/out function.
In the [AUTO PUNCH] “AtPunch” tab page, press
the “AutoPunch” button to turn it “On.” The [AUTO
PUNCH] key will light.
7. Begin recording.
When you press the [REC] key, the location will move
back from the specified record start time by the
length of the pre-roll time specified by “Pr
eRoll,” and
the D1600mkII will enter record-ready mode (LED
blinking).
When you press the [PLAY] key, playback will begin.
The track will play back during the pre-roll time, and
will switch to recording at the specified point (IN).
(The [REC] LED will light.)
When the specified end of recording is reached,
recording will end. (The [REC] LED will blink.)
8. Press the [STOP] key to stop.
After the post-roll time has elapsed, the
D1600mkII will stop and return to the beginning
of the pre-roll time.
9. Listen to the performance that you recorded.
Recording