


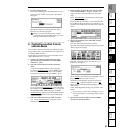


65
Creating/
selecting a song
Assign audio inputs
to the mixer
Basic
operation
RecordingPlayback
Changing the
time location
Using the
mixer
Using
effects
MixdownTrack
editing
Song
editing
Rhythm/tempo
settings
DataDriveUSBUpdating
the system
MIDI
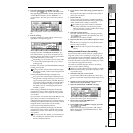
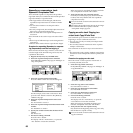
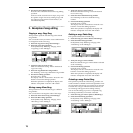
Erasing audio events from silent areas
Here’s how you can erase audio events from silent areas
of the IN–OUT region of track 1. (These areas will be-
come blank.)
1. Store the IN and OUT locations.
Set IN at a point slightly ahead of the silent areas you
want to erase, and OUT at a location after the end of
the silent areas.
2. Select the Optimize command.
In the [TRACK] “EditTrk” tab page, set “EditType” to
“OptimizeTrack.”
3. Select the optimize mode.
Press the “Mode” button to open the dialog box.
For this example, select “Erase Silence,” and press the
“Yes” button to return to the [TRACK] “EditTrk” tab
page.
4. Select the track number that you want to optimize.
For this example, set “DestTrack” to track “1”.
5. Execute the operation.
Press the “Exec.” button.
The display will ask “AreYouSure?” Press the “Yes”
button to execute the operation.
When the operation is completed, the display will
indicate “Completed.” Press the “OK” button.
6. Check the results.
Press the [IN/LOC1] key, play back from the IN loca-
tion, and check the result of the operation.
You can use Undo to return to the state prior to
execution.
This operation will require a longer time for comple-
tion in proportion to the length of the specified region
(IN–OUT).
Erasing punch-noise
Here’s how you can erase punch-noise from the IN–OUT
region of track 1.
1. Store the IN and OUT locations.
Set IN at a point slightly ahead of the noise, and OUT
at a location after the end of the noise.
You cannot edit this to other than a transition
between events.
2. Select the Optimize command.
In the [TRACK] “EditTrk” tab page, set “EditType” to
“OptimizeTrack.”
3. Select the optimize mode.
Press the “Mode” button to open the dialog box.
For this example, select “Erase Punch Noise,” and
press the “Yes” button to return to the [TRACK]
“EditTrk” tab page.
4. Select the track number that you want to optimize.
For this example, set “DestTrack” to track “1”.
5. Execute the operation.
Press the “Exec.” button.
The display will ask “AreYouSure?” Press the “Yes”
button to execute the operation.
When the operation is completed, the display will
indicate “Completed.” Press the “OK” button.
6. Check the results.
Press the [IN/LOC1] key, play back from the IN loca-
tion, and check the result of the operation.
You can use Undo to return to the state prior to
execution.
This operation will require a longer time for comple-
tion in proportion to the length of the specified region
(IN–OUT).
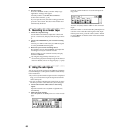
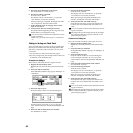
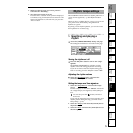
Swapping track data: Swap Track
This command exchanges (swaps) the specified region
(IN–OUT) of recorded track data with the same region of
another track.
• Data can be swapped not only between single tracks,
but also between multiple tracks simultaneously.
Procedure for swapping track data (Swap)
Here’s how to exchange the IN–OUT regions of track 1
and track 2.
1. Register the IN and OUT times.
2. Select the Swap command.
In the [TRACK] “EditTrk” tab page, set “EditType” to
“SwapTrack.”
3. Select the swap source track number.
Set “SourceTrack” to track 1.
4. Select the swap destination track number.
Set “DestTrack” to track 2.
5. Execute the editing command.
Press the “Exec.” button.
The display will ask “AreYouSure?,” so press the
“Yes” button to execute the command.
When processing is completed, the display will
indicate “Completed.” Press the “OK” button.
6. Verify that the data was exchanged correctly.
Press the [IN/LOC1] key to play back from the IN
location, and verify that the data was exchanged
correctly.
You can use Undo to return to the state before execut-
ing the command.
DestTrackSourceTrack
Track
editing