


23
Step 2: OverdubbingStep 3: Mixdown
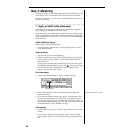
Step 4: Mastering
Step 1: Quick Recording Quick Start
Check the sound
1. Set the [Channel 4] fader to unity gain (0 dB).
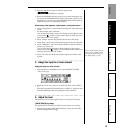
2. In the [SOLO/MONITOR] “Monitor” tab page, make sure that the
“MasterLR” button is “On.”
3. Slowly raise the [MASTER] fader while you sing into the mic.
Check the sound in your headphones or monitor speakers.
[TRACK STATUS] key settings
Set the status for the recording track, playback tracks, and remaining
tracks.
1. Press the track 4 [TRACK STATUS] key to select REC (LED lit red).
2. Press the [TRACK STATUS] keys of the playback tracks to select
PLAY (LED lit green).
3. Press the [TRACK STATUS] keys of the remaining tracks to select
MUTE (LED dark).
Effect settings
If desired, make insert effect settings in the [INSERT EFFECT] “InsAsn,”
“InsEff1,” and “InsEff2” tab pages.
For details, refer to “4. Make insert effect settings” (→p.24).
Check the recording mode
If you have already checked the recording mode, there’s no need to check
it again; if so, proceed to the next step.
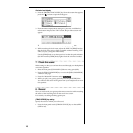
1. Access the [RECORD] “RecMode” tab page, and make sure that
“Select RecMode” is set to “Input.”
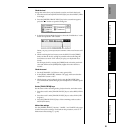
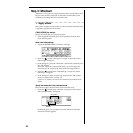
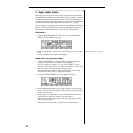
Select a virtual track
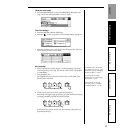
1. Press the [TRACK] key to access the [TRACK] “Vtr 1–8” tab page.
2. In the top line of the screen, press a virtual track number (“4a” in the
example shown here), and turn the [VALUE] dial to select “4b”.
The selected virtual track and the already-recorded virtual tracks are
highlighted. For details, refer to “2. Recording on virtual tracks”
(→p.40).
When you turn on the power, virtual tracks “1a,” “2a,” “3a”... are
selected automatically. In other words if you record a track without
selecting a virtual track, recording will occur on “1a,” “2a,” “3a”...
etc.
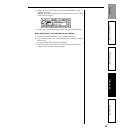
Record
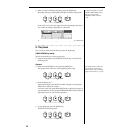
1. Set the recording-start position to the beginning of the song.
At the beginning of the song, the counter value will be “001.01.000”
or “000:00.000”.
2. Press the [REC] key, and then press the [PLAY] key to start recording
on virtual track “4b”.
3. When you have finished recording, press the [STOP] key.
4. Select another virtual track as described in “Select a virtual track”
(above), and continue recording additional takes on other virtual
tracks.
For details on the counter dis-
play and on how to change the
time location, refer to “Chang-
ing the time location” (→p.46)
Step 2: Overdubbing