28
Basic Recording/Playback
1
2
3
4
5
DIGITAL MULTITRACKER
LOCATE ABS 0
LOCATE REC END
SEL
TIMEBASE
CURSOR
PHANTOM
ACCESS
PEAK
CH ON/OFF
LR
GUITAR
GUITAR
LINE MIC LINE MIC MIN MAX
MASTERING TRAINING
EFFECTEQPAN
SCENE SEQ.SCENE
TRACK
UNDO
SETUP
PUNCH
AUTO
LOOP PITCH SCRUB
VARI
F FWDREWINDPLAYSTOPRECORD
EXIT
ENTER
TRIMTRIM
WAVE FORM
MIX PARAMETER
PGM
FADER
MAP
ON/OFF
2TRK MODE
F1
F2
F3
SHIFT
EDIT
EDIT EDIT
MARK
DELETE
LOCATE
FOOT SW
ST OUT
PHONES
INPUT A
BOUNCE
INPUT B
+6
-10
-20
-40
-
∞
-30
0
+6
-10
-20
-40
-
∞
-30
0
+6
-10
-20
-40
-
∞
-30
0
+6
-10
-20
-40
-
∞
-30
0
+6
-10
-20
-40
-
∞
-30
0
+6
-10
-20
-40
-
∞
-30
0
+6
-10
-20
-40
-
∞
-30
0
+6
-10
-20
-40
-
∞
-30
0
PEAK
CH ON/OFF
2 3 4
5 6
7/8 2TRK1
MASTER
TRACK STATUS / TRACK SEL
TRACK STATUS
RED
REC
GREEN
PLAY
OFF
MUTE
STATUS
/SEL
EJECT
/YES
/NO
SHUTTLE
JOG
UNBAL
UNBAL
BAL
BAL
F1
F2 F3
EDIT
/REDO
REC EFF
2
1
6
3
4
4 5 9 7
10
8
11
6
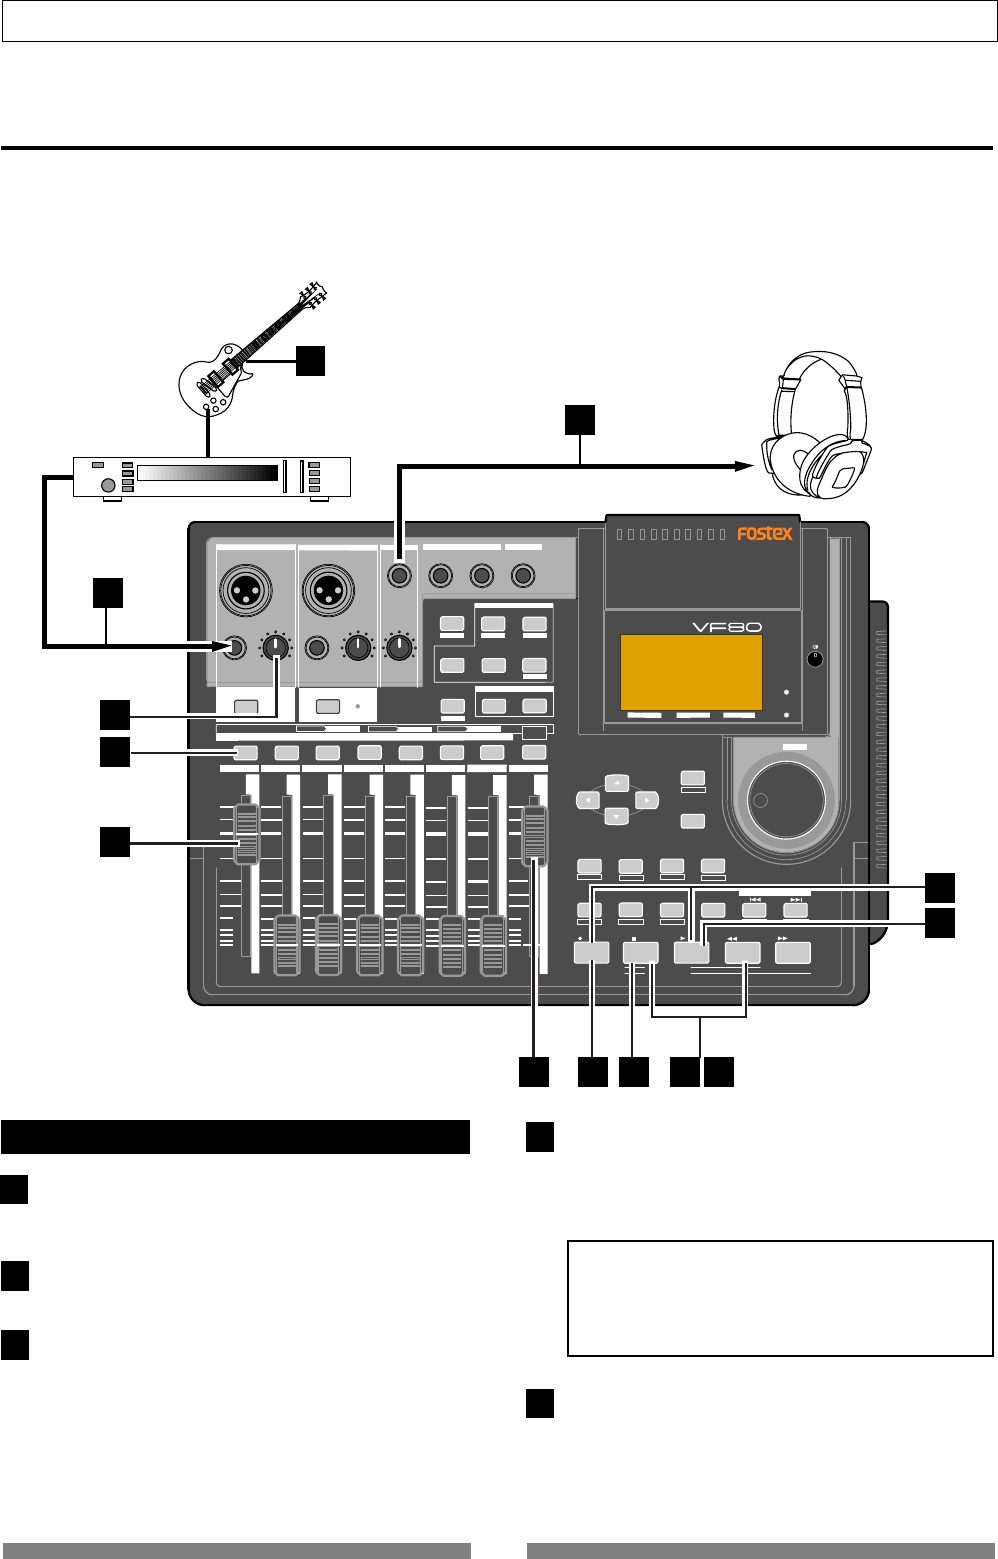
Basic recording (recording onto a single track)
At first, let’s record a single sound source onto a single track to know the basic recording procedure of the VF80
There are 8 recording tracks (Tracks 1 through 8) and you can record onto any desired track(s).
In the following example, we are going to record an electric guitar (with an effect unit) onto Track 1.
Before starting, set all the track faders (1 through 6 and 7-8) and the master fader to the lowest position (-∞), and
the [TRIM] knob to the left most position (LINE).
Preparation for recording
Connect the [INPUT A] UNBAL jack to the output of the
effect unit whose input is connected to a guitar.
To record onto Track 1, 3, 5 or 7, use INPUT A.
Connect the [PHONES] jack to headphones for moni-
toring.
Press the [TRACK STATUS/TRACK SEL] key of Track
1.
The key lighting in green changes to flashing in red,
showing Track 1 is now armed. (The “Remain” time is
shown on the screen.)
The [CH ON/OFF] key of INPUT A automatically lights.
In this condition, by pressing the [CH ON/OFF] key of IN-
PUT A, INPUT A can be muted.
Raise both the track 1 fader and master fader to “0” po-
sition.
This is preparation for monitoring sound. If both of
these faders are set at the minimum position, no sound
can be monitored.
<Note>
The track 1 fader can be used for adjusting the moni-
tor level without affecting the recording level. To
adjust the recording level, use the
[TRIM]
knob of
INPUT A.
Press the [RECORD] key.
The key starts flashing in red, while Track 1 (which is
armed) changes to the input monitor mode.


