60
Recorder Functions
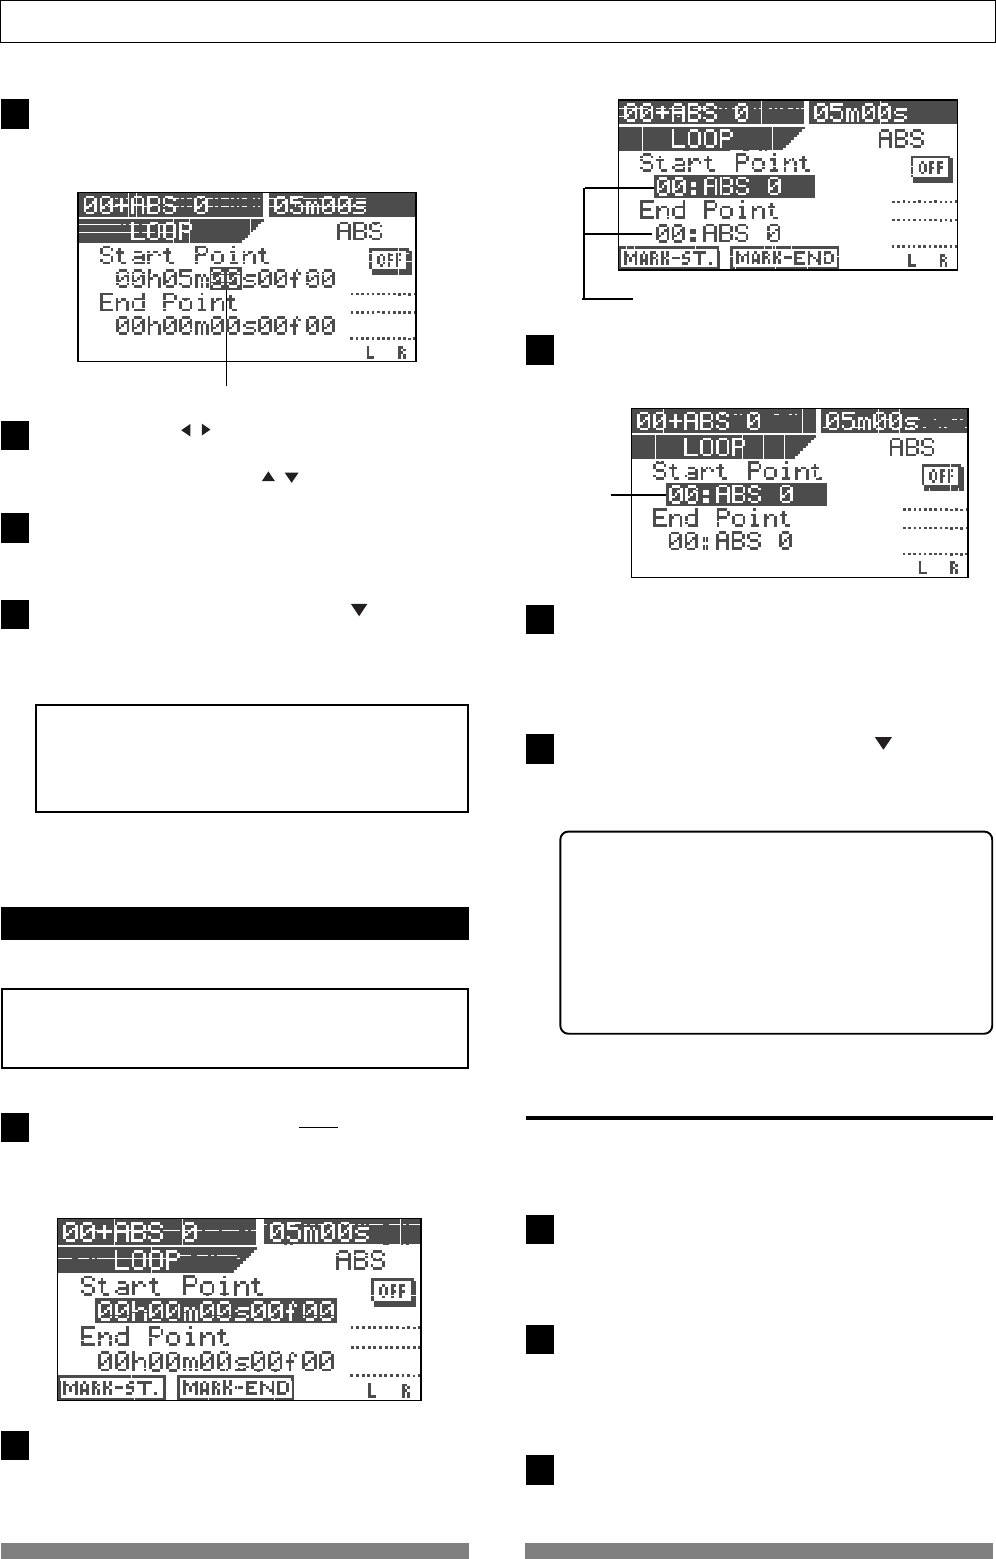
The "seconds" value flashes.
A mark is shown.
Flashing
1
2
3
4
5
3
2
3
4
5
1
2
To edit the Start point, press the [ENTER/YES] key while
"Start Point" value is highlighted.
The "seconds" value flashes, showing that it can be ed-
ited.
Use the [CURSOR / ] keys to move the flashing value,
and use the [JOG] dial to edit the value.
You can also use the [CURSOR / ] keys to edit the value.
After editing all values, press the [ENTER/YES] key.
The display returns to the similar screen shown in step
1 above, in which the Start point is set to the edited time.
To edit the End point, use the [CURSOR ] key to high-
light the "End point" value and carry out the same
operations as steps 2 through 4 above.
<Note>
As also noted in "
capturing the current position on-the-
fly
", the Start point must be earlier than the End point.
Otherwise, the loop function cannot be performed.
Setting the Start and End points by marks
You can set the Start and End points by marks.
<Note>
This method only can be used when any mark point is
already stored.
While stopped, press the [LOOP/EDIT] key while hold-
ing down the [SHIFT] key.
The display shows the loop screen in which you can set
the Start and End points.
Press the [TIME BASE SEL] key.
Both the Start point and End point value fields show a
mark (number and name).
Press the [ENTER/YES] key.
The mark shown on the Start point value field starts
flashing.
Use the [JOG] dial to select the desired mark and press
the [ENTER/YES] key.
The Start point is set to the selected mark, while the
display returns to the similar screen shown in step 2
above.
To edit the End point, use the [CURSOR ] key to high-
light the "End point" value and carry out the same
operations as steps 3 through 4 above.
The selected mark is set to the End point.
<Hint>
When rehearsing the auto punch in/out, if you also
activate the loop function in which the Start point is
set to a point a little bit earlier than the In point while
the End point is set to a point a little bit later than the
Out point, you can rehearse the auto punch in/out
repeatedly as many times as you like.
The loop function is also useful when you make a prac-
tice using the training mode.
Carrying out the loop playback
Once setting the Start and End points, you can carry
out the loop function.
Press the [LOOP] key to illuminate the key.
The loop function is now active.
Each time you press the [LOOP] key, On and Off of the
loop function alternates.
Start playback from the point earlier than the Start point.
When the recorder reaches the End point, it automati-
cally locates to the Start point and starts playback from
that point. The recorder continues loop playback until
stopping the recorder.
To stop loop playback, press the [LOOP] key to turn off
the lamp and press the [STOP] key.
