29
Basic Recording/Playback
6
7
8
9
10
11
LOCATE ABS 0
LOCATE REC END
SEL
TIMEBASE
UNDO / REDO
SETUP
PUNCH I/O
AUTO
LOOP PITCH SCRUB
VARI
F FWDREWINDPLAYSTOPRECORD
WAVE FORM
F1
F2
F3
SHIFT
EDIT
EDIT EDIT
MARK
DELETE
LOCATE
[UNDO/REDO] key
Use the [TRIM] knob of INPUT A while playing the gui-
tar to get proper gain.
Set the gain at maximum within the range in which the
[PEAK] indicator does not turn on when playing the
guitar at the loudest volume.
You can monitor both the input level of Track 1 and the
stereo (L & R) output level from the bar-graph meters
on the screen.
<Note>
Set the gain not to light the
[PEAK]
indicator when
playing the guitar at the loudest volume.
When the
[PEAK]
indicator lights, the input level is
too high and the sound may be distorted or digital
noise may be generated.
In the condition above, if you turn the [PHONES] knob
clockwise, you can monitor the sound from the head-
phones.
<Warning!>
Be careful not to excessively raise the
[PHONE]
volume.
Prolonged exposure to loud sounds may have an
adverse effect on hearing.
Recording
Press the [REWIND] key while holding down the [STOP]
key to locate “ABS 0”.
If the current recorder position is “ABS 0”, you can skip
the operation above.
Press the [PLAY] key while holding down the [RECORD]
key to start recording.
The [TRACK STATUS/TRACK SEL] key of Track 1 and the
[RECORD] key light on, showing the VF80 is now record-
ing.
The VF80 uses the direct recording method. In this
method, a digital signal just after the A/D conversion is
directly recorded onto a track, without being routed to
extra algorithms such as EQ.
You can add reverb or equalize the sound during
mixdown.
In addition, the insert effect function allows rerecord-
ing a track sound with applying a distortion-type effect
later. See “using the insert effect” on page 83.
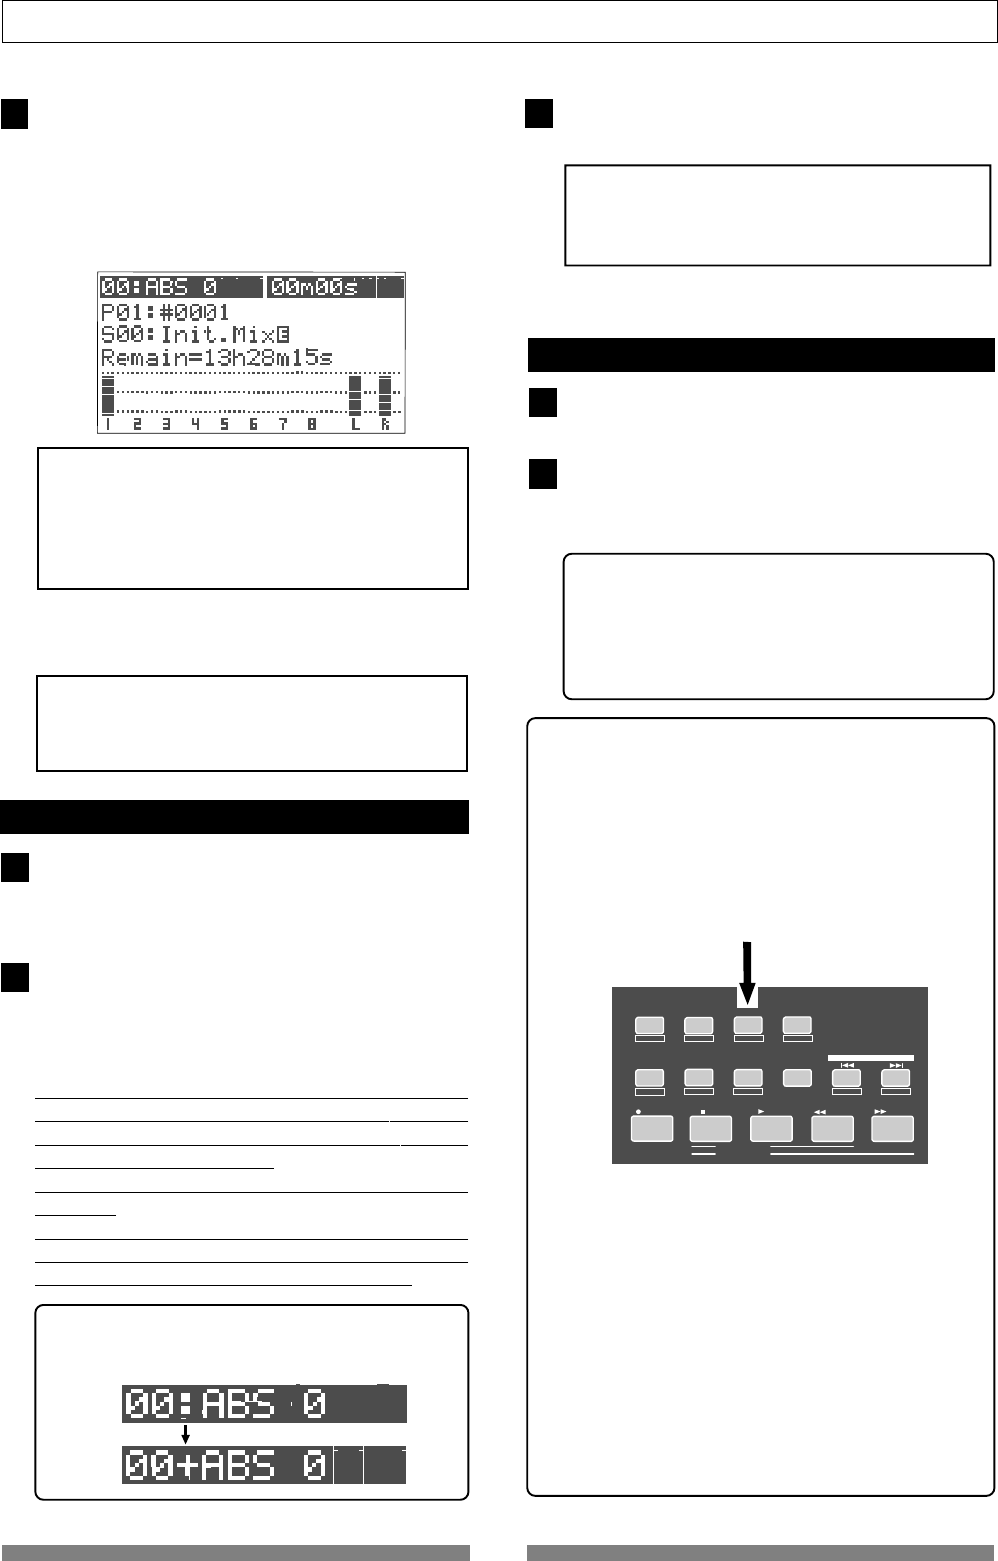
When the recorder starts running, the mark number and name
shown on the top line of the screen changes as below, showing
that the current position is ahead of “ABS 0” point.
To stop recording, press the [STOP] key.
After showing “Please Wait!”, the LCD returns to the Nor-
mal screen.
<Unarming a track>
To unarm a track, press the flashing [TRACK STA-
TUS/TRACK SEL] key twice. The key changes to light
in green.
Now you have recorded a sound source onto a track.
Playback
Press the [REWIND] key while holding down the [STOP]
key to locate “ABS 0”.
Press the [PLAY] key to start playback.
You can control the playback level by the track 1 fader.
If you find that the recording was not successfully made,
use the undo/redo function and try recording again.
<Track muting >
The playback level of each recorded track can be con-
trolled using the corresponding track fader.
You can mute the playback track by pressing the cor-
responding [TRACK STATUS/TRACK SEL] key except
in the mix parameter edit mode.
Undo/Redo
After finishing a recording, pressing the [UNDO/
REDO] key returns to the condition just before re-
cording (Undo).
If you press the [UNDO/REDO] key again, you can
cancel the Undo operation and return back to the
condition after recording.
<Note>
The undo/redo function is available to any recording,
however, if you carry out any of the following operations
after recording, you cannot use the undo/redo function.
Therefore, if you are not satisfied with the recording,
press the
[UNDO/REDO]
key immediately to undo the
recording and make recording again.
* Making a new recording
* Making a new editing (copy, move, erase, auto punch
in/out, etc.)
* Turning off the power
* Executing program select, rename, and deleting
* Executing drive selection


