


PRELIMINARY
6-3
MGP 464 • Special Applications
In this type of configuration, the following occurs:
On the MGP, window 1 displays input 1, window 2 displays input 2, and so •
forth.
Input switches are made at the matrix switcher instead of at the MGP.
•
Input presets are recalled on the MGP to correctly set up the input coming •
from the switcher. This setup can include the video signal type; picture
controls; advanced input configuration functions such as setting the active
lines/pixels, total lines/pixels, and pixel phase; and the input name.
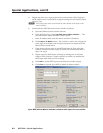
You can perform the required MGP setup operations using any of the following:
SIS commands (See chapter 4.)
•
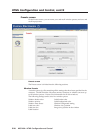
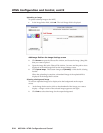
The MGP 464 Web pages (See chapter 5.)•
The Windows-based control software (See chapter 4 and the software’s •
Help.)
Setting up the MGP to work with the switcher
Follow these steps to set up the MGP to work with a matrix switcher.
1
. Install and connect the MGP as described in the “Installation Overview”
section of chapter 2, “Installation,” with the exception of step
3
. In place of
step 3, do the following:
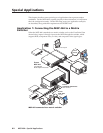
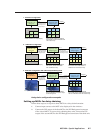
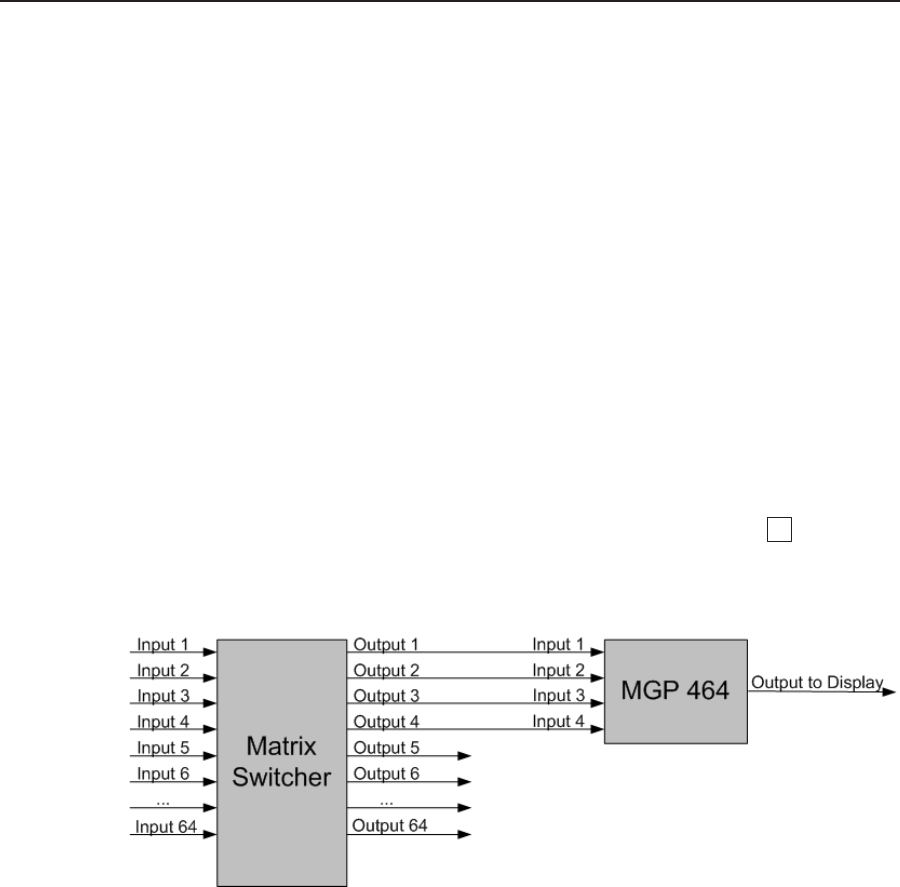
Connect the MGP’s four fully-congurable inputs to four of the matrix
switcher’s outputs. (See the diagram below.)
Connecting the matrix switcher to the MGP 464
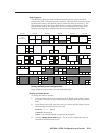
2. Size the windows on the MGP to full screen. You can do this quickly by
selecting window preset 1, 31, 61, 91, or 121.
3
. On the matrix switcher, tie input 1 to the four switcher outputs that are
connected to the MGP 464. (Refer to your matrix switcher user’s manual for
the procedure.)
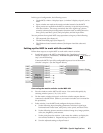
4. Select window 1 on the MGP, and congure the input as follows:
a. Set the following input sampling parameters as desired: signal type,
horizontal and vertical start, total pixels, active pixels, and active lines.
b
. Set the following picture controls as desired: image size, image position,
color, tint, brightness, and contrast.
c
. Set the pixel phase for window 1, then mute the window to display the
next window behind it. Repeat this step for windows 2, 3, and 4.
d
. Save the adjusted settings as Input Preset 1.