168
Creating and Editing Songs
You can make corrections in a recorded performance one note at a
time. This process of making changes in individual notes is called
“note editing.”
You can make these corrections by using note editing:
• Deleting misplayed notes
• Changing the scale of a single note
• Changing the force used in playing a single key (velocity)
• Change the finger number
At Step 4 of “Selecting the Editing Function” (p. 163), select
<Note Edit>.
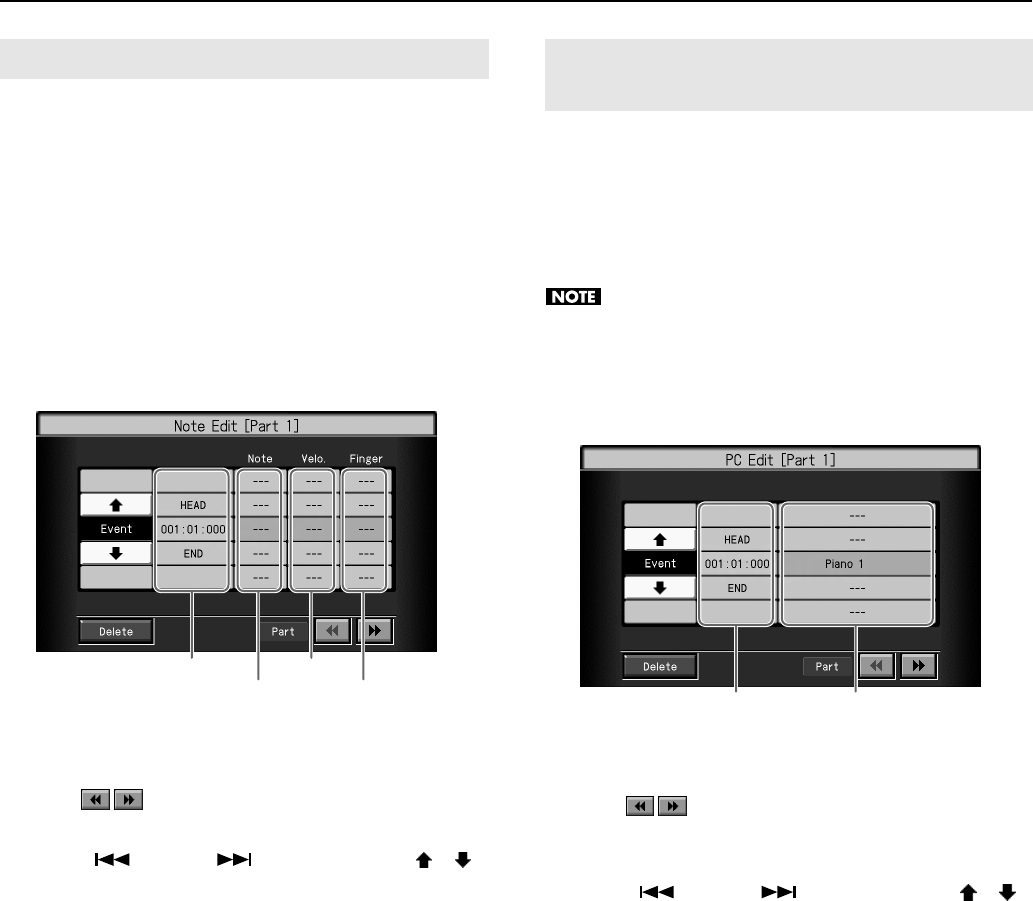
The following screen appears.
The note-location display uses “Measure: Beat: Tick” as the format.
A tick is a unit of time that’s shorter than a beat.
Touch to select the part with the note to be corrected.
The Part number appears at the top of the screen.
Use the [ (Prev)] and [ (Next)] buttons or use < >< >
on the screen to find the note to be corrected.
When you’ve found the note you want to correct, touch “Pitch,”
“Velocity,” or “Finger Number” for the note.
Use the dial to correct the pitch, velocity, or finger number. If you
want to delete the note, touch <Delete>.
When you’re done making all the settings, press the [Exit] button.
You will return to the “Song Edit” screen.
In some songs, the instrument sound changes during the course of
the song (that is, the Tone changes in the middle of a Part). In such
songs, an instruction to switch the Tone is inserted at the place
where you want the sound to change. This instruction is called a
“Program Change” (PC), and actions such as deleting program
changes, or changing the selected Tone by them are called “PC
editing.”
It is not possible to insert a program change into a measure or
beat that does not contain a program change.
At Step 4 of “Selecting the Editing Function” (p. 163), select
<PC Edit>.
The following screen appears.
The PC-location display uses “Measure: Beat: Tick” as the format.
A tick is a unit of time that’s shorter than a beat.
Touch to select the part with the program change to be
edited.
The Part number appears at the top of the screen.
Use the [ (Prev)] and [ (Next)] buttons or use < >< >
on the screen to find the program change to be edited.
When you’ve found the Program Change you want to modify, touch
“Tone Name” on the screen.
Press a Tone button to select a Tone group, then select a Tone with
the dial. When selecting Part 10 or 11, select the drum set or effect
sound.
If you want to delete the Program Change, touch <Delete>.
When you’re done making all the settings, press the [Exit] button.
Correcting Notes One by One (Note Edit)
Location
Pitch
Velocity
Finger number
Modifying the Tone Changes in a Song
(PC Edit)
RM-700_e.book 168 ページ 2009年3月18日 水曜日 午前11時5分
