


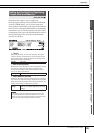

Sampling Mode [SAMPLING]
Reference
136
DTXTREME III Owner’s Manual
Reference
Drum Kit mode Song mode Click mode Tr igger mode File mode Utility mode Chain mode Sampling mode
Creating a User Voice [F1] SELECT/[F2] SETTING
This section describes the instructions on executing the Sampling operation and creating a User Voice. The created User
Voice can be assigned to the Drum Kit and played back by hitting the pad.
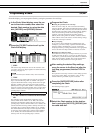
1
Connect a microphone or audio equip-
ment to the DTXTREME III.
2
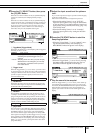
Press the [SAMPLING] button to enter the
Sampling mode.
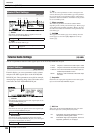
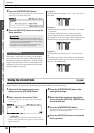
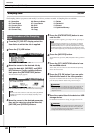
The User Voice Select display appears. From this display, you
can select the User Voice number (USR-A: 001 – USR-H:
127) as Sampling destination. The Sampling operation
assigns the recorded audio data to the User Voice selected
here.
1 User Voice
Determines the User Voice to which the audio signals
obtained via the Sampling operation are assigned.
B [SF1] AUDITION
You can hear the currently selected User Voice by holding this
button. (If the User Voice is empty, no sound will result.)
C [F6] REC
Pressing this button calls up the Sampling Record Standby
display.
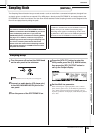
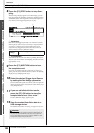
D [SF6] INF
Pressing this button indicates the amount of Sampling mem-
ory used. Pressing this button again returns to the original dis-
play.
1 Used/Total
Indicates the amount of memory being used and the total
amount available.
B Recordable Size
Indicates the amount of free memory.
C Recordable Time
Indicates the available Sampling time according to the
available memory.
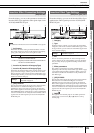
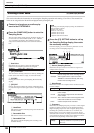
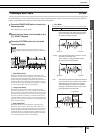
3
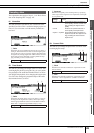
Press the [F2] SETTING button to call up
the Sampling Setting display, then make
the necessary settings.
From this display, you can set the basic parameters such as
recording source and sampling frequency.
1 Source (Sampling Source)
Determines the input connector via which the signal to be
sampled will be received.
AUX IN Analog audio from the AUX IN/SAMPLING IN
jacks is recognized as the recording source.
resample Audio signal from the output of the DTX-
TREME III is received internally and recog-
nized as the recording source.
B Mono/Stereo
Determines whether new samples will be recorded as stereo
or mono samples.
monoL The L-channel signal will be recorded as a
mono sample.
monoR The R-channel signal will be recorded as a
mono sample.
monoL+R The L-channel and R-channel signals will be
mixed and recorded as a mono sample.
stereo A stereo sample will be recorded.
C Frequency
Determines the sampling frequency. The rate at which digital
readings are taken is referred to as the sampling frequency.
Higher sampling frequencies result in higher quality sound.
Normally, this parameter should be set to “44.1kHz,” the
highest setting. If you wish to obtain a lo-fi sound, select a
value other than 44.1 kHz. At settings other than 44.1 kHz, the
sound monitored during recording may be different from the
recorded sound, depending on the source signal.
Settings USR-A: 001 – USR-H: 127
2
1
4
2
1
3
NOTE
• Depending on the Sampling Frequency settings, the available Sam-
pling time differs as follows:
44.1kHz: 6 min. 20 sec.
22.05kHz: 12 min. 40 sec.
11.025kHz: 25 min. 20 sec.
5.5125kHz: 55 min. 40 sec.
* Applied to both Mono and Stereo
Settings AUX IN, resample
Settings monoL, monoR, monoL+R, stereo
Settings
44.1k (44.1 kHz), 22.0kLo (22.05 kHz Lo-Fi),
11.0kLo (11.025 kHz Lo-Fi), 5.5kLo (5.5125
kHz Lo-Fi)
1
2 3
3