


Using the Groove Check Function
Quick Guide
DTXTREME III Owner’s Manual
53
Quick Guide
4
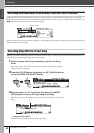
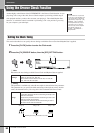
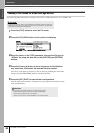
Move the cursor to the Trigger Input, then select the desired one.
When “ALL” is selected for any one of the lines, no other lines can be used.
5
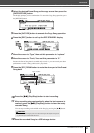
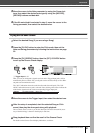
Move the cursor to the EARLY or LATE column, then set the
allowable range by using the [INC/YES], [DEC/NO] buttons and
data dial.
According to the value set here, the Rhythm Gate range (crosshatch bar) becomes
wider or narrower.
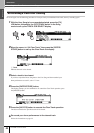
6
After the setup is completed, start the selected Song or Click
sound, then play the drum pads along with playback.
The Rhythm Gate starts as soon as you hit the drum pad. The result for each hit
(accuracy of the hit timing) is shown in the display in real time.
7
Stop playback, then confirm the result of the Rhythm Gate.
For details on the Rhythm Gate display indications, see below.
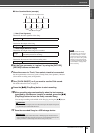
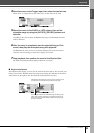
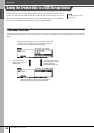
■ Rhythm Gate Results
In the Rhythm Gate display, you can view the result of the check and see how accurate your
timing is in real time. With the center line being correct timing, hits indicated at the left are
early, and hits on the right are late. For details on each indication, see below.
Indicates the actual timing at which you hit the pad. The sound
is produced only when this timing is within the bar graph.
This bar graph indicates the allowable range (the timing range
within which sound is produced). This is different from the bar
graph in the Groove Check display, indicates the timing range
of all your actual hits.