


Optional DIMM Installation
Appendix
148
DTXTREME III Owner’s Manual
1
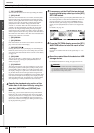
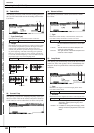
Turn the DTXTREME III power off, and dis-
connect the power cord.
2
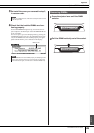
Turn over the DTXTREME III so you can
have direct access to the underside.
To protect the data dial and sliders from damage, place the
DTXTREME III so the four corners are supported by some-
thing that provides sufficient support, such as magazines or
cushions. Place supports at all four corners, taking care not to
touch the Data dial and Sliders.
3
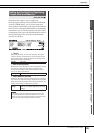
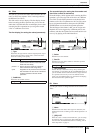
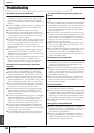
Remove the slot cover.
Remove the screws from the slot cover by using a Phillips
screwdriver.
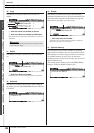
4
Insert the two DIMMs into the DIMM sock-
ets.
Location for DIMM installation
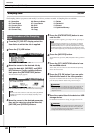
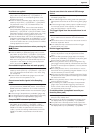
Installing the DIMM modules to the sockets
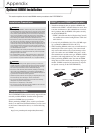
4-1 Press the ejector levers to the outside of the
socket.
4-2 Insert the DIMM vertically in the socket.
Press the DIMM in firmly until it “snaps” or
locks in place.
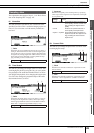
Confirm whether or not both the levers are
firmly locked.
DIMM Installation
IMPORTANT
Keep the removed screws in a safe place. They will
be used when re-attaching the cover to the instru-
ment after installing the DIMMs.
Rear panel
Bottom surface of the
DTXTREME III
Slot cover
Underside of the DTXTREME III
DIMM slot x 2
Make sure that the DIMM module is aligned
correctly before you install it.
Ejector lever
Notch for alignment