132
MR16 Owner’s Manual (Part editing)
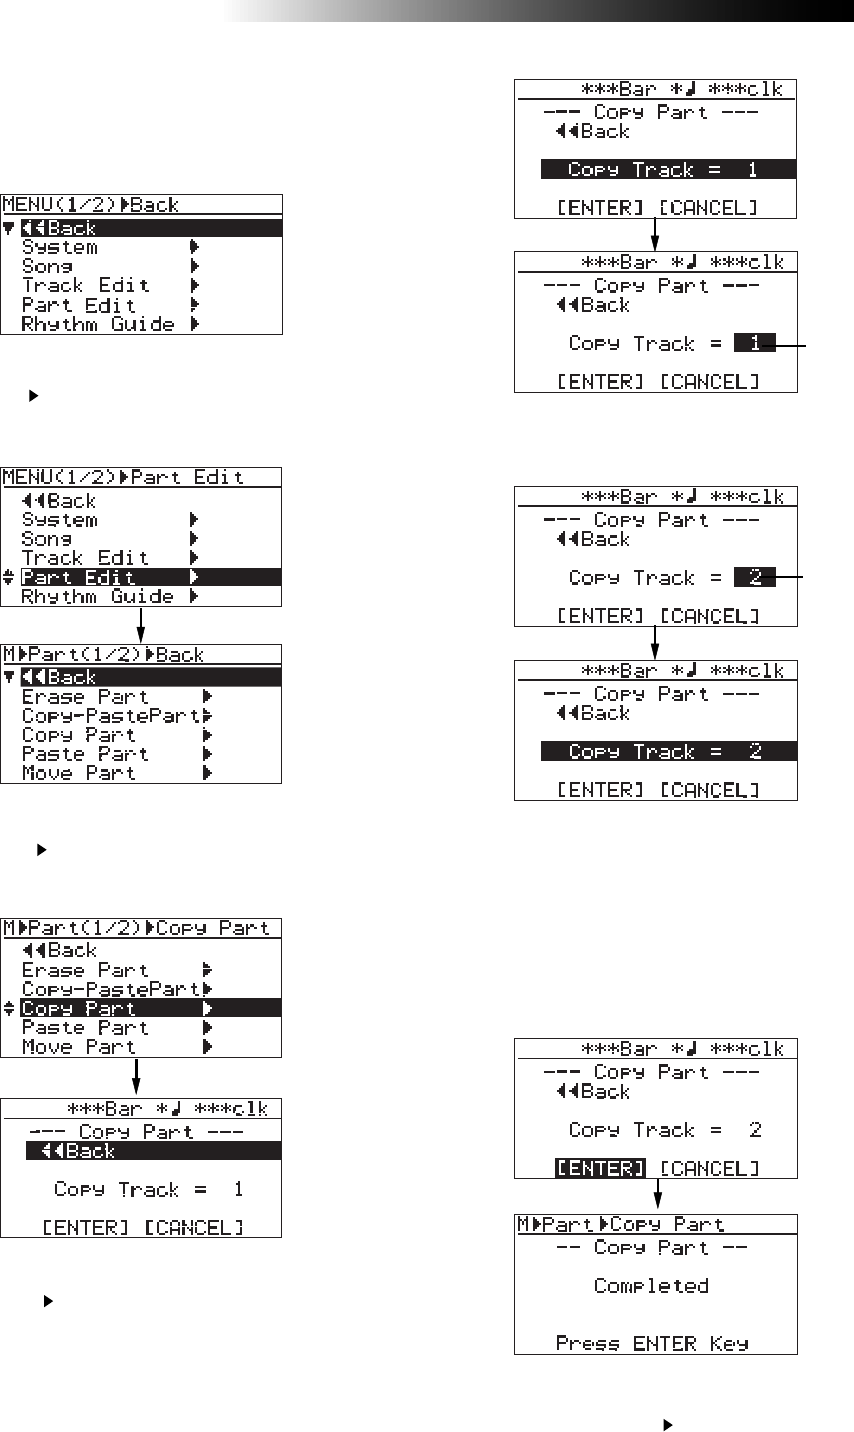
3) While the recorder is stopped, press the
[MENU/ENTER] knob to enter the menu mode.
The display now shows the first page of the
menu selection screen.
4) Rotate the [MENU/ENTER] knob to select
"Part Edit
", and press the [MENU/ENTER] knob.
The display now shows the part edit menu
screen.
5) Rotate the [MENU/ENTER] knob to select
"Copy Part
", and press the [MENU/ENTER] knob.
The display now shows the screen for selecting
the source track(s).
6) Rotate the [MENU/ENTER] knob to select
"Copy Track
", and press the [MENU/ENTER] knob.
The display now shows the screen for selecting
the copy source track(s). You can select the copy
source track(s) by rotating the [MENU/ENTER]
knob. The available options are:
• 1 through 8 (mono track)
• 1/2, 3/4, 5/6, 7/8, 9/10, 11/12, 13/14 and 15/16
(stereo tracks)
8) Rotate the [MENU/ENTER] knob to move the
cursor to "[ENTER]" at the bottom of the screen,
then press the [MENU/ENTER] knob.
The display shows "Please Wait", immediately
followed by "Completed" when the MR16
completes the part copy operation.
To cancel the part copy operation, move the
cursor to "[CANCEL]" at the bottom of the
screen, and press the [MENU/ENTER] knob.
7) Rotate the [MENU/ENTER] knob to select the track(s)
to be copied, and press the [MENU/ENTER] knob.
The display returns to the previous screen.
Flashing
Flashing
9) Press the [MENU/ENTER] knob.
The display now returns to the part edit menu
screen, where “Copy Part
” is highlighted.
The procedure example below shows how to
paste the copied part data on the clipboard to
the LOCATE A point of the selected track.


