Connecting a computer
29
Quick StartIntroductionSetupProgram
Combination
MultiEffectGlobalArpeggiatorDrum Kit
External control
Other functions
Appendices
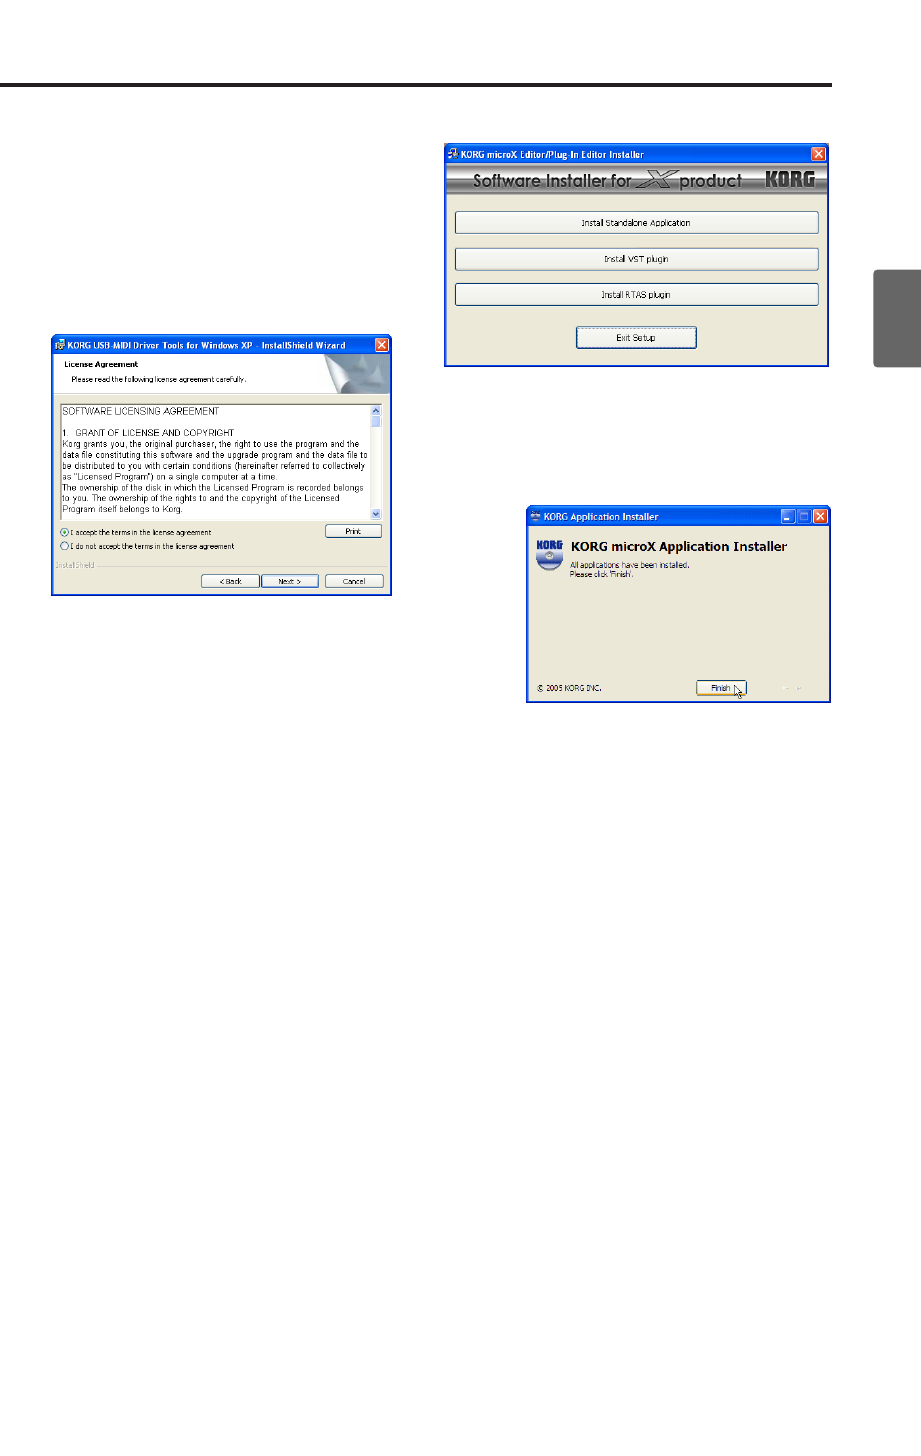
If you’ve made settings as shown in the screen
shot for step 2, the KORG USB MIDI Driver
Tools Installer screen will appear first.
• Click [Next >].
• The “License agreement” will appear. Care-
fully read the contents, and if you agree,
check “I accept the terms of the license agree-
ment” and click [Next>].
• Specify the installation destination. The
screen will show the installation destination
folder. If you want to change this, click
[Change] and select the desired installation
destination.
• Click [Next >] to begin the installation.
• When the installation is complete, click [Fin-
ish] to exit the installer.
Install the next application in the same way.
5. If you selected microX Editor/Plug-In Editor in
step 2, choose the application(s) you want to
install.
• Successively select and install the Editor
(Standalone), Plug-In Editor (VST), and/or
Plug-In Editor (RTAS) as desired.
For example if you want to install the stand-
alone version, click [Install Stand-alone
version]. Then follow the on-screen
directions to perform the installation, and
click [Close] when the installation has been
successfully completed.
If you want to install a plug-in version, click
in the Installer screen to select the format of
plug-in that you want to install, and perform
the installation.
• When you’ve finished installing the applica-
tion(s) you want, click [Exit installer] to exit
the installer.
6. When all the selected applications have been
installed, click [Finish] to exit the installer.
7. The first time you connect the microX to the
USB port of your computer, the standard USB-
MIDI driver provided by Windows will be
installed automatically.
If you want to use the KORG USB-MIDI Driver
for Windows XP, please re-install the driver
manually using the procedure described below.
Setting up the KORG USB-MIDI Driver
1. Before you perform the procedure below, you
must finish installing KORG USB-MIDI Driver
Tools into your computer.
Then restart the operating system of your
computer, and power-on the microX. (☞p.23)
Note: The driver must be installed for each USB
port. If you connect the microX to a different
USB port than the one you used when
installing KORG USB-MIDI Driver for
Windows, you will need to use the same
procedure to install the driver again.
2. Using a USB cable, connect the USB connector
of the microX to the USB connector of your
computer.
Make sure that the plug is oriented correctly,
and push it all the way into the connector.
Windows will detect that the microX has been
connected.


