


Using Controllers
41
Quick StartIntroductionSetupProgram
Combination
MultiEffectGlobalArpeggiatorDrum Kit
External control
Other functions
Appendices
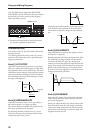
• Joystick movement in the +X/–X axis can vary
the cutoff frequency
PROG 4: Ed–Filter1/2, Mod.2 (☞PG p.16)
• Joystick movement in the +Y axis can adjust the
depth of vibrato
PROG 2: Ed–Pitch, OSC 1/2 LFO (☞p.52, PG
p.11)
• Joystick movement in the –Y axis can adjust the
depth of the wah effect
PROG 4: Ed–Filter1/2, LFO Mod. (☞p.54, PG
p.18)
• Joystick movement in the +Y axis can adjust the
speed of the LFO
PROG 3: Ed–LFOs, OSC 1/2 LFO 1/2 (☞PG
p.14)
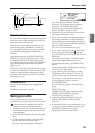
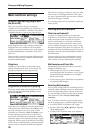
OCTAVE
These buttons shift the range of pitches assigned
to the keyboard in one-octave steps over a range
of ±3 octaves.
Pressing the [π] button will raise the pitch in one-
octave steps. Pressing the [†] button will lower
the pitch in one-octave steps.
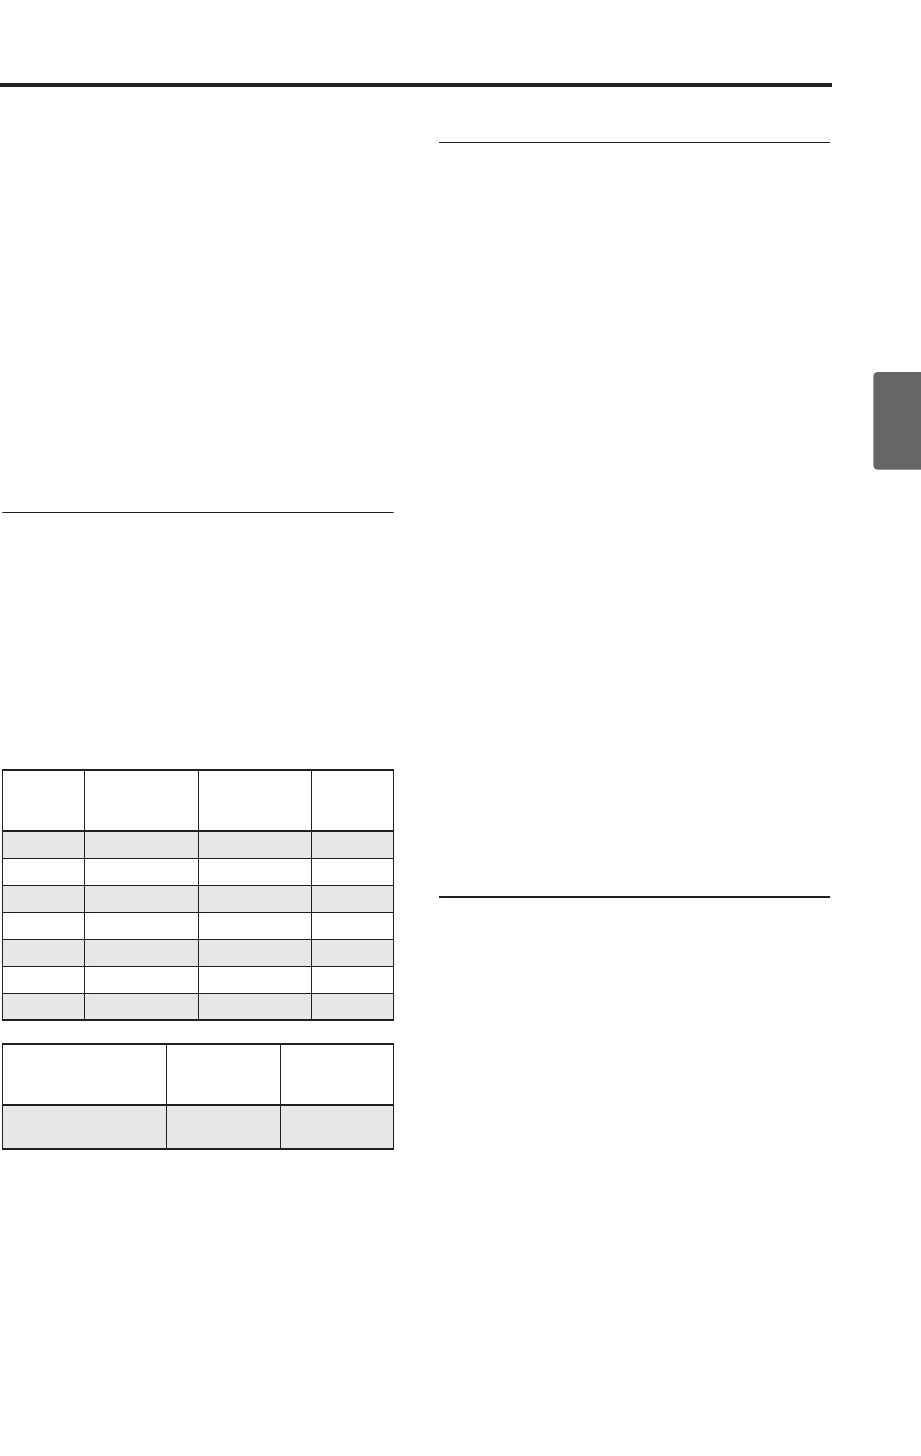
You can press the OCTAVE [†][π] buttons simul-
taneously to recall the written (saved) settings.
OCTAVE [†][π] functions
Note: With the factory settings, changing the
program, combination, or multi set will also recall
the OCTAVE [†][π] button setting that was
written as part of that data. This is because the
GLOBAL 0 “OCTAVE Keys [†/π]: Use Prog/
Combi/Multi’s Octave” setting is checked. If this
setting is not checked, changing the program etc.
will not affect the OCTAVE [†][π] setting until
you change the octave yourself. (☞p.88)
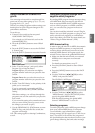
REALTIME CONTROLS [1], [2], [3], [4],
[SELECT]
Use the [SELECT] button to select realtime con-
troller mode A/B/C, and use knobs [1]–[4] to con-
trol the tone, effects, MIDI control changes, and
arpeggiator etc. while you perform.
Specifically, you can use these controllers to edit
the filter cutoff frequency, resonance, amp and fil-
ter EQ, volume, portamento time, pan, pitch LFO,
and master effect send level, etc. You can also use
them to modify the arpeggiator tempo, gate,
velocity, and length. For more details, see p.43 and
p.91.
1. Press the REALTIME CONTROLS [SELECT]
button to switch the function of the realtime
controllers to A-mode, B-mode, or C-mode.
2. Rotate the desired knob to control the sound,
etc.
The REALTIME CONTROLS [1], [2], [3], and [4]
knob B-mode functions can be viewed for Program
mode in the 0: Play, Program page; for Combina-
tion mode in the 0: Play, Combination page; and
for Multi mode in the 0: Play, Multi page. (
☞
p.37)
Note: If you turn the [EXT. CONTROLLER] button
on (lit), these knobs will be switched to the
external control function, and will be disconnected
from the internal sound generator. The
REALTIME CONTROLS [1]–[4] knobs will
transmit MIDI messages (as specified by the
external control setup) to your external MIDI
equipment.
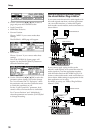
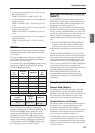
Using the pedals for control
Damper Pedal (Sustain)
The damper pedal is also sometimes called the
sustain pedal. It acts like the similarly-named
pedal on an acoustic piano; when you hold down
the pedal, notes will continue to sustain even
when you lift your hands off of the keyboard.
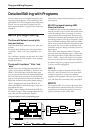
Damper Switch vs. Half-Damper
You can use either a standard footswitch (such as
the Korg PS-1) or a special half-damper pedal
(such as the Korg DS-1H) as the Damper.
If you use a footswitch, it will work like a normal
synthesizer sustain pedal: notes will sustain for-
ever, as long as the pedal is held down.
A half-damper pedal is a special type of continu-
ous foot pedal (normal foot pedals won’t work
properly for this application). It offers more subtle
control of sustain, which can be especially useful
for piano sounds.
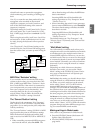
Press the
[†]
button
Keyboard
range
LED status
Press the
[π]
button
† C6 – C8 Rapid blinking π
† C5 – C7 Slow blinking π
† C4 – C6 Lit π
† C3 – C5 Dark π
† C2 – C4 Lit π
† C1 – C3 Slow blinking π
† C0 – C2 Rapid blinking π
Press the [†][π]
buttons
simultaneously
Keyboard
range
LED status
† + π Written value
Corresponds to
pitch range