Effects settings
86
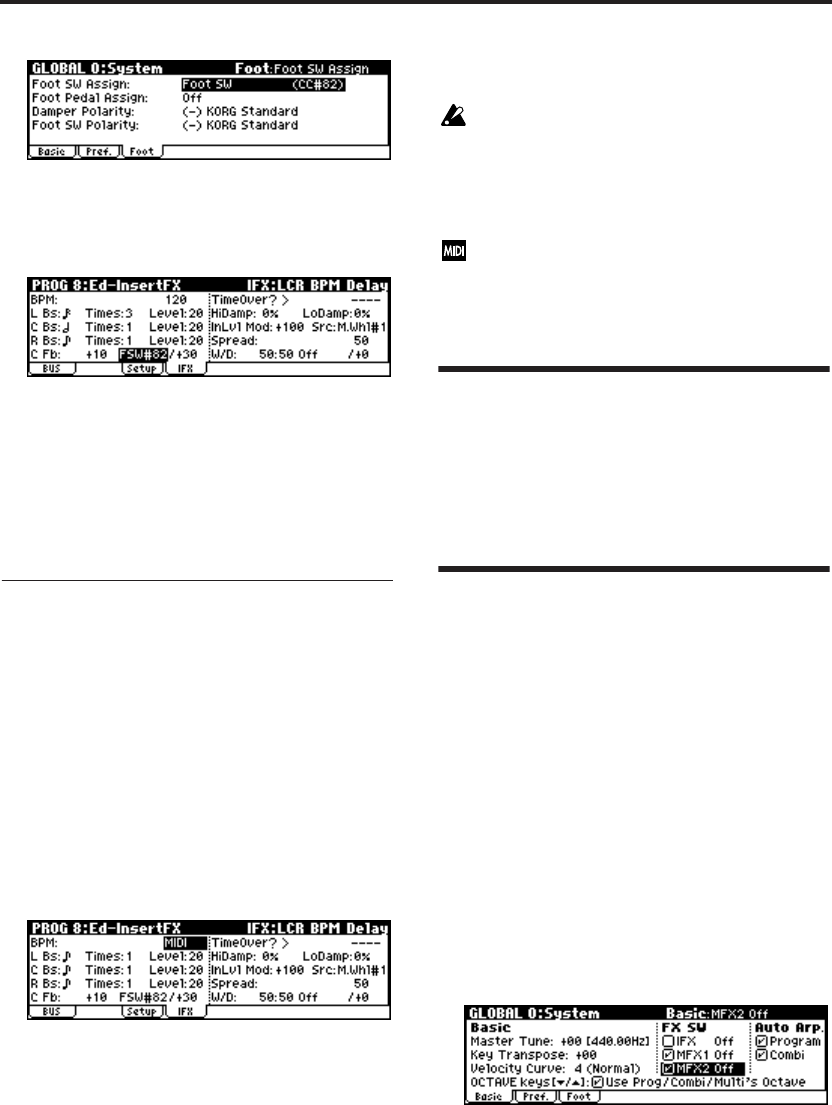
2. Return to the PROG 8: Ed–InsertFX, IFX page,
and set the C Fb (C Delay Feedback) “(Source)”
to SW1 #82.
3. Set “(Amount)” to +30.
4. (Move the joystick up.) Press the foot-switch;
the feedback level will increase, and the delay
sound will continue for an extended time.
The “(Amount)” setting determines the
feedback level when the foot-switch is pressed.
If you set “(Amount)” to –10 and press the foot-
switch, the feedback level will be 0.
Using the BPM/MIDI Sync. function
to synchronize the delay time to
arpeggiator tempo changes.
The BPM/MIDI Sync. function lets you synchro-
nize the delay time to the tempo of the arpeggio.
1. In the PROG 8: Ed–InsertFX, IFX page, set
“BPM” to MIDI.
2. For L, C, and R, set “L/C/R Bs” and “Times” as
desired.
For this example, set “L/C/R Bs” to and
“Times” to 1 so that the effect will be easily
understandable. The delay time will repeat at
an interval of a 8th note.
3. Set the realtime controller function to C-mode,
and rotate REALTIME CONTROLS knob [4]
(“TEMPO”).
(Move the joystick up.) Operate the knob; the
delay time will change.
4. Turn on the [ARP ON/OFF] button to start the
arpeggiator.
Select an arpeggio pattern as desired.
(Move the joystick up.) When you rotate
REALTIME CONTROLS knob [4], the delay
time will change in synchronization to any
changes you make in the arpeggiator tempo.
If you rotate the REALTIME CONTROLS
knob [4] to change the tempo while the delay
is sounding, noise may occur in the delay
sound. This is because the delay sound
becomes discontinuous, and is not a
malfunction.
For some effects, you can synchronize the
LFO frequency to the tempo. Set the effect
parameters “BPM/MIDI Sync” to On, and
“BPM” to MIDI. For details see PG p.160.
Saving edited effect settings
Effect parameters that you edit in Program mode
are saved when you write the program. Similarly,
effect parameters that you edit in Combination
mode or Multi mode are saved when you write
the combination or multi set. (☞p.45, 61, 75)
Bypassing the insert effect or
the master effects
Normally, you will switch the effects on/off indi-
vidually for each program, combination, or multi
set. However, you also have the option of bypass-
ing the insert effect or master effects for the entire
microX if you don’t want to use them.
For example, this can be useful when you’re using
an outboard effect such as reverb, chorus, or com-
pressor to create an effect that you would other-
wise create using the microX’s master effects, or
when you’re using a plug-in effect on your com-
puter to process the sound of the microX together
with other sound sources.
1. Press the [GLOBAL] button to enter Global
mode.
2. Access the GLOBAL 0: System, Basic page.
3. Check the “IFX Off” check box if you want to
bypass the insert effect.
Check the “MFX1 Off” dialog box if you want
to bypass master effect 1, or the “MFX2 Off”
dialog box if you want to bypass master effect
2.


