Playing and Editing Programs
50
Copying settings between OSC1 &
OSC2
Many of the Program parameters can be set differ-
ently for OSC1 and OSC2.
These include all of the parameters on:
• All of the tabs on the Ed–Pitch page, except for
the Pitch EG
• All of the tabs on the Ed–Filter page
• All of the tabs on the Ed–Amp page
• All of the tabs on the Ed–LFOs page
You can use the utility menu’s Copy Oscillator
command to copy these parameters from one
Oscillator to another. You can even copy parame-
ters from an Oscillator in a different Program.
This command is useful when you want to set
both Oscillators to the same settings, or when you
want to duplicate settings you’ve used before.
Assigning a drum kit
What is a drum kit?
If you want to use a drum kit in a program, set the
“Oscillator Mode” to Drums. Then choose one of
the 40 user drum kits or nine GM-compatible
drum kits for the program to use.
A drum program uses a “drum kit” for its oscilla-
tor. A drum kit consists of multiple drum instru-
ment samples placed across the keyboard. There
are 929 drum instrument samples. (☞p.48 “Multi-
samples and Drum Kits”)
In Global mode you can create or edit a drum kit
itself. You can assign up to two drum samples
(High and Low) to each note of the keyboard, and
switch between these drum samples by velocity.
You can also specify the effects and the routing to
the audio output jacks. (☞p.108 “Editing Drum
Kits”)
Selecting a drum kit
1. Access the PROG 1: Ed–Basic, Prog Basic page.
2. Set “Oscillator Mode” to Drums.
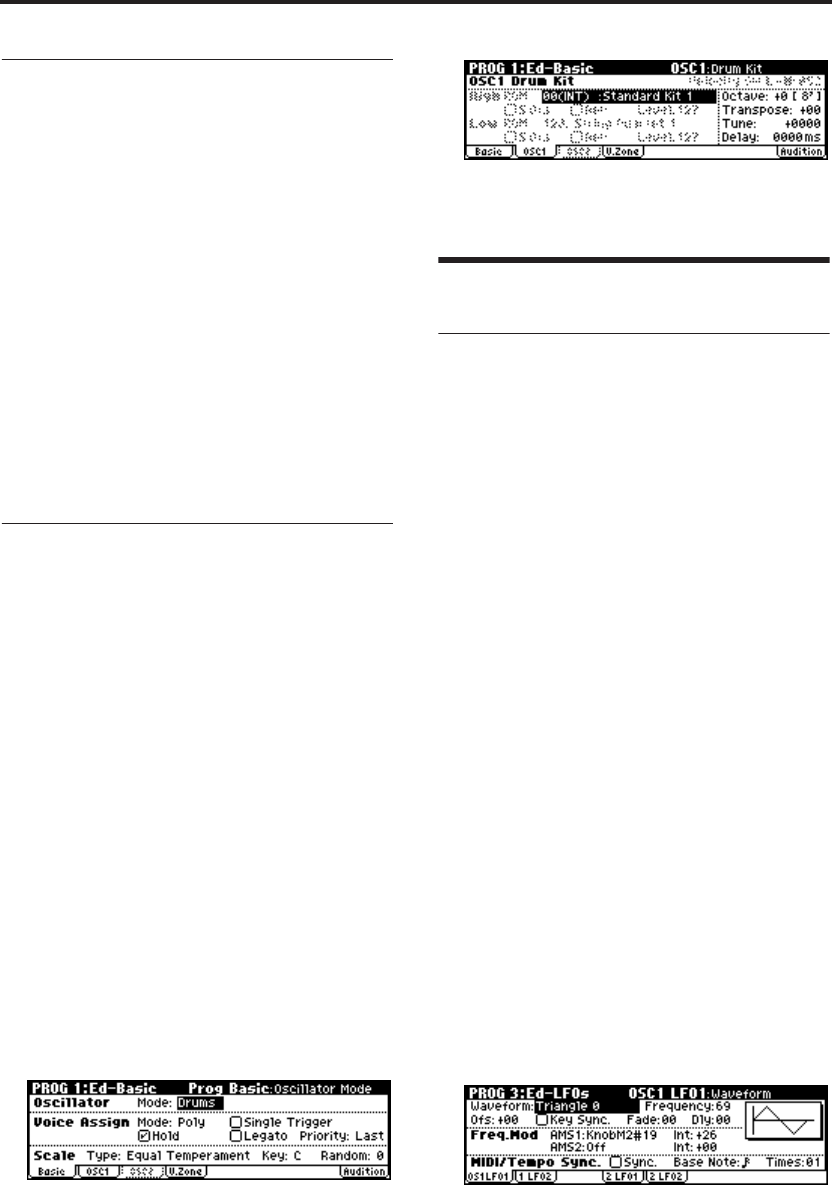
3. Access the PROG 1: Ed–Basic, OSC1 page.
4. Use the ClickPoint [√][®][π][†] to highlight
“Drum Kit.”
Use the [VALUE] dial to select a drum kit.
5. Specify the basic pitch of the oscillator. For a
drum kit, set “Octave” to +0 [8'].
Using LFOs and Envelopes (EGs)
Using LFOs
Each Oscillator has two LFOs: LFO1 and LFO2.
You can use these LFOs to modulate many differ-
ent Program parameters, including:
• Pitch (vibrato): PROG 2: Ed–Pitch, OSC1 LFO
“Intensity,” and the same parameter of the
OSC2 LFO
• Filter (wah effect): PROG 4: Ed–Filter1, LFO
Mod. “Intensity to A” and “to B,” and the same
parameters for PROG 5: Ed–Filter2
•Volume (auto-tremolo): PROG 6: Ed–Amp1/2,
Mod, LFO1 Mod. “Intensity,” and the same
parameters for LFO2 Mod.
In addition to the uses described above, you can
use an LFO as a source for Alternate Modulation
and Effect Dynamic Modulation to modulate a
wide range of parameters. By assigning an LFO to
“Pan AMS” (PROG 6: Ed–Amp1/2, Level/Pan)
you can create an auto-pan effect.
Basic LFO settings
Note: Depending on the program you’ve selected,
you may be unable to hear the result of the
following edits. If so, increase the value of one of
the “Intensity” parameters listed above so that
you can hear the result.
For example in order to use OSC1 LFO1 to modu-
late filter 1, you should increase the PROG 4: Ed–
Filter1, LFO Mod. LFO1 “Intensity to A” or “Inten-
sity to B” value.
1. Access the PROG 3: Ed–LFOs, OSC1 LFO page.
2. Select the “Waveform” parameter.
3. Use the [VALUE] dial etc. to select the desired
LFO waveform.
The display shows a graphic of the waveform.


