Setup
32
3. Follow the on-screen instructions to install
application.
See “Installing the KORG USB-MIDI Driver”
(☞p.31).
4. When the installation has been successfully
completed, click [Close] to exit the installer.
About the microX external control tem-
plates
See “microX External Control Template List”
(PDF) for details on the control change (CC#) set-
tings assigned by the preloaded external control
templates and the application settings to which
they correspond.
Connecting via the microX’s USB
connector, and setting-up
USB connector (for connecting to com-
puter)
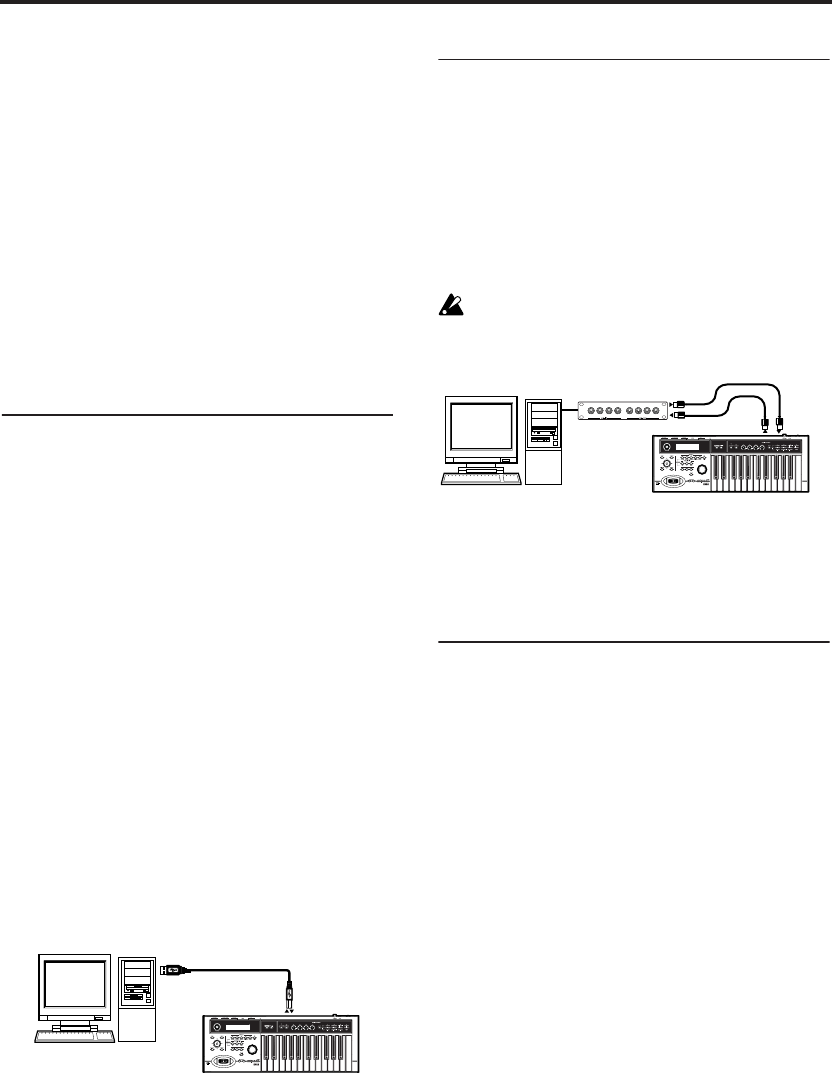
If you connect the microX’s USB connector to your
computer, you’ll be able to send and receive note
data and other performance information and
sound settings between your computer and the
microX as MIDI messages.
Note: The USB connector of the microX is only able
to transmit and receive MIDI data.
Note: Use the KORG USB-MIDI Driver if you’re
connecting the microX via USB to a computer that
meets the requirements described in “KORG USB-
MIDI Driver operating requirements.”
1. Using a USB cable, connect the USB connector
of the microX to the USB connector of your
computer.
Make sure that the plug is oriented correctly,
and push it all the way into the connector.
2. Make the necessary settings in the microX’s
Global mode.
See “Global mode settings on the microX,”
below.
Connecting to your computer via
MIDI
Here’s how to connect the microX to your com-
puter via a commercially available MIDI interface.
1. Connect the microX’s MIDI OUT connector and
MIDI IN connector to your computer via the
MIDI interface.
For details on how to use your MIDI interface,
see its owner’s manual.
Some models of USB-MIDI interface may be
unable to transmit or receive the microX’s
MIDI exclusive messages.
2. Make the necessary settings in the microX’s
Global mode.
See “Global mode settings on the microX,”
below.
Global mode settings on the microX
Local Control On settings
Turn on the Echo Back function of the external
MIDI/USB sequencer or computer (so that data
received at MIDI IN will be re-transmitted from
MIDI OUT/USB), and turn off the microX’s Local
Control setting (so that microX’s keyboard and
tone generator will be internally disconnected).
When you play the keyboard of the microX, the
musical data will be transmitted to the external
MIDI sequencer or computer, and then echoed
back to play the microX tone generator. In other
words, by turning Local Control OFF, you can pre-
vent notes from being sounded in duplicate, as
would otherwise occur if a note were sounded by
the microX’s own keyboard and again by the data
that was echoed-back.
If the arpeggiator function is on, playing the
microX’s keyboard will not cause the arpeggiator
to operate, and only the musical data produced by
playing the keyboard will be transmitted. The
arpeggiator will operate only in response to the
notes that are echoed-back and received at MIDI
IN. In this way, turning off Local Control prevents
the arpeggiator from operating in duplicate.
Use this setting when you wish to record on the
external MIDI sequencer or computer only the
notes that trigger the arpeggiator, and to use the
USB
microX
USB cable
Computer
MIDI IN
MIDI INMIDI OUT
MIDI OUT
microX
MIDI interface
Computer
