Selecting programs
39
Quick StartIntroductionSetupProgram
Combination
MultiEffectGlobalArpeggiatorDrum Kit
External control
Other functions
Appendices
Using a footswitch to select Pro-
grams
You can assign a footswitch to step through Pro-
grams one by one, either going up (0, 1, 2, 3, etc.)
or going down (3, 2, 1 etc.).
This lets you change Programs without using your
hands–great for quick Program changes in live
performance situations.
To set this up:
1. Connect a foot switch to the rear-panel
ASSIGNABLE SWITCH jack.
Use a simple on/off footswitch, such as the
optional KORG PS-1.
2. Press the [GLOBAL] button to enter Global
mode.
3. Press the [EXIT] button to access the GLOBAL
0: System page.
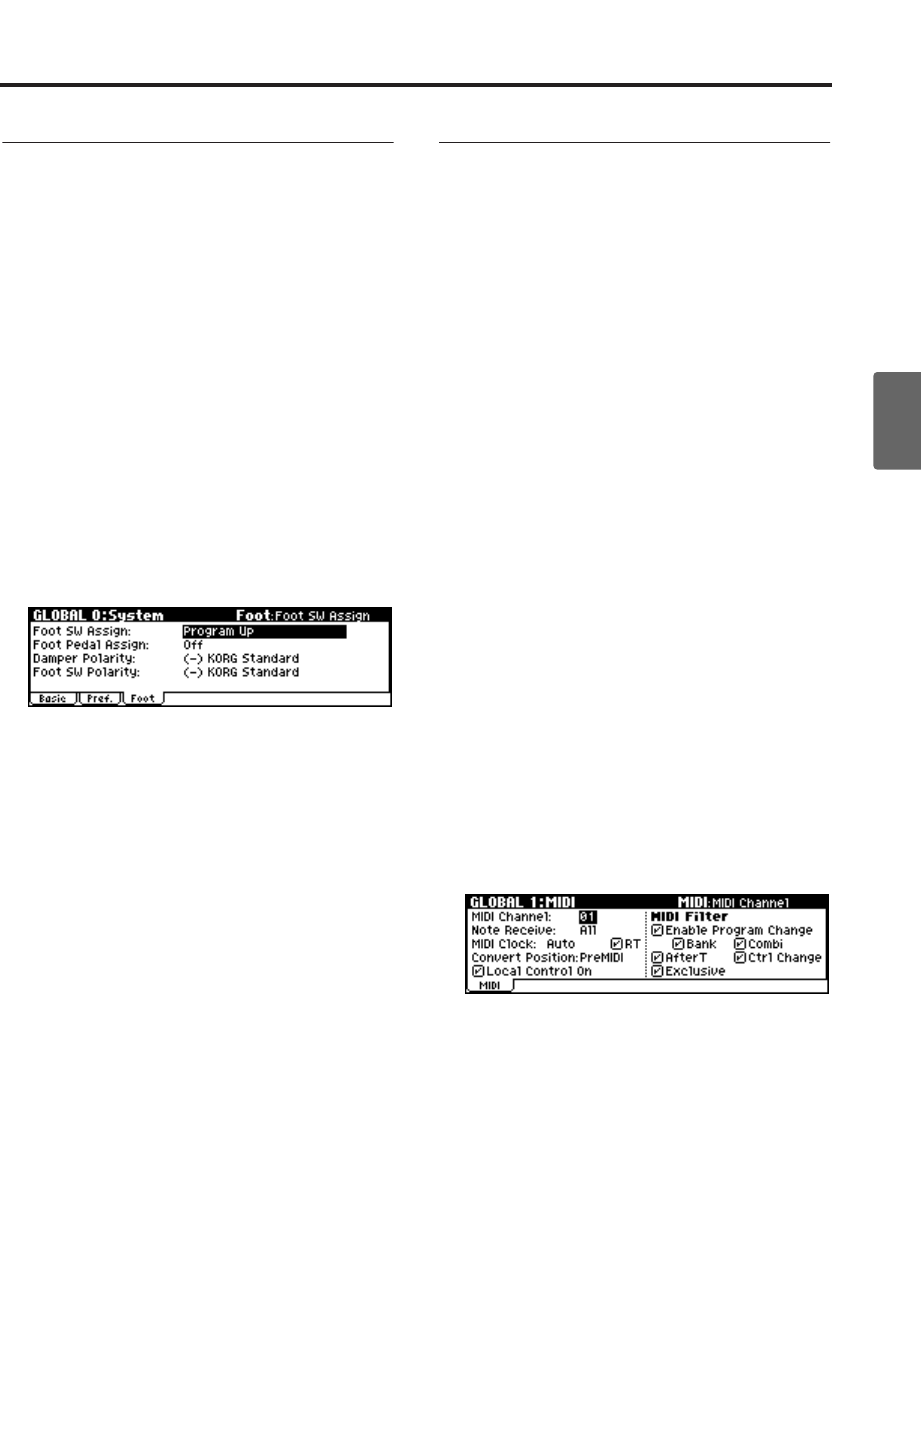
4. Press the [PAGE+] button to access the Foot tab.
5. Select “Foot SW Assign,” and specify either
Program Up or Program Down.
Program Up lets you select the next higher
program number each time you press the foot
switch.
Program Down lets you select the next lower
program number each time you press the foot
switch.
6. Set the “Foot SW Polarity” to the polarity of the
pedal you’ve connected.
If you’ve connected a separately sold PS-1
pedal switch, choose the (–) KORG Standard
setting.
With these settings, you will step through the
programs one at a time each time you press the
foot switch.
If you want this setting to be remembered even
after you turn off the power, be sure to write
the changes you made. (☞p.45)
7. Use the PROGRAM [A]–[GM] buttons to enter
PROG 0: Play, and press the foot switch; the
program will change.
Note: This setting applies to selecting Combinations,
as well.
Using MIDI program change mes-
sages to select programs
By sending MIDI program change messages along
with MIDI bank select messages to the microX
from an external MIDI device (a MIDI sequencer
such as a DAW program, or a MIDI controller,
etc.), you can select any program in the seven
banks.
You can also install the included “microX Plug-In
Editor” into your DAW program as a plug-in, and
easily select microX programs or combinations
from a list within your DAW. For more details, see
“Editor/Plug-In Editor Manual” (PDF).
MIDI channel setting
In order to play the microX via MIDI, the transmit-
ting device (MIDI sequencer or computer) and
receiving device (the microX) must be set to the
matching MIDI channel. In Program mode, the
microX receives data on the global MIDI channel.
1. Make sure that the microX and your external
MIDI device or computer are connected
correctly.
For details on connections, see p.27.
2. Press the [GLOBAL] button to enter Global
mode.
3. Press the [MENU] button to access the PAGE
MENU.
4. Use the ClickPoint [√][®][π][†] to select
“MIDI,” and press the center.
The GLOBAL 1: MIDI page will appear.
5. Use the ClickPoint [√][®][π][†] to select
“MIDI Channel,” and use the [VALUE] dial to
specify the global MIDI channel.
With the default settings, the global MIDI
channel “MIDI Channel” is set to 01.
Selecting programs
To switch programs, send a MIDI program change
from your external MIDI device or computer.
To switch banks, send a Bank Select control
change message (CC#0: upper byte, CC#32: lower
byte). The microX will switch to the program of
the specified bank at the time that it receives a pro-
gram change following the bank select message.
