Creating an audio CD
100
Writing audio data (Track At Once)
Here’s how to use the Track At Once method to write ste-
reo tracks from songs saved on the hard disk to CD-R/RW
media. Use this method if you expect to be adding tracks
to the disc later, or if you want a two-second gap
between tracks.
1
Make sure that the appropriate virtual track is
selected for the stereo track of the song(s)
you want to write.
Only the virtual track that can be played by the ste-
reo track (i.e., the “current track”) will be written to
disc. If the correct virtual track is not selected, load
that song, use the ST.TRACK page of the MONITOR
screen to switch to the correct virtual track, and
then save the song.
2
Repeatedly press the [CD] key or hold down
the [CD] key and use the CURSOR [ ]/[ ]
keys to access the CD WRITE page of the CD
screen.
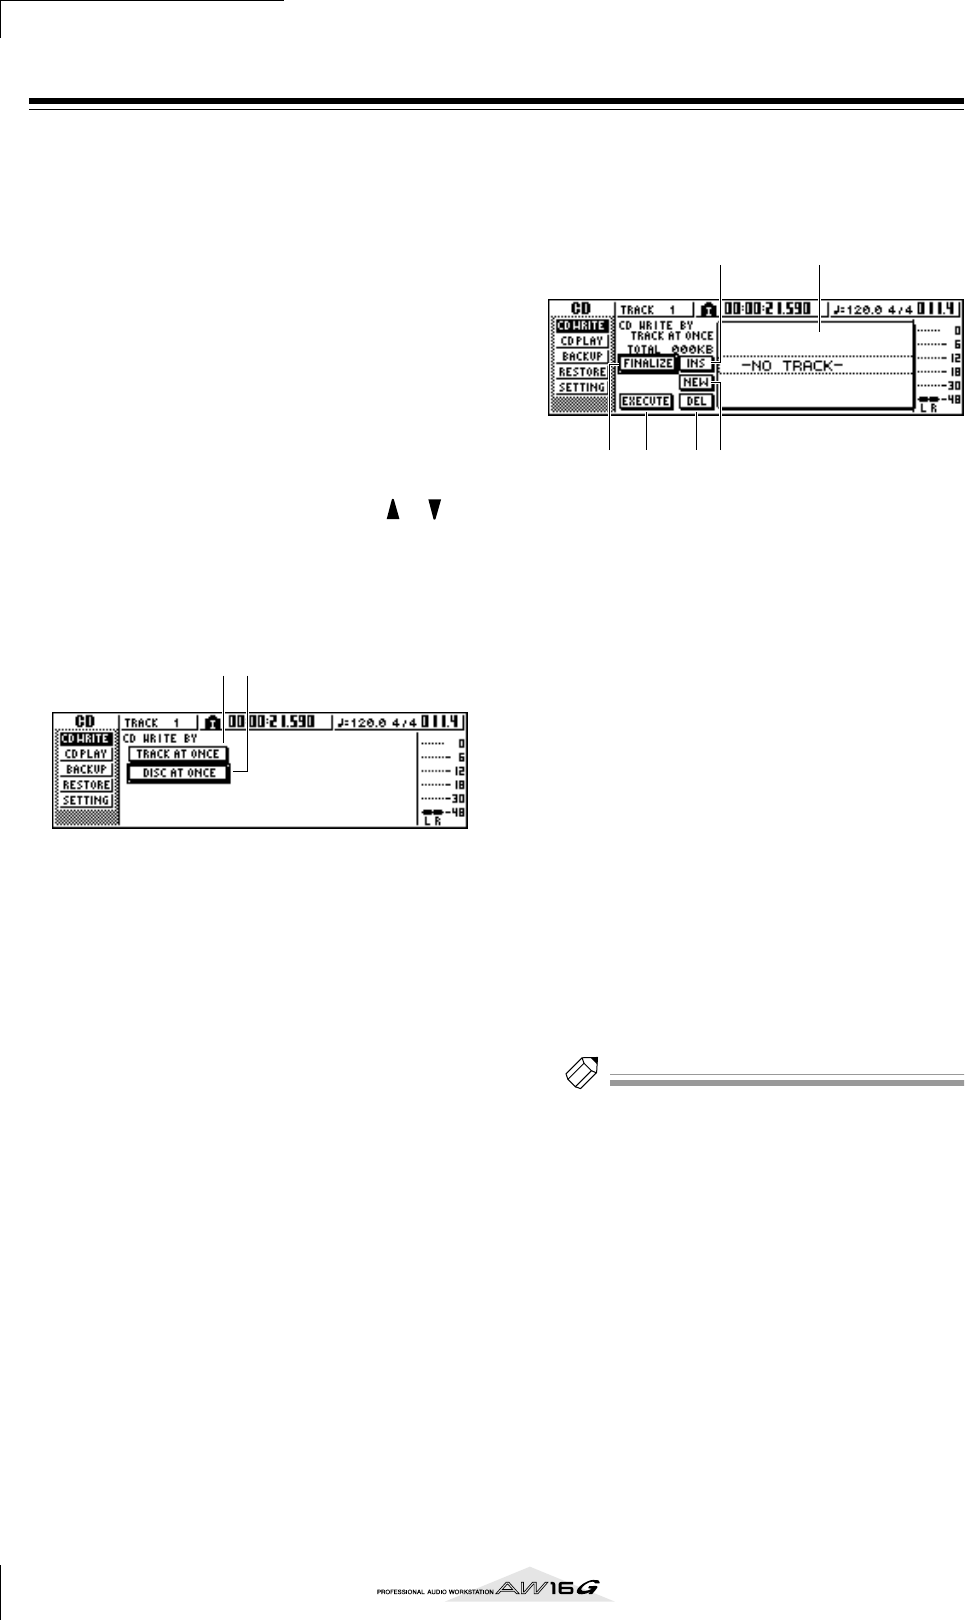
Immediately after you access this page, the
following two buttons will appear in the dis-
play.
1 TRACK AT ONCE button
Creates an audio CD using the Track At Once
method.
B DISC AT ONCE button
Creates an audio CD using the Disc At Once
method.
3
Insert CD-R/RW media in the drive, move the
cursor to the TRACK AT ONCE button, and
press the [ENTER] key.
A display like the following will appear.
1 Song list
This is a list of the songs containing stereo tracks
that will be written to the CD-R/RW media. The line
enclosed by a dotted frame is currently selected for
operations. If no songs have been registered, this
will indicate “-NO TRACK-”.
If audio data has already been written to the
inserted CD-R/RW media but the media has not yet
been finalized, a title of “--EXIST--” will be dis-
played for the already-written data.
B FINALIZE button
Finalizes the inserted media by writing track infor-
mation to it.
C INS button
Inserts a new song in front of the song currently
selected in the list.
D NEW button
Adds a song at the end of the song list.
E DEL button
Deletes the selected song from the list.
F EXECUTE button
Executes writing to the CD media.
Tip!
If you have inserted CD-RW media that contains data
written using other than the Track At Once method, a
popup window will appear immediately after step 3, ask-
ing whether you want to erase the data. If you want to
erase the entire media, move the cursor to the OK but-
ton. If you want to cancel creation of an audio CD, move
the cursor to the CANCEL button. Then press the
[ENTER] key.
4
Move the cursor to the NEW button, and
press the [ENTER] key.
The song list will show information (track number/
song name/size of the stereo track) for the song that
will be written to track 1 of the CD.
1 2
6 542
3 1


