


Mixdown and bounce operations
92
Editing the EQ parameters
The chapters entitled “Track recording” and “Overdub-
bing” explained how to load an EQ library and use the
Selected Channel section [EQ] knob to make adjust-
ments. Here’s how you can make more detailed adjust-
ments to the EQ parameters.
1
Press an [INPUT SEL] key, a pad 1–4, a
[TRACK SEL] key, or the [STEREO SEL] key to
select the channel whose EQ you want to
adjust.
2
If desired, load library data from the EQ
library.
3
Repeatedly press the Selected Channel sec-
tion [EQ] knob or hold down the [EQ] knob
and use the CURSOR [ ]/[ ] keys to access
the EDIT page of the EQ screen.
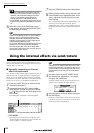
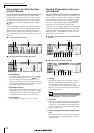
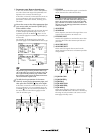
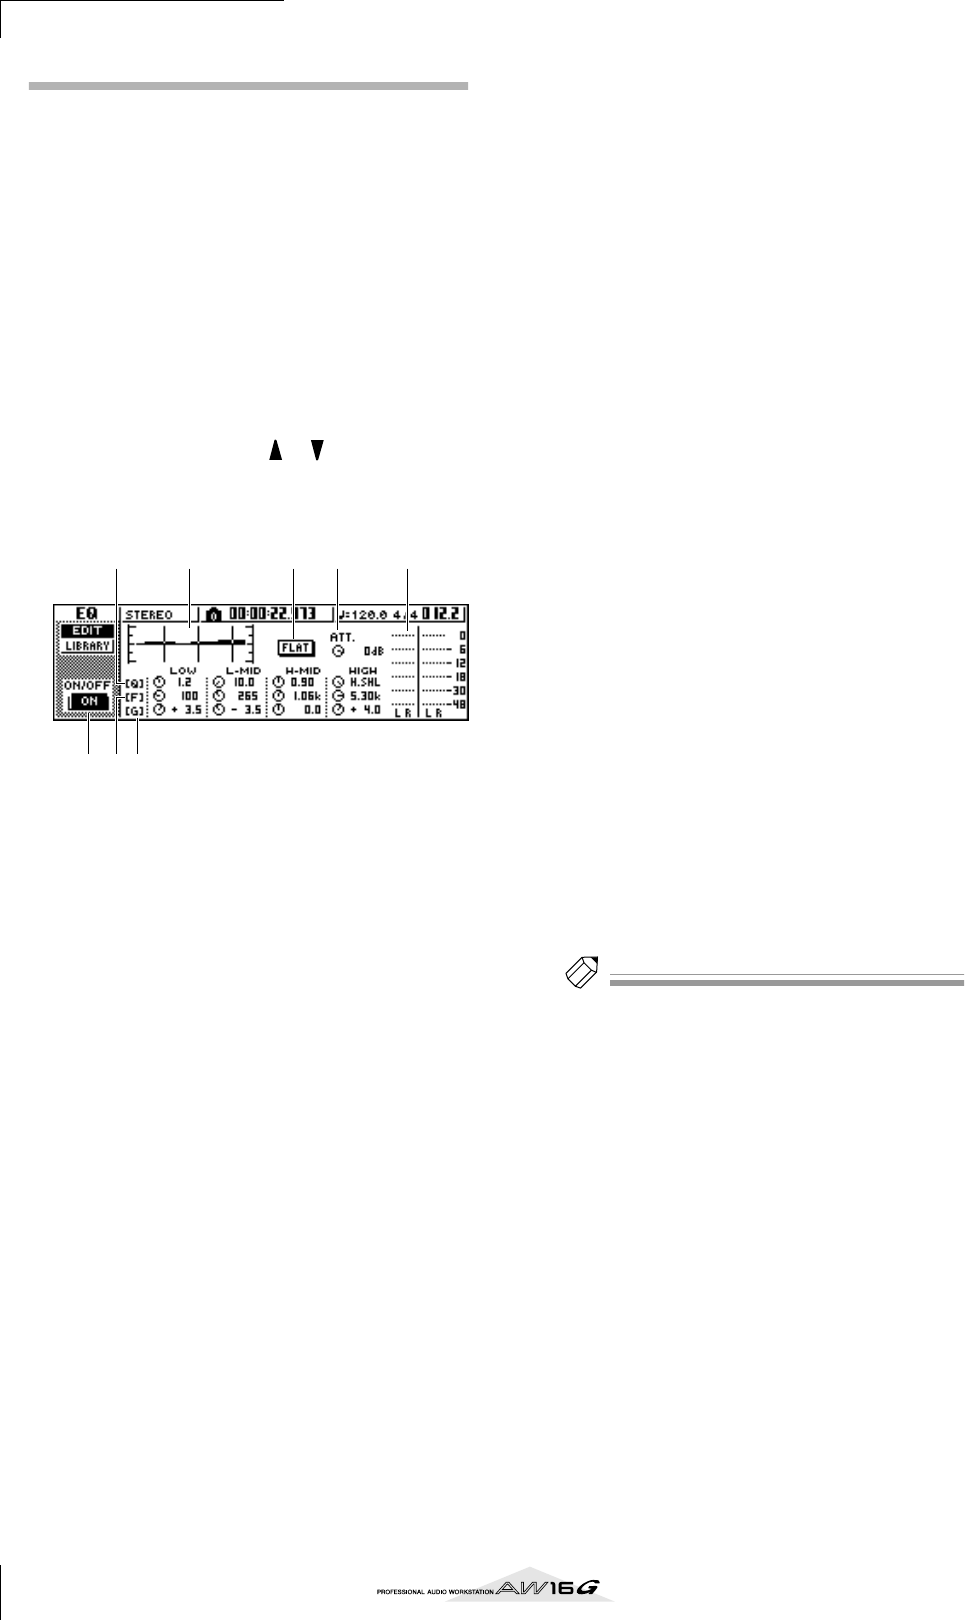
The EDIT page of the EQ screen lets you edit all of
the EQ parameters.
1 ON/OFF button
Switches the EQ on/off.
B Response curve
Graphically indicates the approximate response of
the EQ.
C FLAT button
Move the cursor to this button and press the
[ENTER] key to reset the boost/cut amount of all
bands to 0 dB.
D ATT. (Attenuation) knob
Attenuates the signal immediately before it is input
to the EQ, over a range of –96 to 0 dB. This is used
mainly to prevent the signal from clipping when
you use the EQ to boost a specific frequency region.
E Output meter
Indicates the level of the signal after it has passed
through the EQ.
F Q knobs
Specify the Q (steepness) at which each band
(HIGH, HI-MID, LO-MID, LOW) will be boosted or
cut. The range is 10–0.10, and higher settings will
produce a steeper curve.
G F (Frequency) knobs
Specify the center frequency of the boost/cut, over a
range of 21.2 Hz–20.0 kHz.
H G (Gain) knobs
Specify the amount of boost/cut, over a range of
–18.0 dB to +18.0 dB.
4
Move the cursor to the parameter that you
want to edit, and use the [DATA/JOG] dial to
adjust the value.
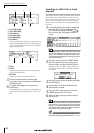
5
To switch the LOW band type, move the cur-
sor to the LOW band Q knob and turn the
[DATA/JOG] dial toward the left.
With the default EQ settings, the LOW band is a
shelving type. (The value field for the Q knob will
indicate “L.SHL”.)
If you turn the Q knob toward the left, the Q knob
value field will change to a numerical value, and
will switch to the same boost/cut type as the HI-
MID and LO-MID bands.
If you continue turning the Q knob toward the left,
the Q knob value field will indicate “HPF,” and the
LOW band will function as a high-pass filter. If
“HPF” is selected, you can use the LOW band G
knob to switch the high-pass filter on/off.
6
To switch the HIGH band type, turn the
HIGH band Q knob all the way to the left.
With the default EQ settings, the HIGH band is a
shelving type. (The value field for the Q knob will
indicate “H.SHL”.)
If you turn the Q knob toward the left, the Q knob
value field will change to a numerical value, and
will switch to the same boost/cut type as the HI-
MID and LO-MID bands.
If you continue turning the Q knob toward the left,
the Q knob value field will indicate “LPF,” and the
HIGH band will function as a low-pass filter. If
“LPF” is selected, you can use the HIGH band G
knob to switch the low-pass filter on/off.
7
To switch the EQ on/off, press the [ENTER]
key.
In the EDIT page, you can press the [ENTER] key to
switch the EQ on/off (except when the cursor is
located at the FLAT button).
Tip!
Tip!
• If the meter display clips because you boosted a certain
band, lower the ATT. knob to attenuate the signal.
• The [EQ] knob of the Selected Channel section will still
operate even while the EDIT page of the EQ screen is
displayed.
81
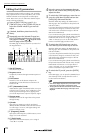
2 4 536
7