Track recording
42
Assigning input signals to tracks
(Direct recording)
1
Lower the [STEREO] fader to the –∞ position.
2
Connect instruments/mics to MIC/LINE
INPUT jacks 1–8.
3
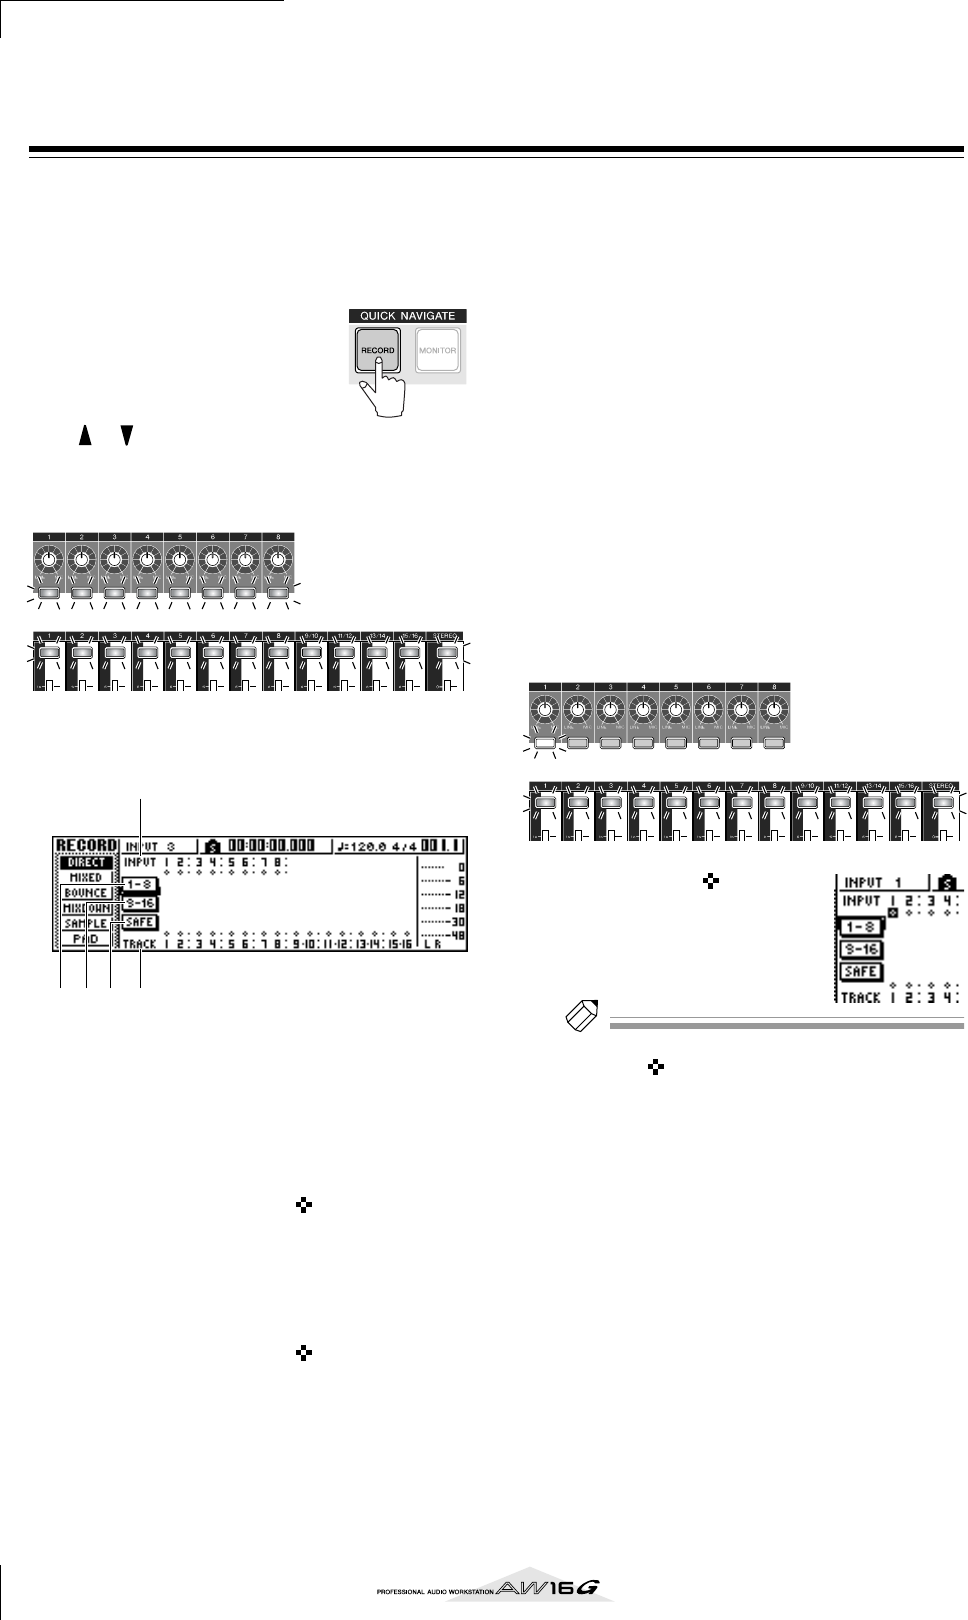
In the Quick Navigate sec-
tion, either press the
[RECORD] key repeatedly or
hold down the [RECORD]
key and use the CURSOR
[ ]/[ ] keys to access the
DIRECT page of the RECORD screen.
The [INPUT SEL] keys and [TRACK SEL] keys will
blink red.
The screen will indicate how input channels are
connected to tracks.
1 INPUT
Indicates the connection status of input channels 1–
8.
If you move the cursor to numbers 1–8 and press
the [ENTER] key, the INPUT SETTING popup win-
dow will appear, allowing you to make settings for
the corresponding input channel.
If you move the cursor to the symbol and press
the [ENTER] key, the symbol will be highlighted,
and the corresponding input channel will be
selected as a recording source.
B TRACK
Indicates the connection status of tracks 1–16.
If you move the cursor to the symbol and press
the [ENTER] key, the symbol will be highlighted,
and the corresponding track will be selected as a
recording destination.
C 1-8 button
If you move the cursor to this button and press the
[ENTER] key, input channels 1–8 will be connected
to tracks 1–8.
D 9-16 button
If you move the cursor to this button and press the
[ENTER] key, input channels 1–8 will be connected
to tracks 9–16.
E SAFE button
If you move the cursor to this button and press the
[ENTER] key, all connections will be cancelled.
4
Press the [INPUT SEL] key for the input chan-
nel to which your instrument/mic is con-
nected.
The corresponding [INPUT SEL] key will light red,
and the remaining [INPUT SEL] keys will go dark. If
this input channel is not yet assigned to a track, all
[TRACK SEL] keys will blink red. This blinking indi-
cates that the tracks can be selected as the record-
ing destination.
In the screen, the symbol
for that input channel will be
highlighted.
Tip!
•You can also select an input channel by moving the cur-
sor to the symbol of the desired input channel and
pressing the [ENTER] key.
• If you select an input channel to which a track is
already assigned, only the corresponding [TRACK SEL]
key will blink red.
• If you press and hold the [INPUT SEL] key of an input
channel, the INPUT SETTING popup window will
appear, allowing you to make settings for the corre-
sponding input channel. To exit this window and return
to the previous screen, move the cursor to the EXIT but-
ton and press the [ENTER] key.
2
1
543


