Overdubbing
62
Switching virtual tracks
Each audio track 1–16 contains eight virtual tracks. After
overdubbing a solo part, you can switch the virtual track
for that track, and record a different take while preserv-
ing the previously-recorded content. Here’s how to
switch the virtual track that is selected for a track.
1
In the Work Navigate section, repeatedly
press the [TRACK] key or hold down the
[TRACK] key and use the CURSOR [ ]/[ ]
keys to access the V.TR page.
In the V.TR page you can switch the virtual track (1–
8) that will be used for recording/playback by each
audio track 1–16.
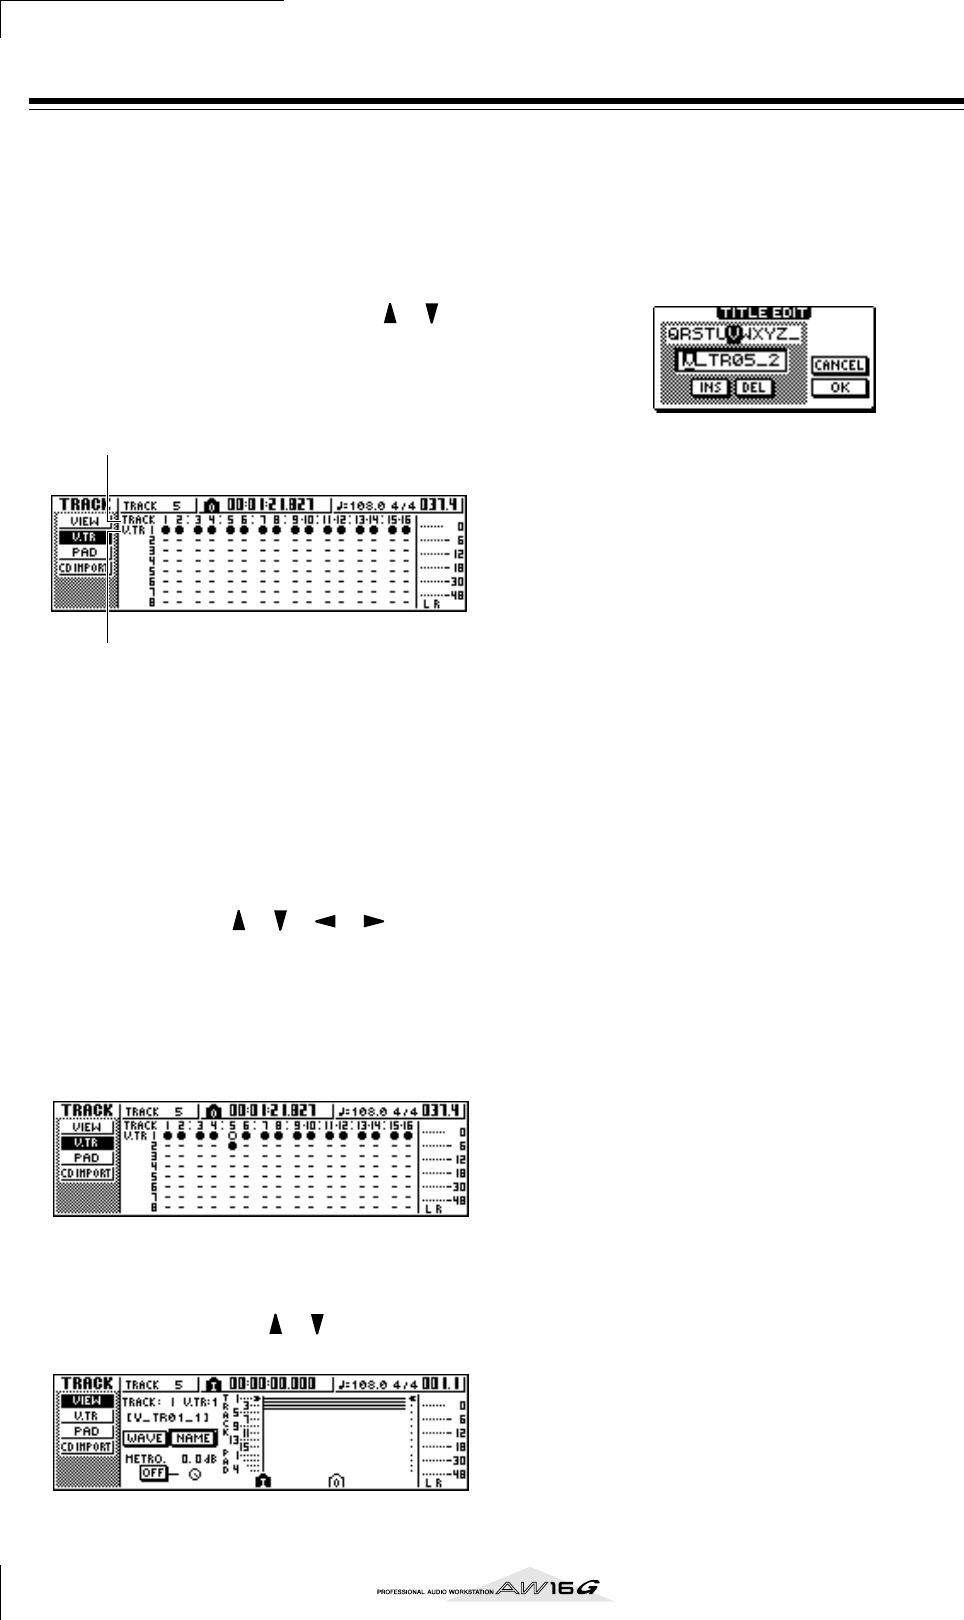
1 TRACK
Indicates the track number 1–16.
B V.TR
Indicates the status of virtual tracks 1–8. The virtual
track that is currently selected for each track is indi-
cated by a “●” symbol. Of the virtual tracks that are
currently not selected, those that have been
recorded are indicated by “❍”, and those that have
not yet been recorded are indicated as “-”.
2
Use the CURSOR [ ]/[ ]/[ ]/[ ] keys to
select the virtual track number that you want
to assign to the desired track.
3
Press the [ENTER] key.
The “●” symbol will be displayed at the position of
the newly-selected virtual track. This virtual track
will now be used for recording/playback.
4
If you want to assign a name to each virtual
track, repeatedly press the Work Navigate
[TRACK] key or hold down the [TRACK] key
and use the CURSOR [ ]/[ ] keys to access
the VIEW page.
5
Move the cursor to the TRACK field, and turn
the [DATA/JOG] dial to select a track number.
6
Move the cursor to the NAME button and
press the [ENTER] key.
The TITLE EDIT popup window will appear, allow-
ing you to assign a name to the virtual track.
7
Assign a new name to the virtual track.
For details on how to assign a name, refer to page
24.
1
2


