


MIDI and utility functions
150
Basic MIDI settings
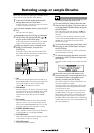
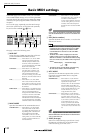
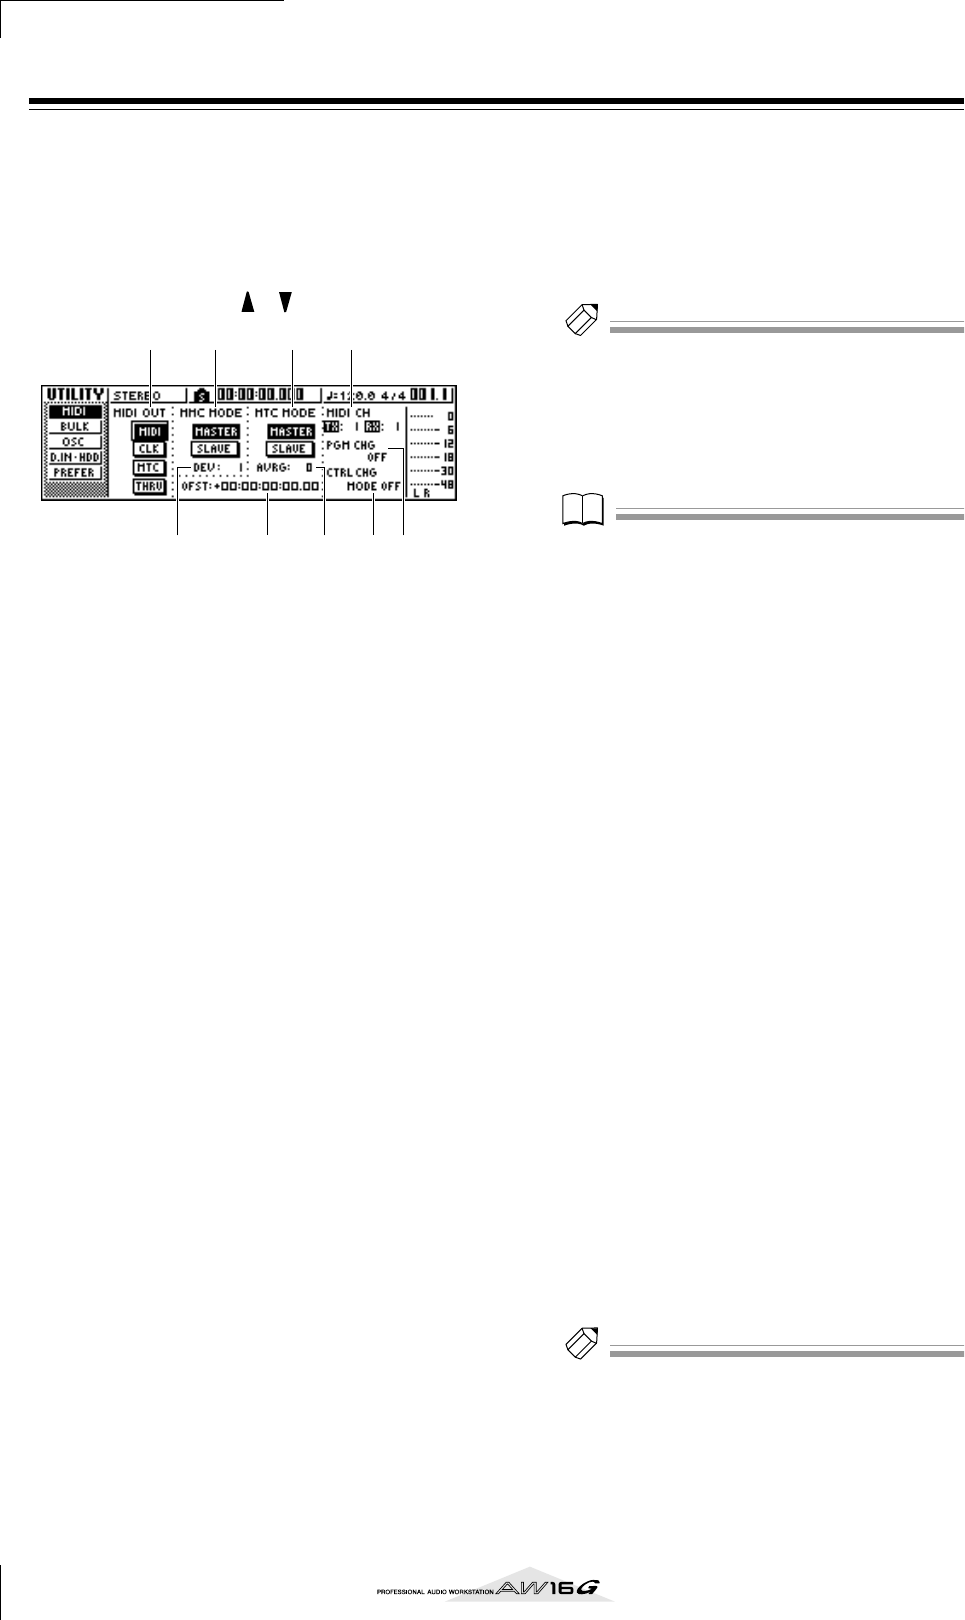
In the MIDI page of the UTILITY screen, you can make
various MIDI-related settings such as selecting the MIDI
messages that will be output from the MIDI OUT/THRU
connector, and specifying MTC/MMC transmission and
reception.
To access this page, repeatedly press the Work Naviga-
tion section [UTILITY] key or hold down the [UTILITY]
key and use the CURSOR [ ]/[ ] keys.
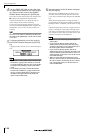
This page contains the following items.
1 MIDI OUT
Selects the type of MIDI messages that will be out-
put from the MIDI OUT/THRU connector.
MIDI button...............If this button is on, various MIDI
messages generated within the
AW16G (except for MIDI Clock
and MTC) will be transmitted. If
you turn this button on, the THRU
button will be defeated.
CLK button.................If this button is on, MIDI Clock
(and Start, Stop, Continue, and
Song Position Pointer) messages
will be transmitted while the
recorder is running. If you turn this
button on, the MTC button will be
defeated.
MTC...........................If this button is on, MTC (MIDI
Time Code) will be transmit while
the recorder is running. If you turn
this button on, the CLK button will
be defeated.
THRU button ............. If this button is on, MIDI messages
received at the MIDI IN connector
will be re-transmitted without
change from the MIDI OUT/THRU
connector, and none of the MIDI
messages generated within the
AW16G itself will be transmitted. If
you turn this button on, the MIDI/
CLK/MTC buttons will be defeated.
B MMC MODE
Specifies how MMC will be transmitted/received.
MASTER button..........If this button is on, the AW16G
will be the MMC master. When
you operate the transport, the cor-
responding MMC command will
be transmitted from the MIDI
OUT/THRU connector. Use this
setting when you want to remotely
control an external MIDI device
from the AW16G.
SLAVE button..............If this button is on, the AW16G
will be the MTC slave, and will fol-
low MMC commands that it
receives at the MIDI IN connector.
Use this setting when you want to
remotely control the transport of
the AW16G from an external MIDI
device.
Tip!
Tip!
If you want to use the AW16G as the MMC master, make
sure that the MIDI button is turned on in the MIDI OUT
area.
C DEV (device number)
Specifies the MMC device number (1–127) that the
AW16G will receive.
Note
Note
• The MMC device number is an identifying number used
to distinguish devices that transmit and receive MMC
commands. When using MMC, the AW16G and the
external MIDI device must be set to the same MMC
device number.
• The MMC device number is displayed as a decimal
number starting from one. Some devices display the
MMC device number as a hexadecimal number starting
from zero. In this case, the numbers will correspond as
follows.
• The AW16G always transmits MMC commands using
the “All” device number (7Fh in hexadecimal).
D MTC MODE
Specifies how the AW16G operate when synchro-
nized with an external MIDI device using MTC
(MIDI Time Code).
MASTER button..........If this button is on, the AW16G
will be the MTC master. When you
operate the transport of the
AW16G, MTC will be transmitted
from the MIDI OUT/THRU con-
nector. Use this setting if you want
to the external MIDI device to fol-
low the AW16G, or if you are
using the AW16G by itself.
SLAVE button..............If this button is on, the AW16G
will be an MTC slave, and will fol-
low MTC data it receives at the
MIDI IN connector. Use this setting
if you want to synchronize with a
second AW16G unit, or if you
want to synchronize the AW16G
with an external MIDI device that
can function only as the MTC mas-
ter.
Tip!
Tip!
When using the AW16G as the MTC master, make sure
that the MIDI button and MTC button in the MIDI OUT
area are both turned on.
E AVRG (Average)
Select one of the following to specify how closely
the AW16G will follow the incoming MTC data
when functioning as an MTC slave.
6 9
1 2 4 7
358
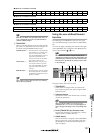
AW16W display
→
hexadecimal display
1
→
00h
127
→
7Eh